Remote Station
Remote operation for any mode — CW, SSB and digital: remote audio, rig control, CW/PTT relay, DX Cluster, and the main operating windows for station control.
This page covers full remote operation with OpenShack. If you only want to relay CW keying between two OpenShack Boxes with no PC in the path, see Box-2-Box mode. For local keying of a networked FlexRadio through the SmartSDR API, see the Flex Keyer mode of CW Link.
In normal use, remote operation does not require manual router setup. No port forwarding and usually no extra firewall rules. Enter the same passphrase on both sides and the connection can be established.
OpenShack is open by design. You can operate through the built-in windows (Remote Control, Keyer, DX Cluster, Audio Decoder, Waterfall, Rotator) — or hand the radio to the software you already use. OpenShack exposes the host's CAT line to your client PC as a virtual serial port or a TCP socket, and the host's rigctld through a local proxy port. Your logger, digital-mode app, or anything else that talks to a radio just keeps working — only now it's over the network.

Complete operating environment — main window, rig control, rotator, DX cluster, waterfall, and audio decoder

Remote Station window
Bi-directional Audio
WASAPI and OPUS codec. Sidetone remains responsive because the mixing is done in the OpenShack Box. Optional binaural CW spatializer on the client pans each tone by pitch.
Rig Control
Two paths: CAT Proxy as a raw byte tunnel without rigctld, or rigctld for OpenShack Remote Control, the rigctld proxy port, and the TRX Emulator.
TRX Emulator
Client-side TS-2000 emulator. Contest loggers can connect through COM or TCP. Requires rigctld on the host.
True CW Transport
Paddle timing is sent directly to the host.
Your own sending style is preserved.
WINKEY is also supported on the client so your logging
program can continue to work as usual.
Waterfall
Live spectrum waterfall for compatible ICOM rigs (CI-V), Kenwood TS-890S / TS-990S (KNS LAN), FlexRadio 6000- / 8000-series and Aurora AU-series (SmartSDR API), and the Elecraft K4 (network remote). Click a frequency to QSY.
DX Cluster
Live DX spots with direct QSY from the list.
Antenna Rotator
A compass rose shows antenna heading. Click a bearing to turn the rotator. Control is provided through PSTROTATORAZ over UDP.
Aux Devices
Monitor and control external amplifiers, tuners, and antennas such as SPE Expert, Elecraft KPA500/KAT500/KPA1500, Rf2k S, Juma PA600/PA1000, OM Power, DU4000AL, Ultrabeam, and SteppIR SDA 100 / SDA 2000 — plus generic URL Switchers (hamparts.shop / qro.cz remote relays) and an optional remote Shutdown-Host-PC control.
Command Center
A small, always-on-top panel that lists every open window and switches to any of them with one click — plus a single button to minimize them all. Handy on a laptop screen.
How It Works
Two instances of OpenShack connect through the host's Station-ID (its callsign) plus a shared secret that you choose. The secret is processed locally and is never sent in the clear. A club can operate several stations independently, and a caller needs to know both the host's callsign and the secret. The application then selects a suitable connection path across IPv4 or IPv6 networks, using professionally operated infrastructure where necessary.
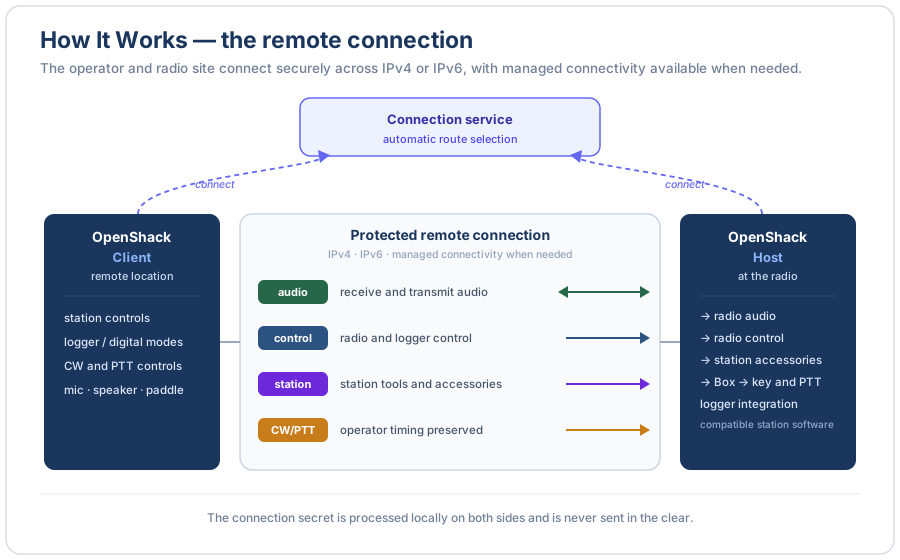
| Role | Location | What It Does |
|---|---|---|
| Host | At the radio station | Connected to the transceiver through CAT and/or
rigctld, and also to the OpenShack Box, which handles CW
and PTT. rigctld.exe must run on the host
if Remote Control, the rigctld proxy, or the TRX
Emulator is used. The host provides the selected
services to the client over the protected remote connection. |
| Client | Your remote location | Receives audio and rig data, and sends keying and CAT commands back. A local OpenShack Box can be used for sidetone and paddle input. |
Both roles use the same window. Select Host or Client with the radio buttons at the top before connecting. You cannot switch roles while a connection is active.
Setting Up a Connection
The home tab is where you set the shared secret that controls who can connect, plus your on-air callsign. It is labelled Stations when you run as Client — a live dashboard of the remote stations you can reach — and My Station when you run as Host, where you publish your own station's secret. Your callsign is required: it is your Station-ID in Host role (clients use it together with the secret to find you) and your Operator-ID in Client role (the identity the host sees). The top half changes with the role; the bottom half — your callsign and Note — is the same in both.
Windows Firewall Warning
The first time you click Connect on a PC, Windows may show a Windows Security dialog asking whether to allow the app to access public and private networks. This is normal — OpenShack needs network access to reach the connection service and establish the remote session. Click Allow so the connection can be set up. If you click Cancel, remote operation will be blocked until you allow the app through the firewall.
The same prompt can appear again after you install a new version — Windows treats the updated program as a new app. On the host especially, expect it on the first connect after each update and simply click Allow again. See Updating OpenShack.
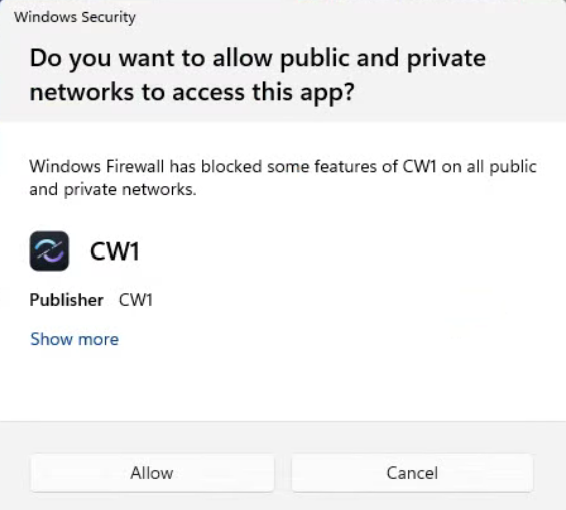
Click Allow when Windows asks to grant network access on the first connect.
My Station tab — Host role
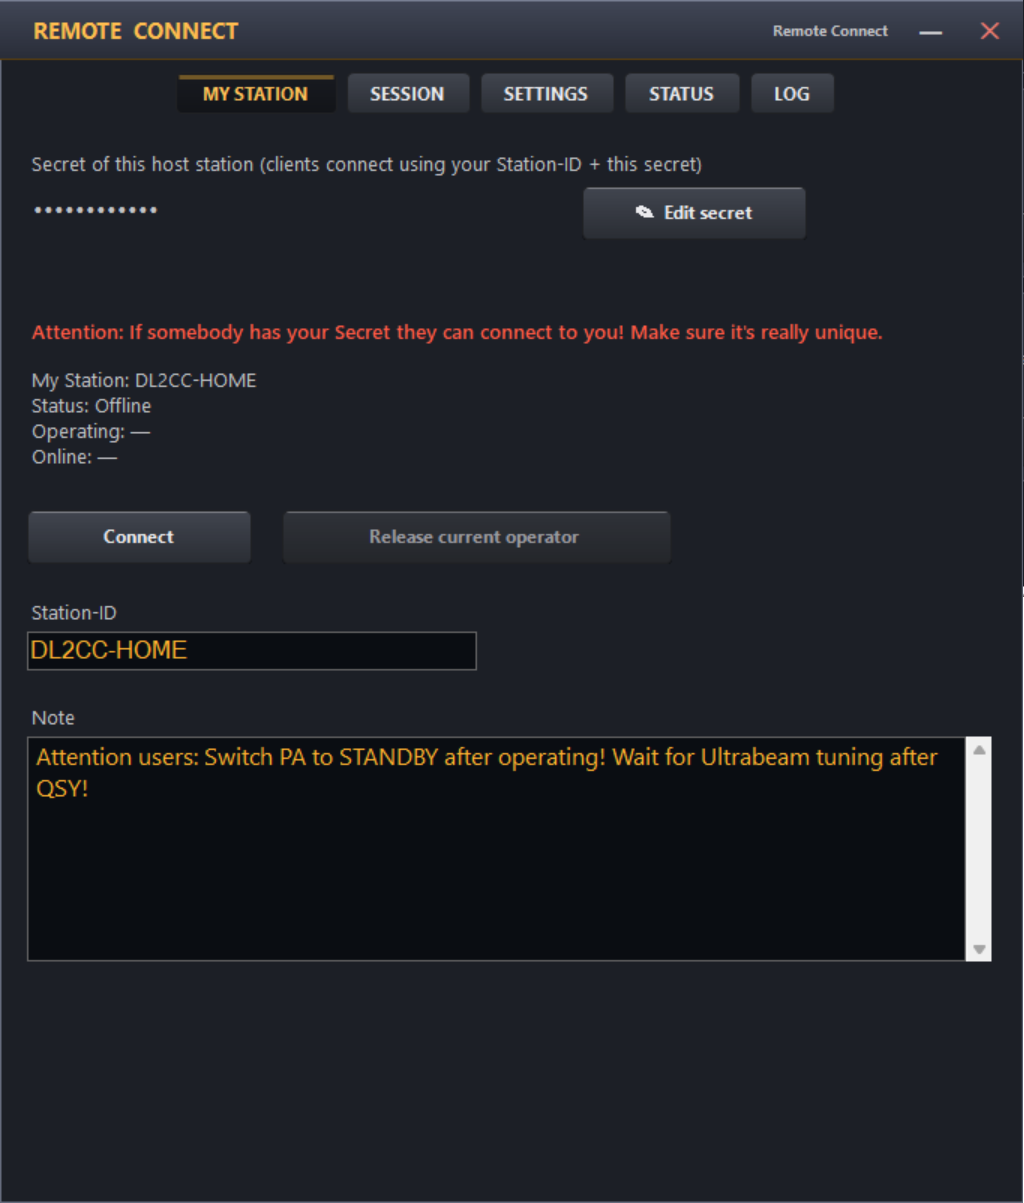
The My Station tab in Host role — your station's secret and the RX-only secret (both masked) and a live status panel
A host station has exactly one identity. The top of the My Station tab shows your station's Secret as a row of dots — never the value itself — with an Edit secret (✎) button next to it. Together with your Station-ID (your callsign, in the identity area below) the secret defines the channel clients connect to. If no secret is set yet, the field reads "no secret set — click ✎ to set one" and the editor opens automatically the first time you visit the tab.
Click Edit secret to open a small dialog where you set or change the value:
- Secret — the passphrase that defines your
station. Clients have to type the exact same value to reach
you, including upper/lower case. Minimum eight characters. The value
never leaves your machine — only a hash of it is used to derive the
channel name. Allowed characters: letters (A–Z, a–z), digits (0–9)
and the punctuation
$ & % { } [ ] + - . , : ; _ # @ ! ? * = ~ ^; spaces and quotes are rejected, so a pasted secret can never pick up stray whitespace. - Show — reveals the value while you check it; otherwise it stays masked.
- Generate — picks a random secret for you, using
uppercase letters and digits only (skipping look-alikes like
I,O,0,1) so it is easy to read aloud and to type. Copy it once and share it (through any out-of-band channel) with the people who should be able to connect.
There is deliberately no Delete in this dialog: you cannot delete your own station identity, only change its secret.
Right below the secret sits a second, optional one: the RX-only secret, shown and edited exactly like the station secret (masked value, its own Edit secret (✎) button, same dialog). It is a passphrase for your station that grants receiver access only: anyone who connects with your Station-ID and the RX-only secret hears your receiver, sees the scope and can tune frequency, mode and VFO and pick one of the radio's filters — but your station does not react to anything else. PTT, CW keying, power and other levels, the manual passband, amplifier, tuner, rotator, switches and shutdown commands from such a session are simply ignored, and the session's microphone never reaches the radio. The other side still sees all of these controls and can click them; nothing happens on your side. That makes it the easy way to let a friend or a club member listen on your station while your real secret stays private. Read-only clients see the station in their Stations list like everybody else, and while one of them is connected your own Stations list and the My Station panel show the station as Busy with that client's callsign as the operator, marked "(RX only)": the My Station panel reads Operating: DL1XYZ (RX only), and the Session tab shows Connected to DL1XYZ (RX only). The web client marks its own RX-only session the same way: Connected (RX only). The other way round, a read-only client sees the station as Busy while you are operating. Web listening follows your Allow web listening switch for such a session: with the switch on, the host starts the stream by itself and the RX-only client cannot switch it off (its own checkbox is disabled).
The RX-only secret has the same rules as the real one (at least eight characters, same allowed characters) and must differ from it. Leave it empty to switch read-only access off; the field then reads "(no RX-only secret set — click ✎ to set one)". Changing it while you are hosting takes effect immediately — a client connected with the old RX-only secret is disconnected. Your station still has a single operator slot: while a read-only client is connected, another one gets busy, but a connect with your real secret always wins — the read-only client is disconnected and you take over. While a read-only client is on, the host window's title shows GUEST: receive-only, and every ignored command is listed in the Debug Log under the guest category.
Below the secret, the My Station panel shows your station's live state, derived from who is present on your channel:
- Status — Offline (you are not hosting / not advertising), Online (reachable, nobody operating), Busy (a client is connected and operating) or Busy (RX only) (an RX-only client is listening).
- Operating — the callsign of the operator currently
on the air, or
—when the station is free. - Online — co-operators who are watching your station but are not on the air.
Release current operator ends the active operator's session and frees the station for the next client. Your station stays online the whole time — only that operator is dropped — so there is no gap in availability. The released operator is told their session was ended by the host: their client disconnects and shows Released by host in its window title. It is enabled only while the station is Busy.
Stations tab — Client role
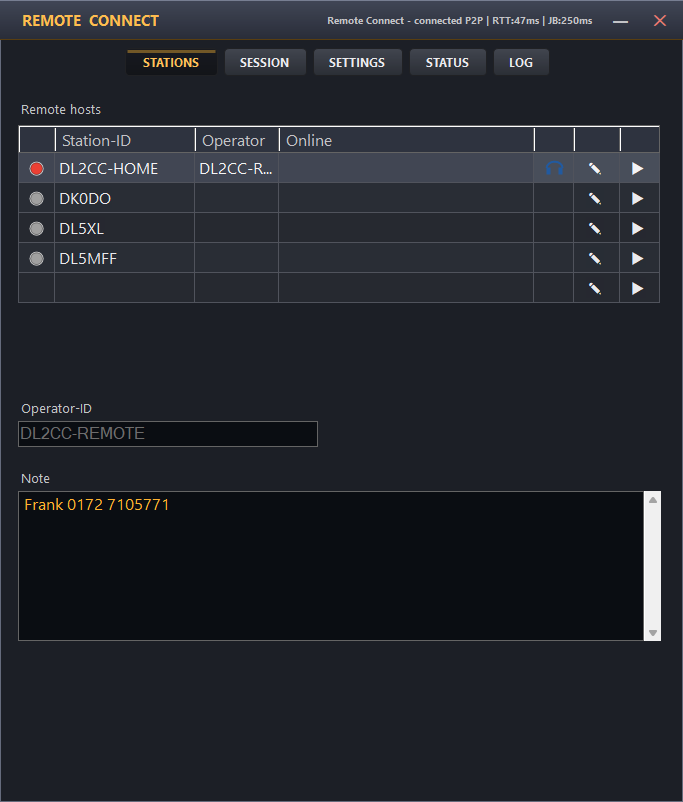
The Stations tab in Client role — a live dashboard of the remote hosts you can reach
As a client you save the remote stations you use in one place and see their live state at a glance — before you even try to connect. Each row in the Remote hosts table is one station:
- Active (radio) — marks the station the Connect button on the Session tab will use. Click any row to move it. While you are connected the radios are greyed out — you cannot switch station in the middle of a session.
- Station-ID — the callsign of the host you want
to reach (for example
DL0AAorDL0AA/P). Required, and must match the host's Station-ID exactly — it selects which station you reach, so a typo lands you on a different (empty) channel. Entered in upper case; allowed characters are letters, digits and# - /. Click the cell to edit. - Status — the station's live reachability, shown without connecting: Online (green dot — reachable and free), Busy (red dot — someone is operating it), Busy (RX only) (blue dot — an RX-only client is listening; another RX-only client gets busy, a connect with the real secret takes the station over) or Offline (grey dot — not currently hosting). Hover the dot to read the word. A blank Status means the Station-ID or secret does not yet match a real station.
- Operator — when a station is Busy, the callsign of the operator currently on the air.
- Online — the other co-operators watching that station (their Operator-IDs). You appear here on the stations you watch, so everyone holding the secret can see who else is around.
- ✎ (Edit secret) — opens the secret dialog for that row: set or change the secret (the same passphrase as the host, with identical casing — the match is case-sensitive), with the same Show and Generate helpers as the host side, plus a Delete station button to remove the row. The secret appears only inside this dialog, never in the table.
- ▶ (Connect) — connects straight to that station; see Connecting to a station below. On the row of the station you are connected to the button turns into ■ and disconnects, the same as the Session tab's Disconnect button.
Add a new host by typing the host's Station-ID into the blank row at the bottom of the table — a new entry is created and selected automatically; open its ✎ dialog to set the secret. Each entry also remembers which side windows (Keyer, DX Cluster, Aux Devices …) were open the last time you were connected to it, so reconnecting restores the same layout. Your callsign, Note and audio preferences are shared across all stations — only each station's Station-ID, secret and remembered-window list are per-station.
Reorder the list by dragging. Grab any row and drag it up or down to a new position — a blue line shows where it will drop, and the new order is remembered, so you can keep your most-used stations at the top. The pointer shows a move cursor over a row you can drag. Reordering is locked while you are connected. (Picking up a row also selects it, so it becomes the active station — the same as clicking it.)
- As a client you appear as Online (a watching co-operator) on every saved station while the Stations tab is open; leaving the tab makes you disappear. You only become a station's Operator once you actually connect and the link is established.
- As a host your station goes Online the moment you press Connect to start hosting, and stays up for the whole hosting session. Opening the My Station tab only reads your own status — it does not advertise anything by itself.
Connecting to a station
There are two ways to connect from the Stations dashboard:
- One click from the dashboard — press the ▶ button on the station's row. It becomes the active station and the connection starts immediately. This is the quickest way to jump onto a station you can see is Online.
- Active radio, then Connect — select the station's Active radio, then press Connect on the Session tab. Use this when you want to review or change settings before connecting.
Either way, before the link is built the app checks that the station has a Station-ID and a valid secret (at least eight characters) and that your own Operator-ID is filled in; if anything is missing it opens the right editor so you can fix it, then press connect again. Connecting to a station whose Status is Busy is refused by the host (see Station already in use?) — wait until it shows Online. The first connect on a PC may also raise a Windows Firewall prompt (above); click Allow.
Your callsign and Note (both roles)
Below the secret area you find your own callsign and a note. The callsign field is the same control in both roles, but it is labelled to match what it does:
- Station-ID (Host role) /
Operator-ID (Client role),
required — your own callsign. Entered in upper case;
allowed characters are letters, digits and
# - /. In Host role it is your Station-ID, the callsign clients type to reach you. In Client role it is your Operator-ID, shown to the host once a beacon is exchanged. You cannot connect until it is filled in. - Note (optional, multi-line) — a short message your partner sees alongside your callsign. Useful for things like "20m CW until 18:00" or "QRT after this QSO." Empty entries are fine — nothing is shown if you leave it blank.
Whatever you enter here and in Note is sent in the periodic beacon and shown on the other side at the top of the Operation tab next to the Connect button. Changes appear after a few seconds; no reconnect is needed. Your callsign, note, audio devices and other personal preferences are shared across all hosts — only each host's Station-ID, secret and remembered-window list are per-host.
Host side — at the radio
- Open Operate → Remote Station from the dashboard.
- Select the Host role. Your local-station identity is created automatically the first time you do this.
- On the My Station tab, click Edit secret (✎) and type a secret (or press Generate in the dialog for a random one) — this is the passphrase clients will need to reach you. It never leaves your machine.
- Fill in your Station-ID (required) — your callsign. Clients enter it together with the secret to reach you. Add a Note if you want to show a short status message.
- Select which services to provide (Audio, CAT, rigctld, CW/PTT). Start with Audio at minimum.
- Click Connect. OpenShack makes the station available and waits for the client.
The Settings → Host tab holds the cards that tell OpenShack how to reach your radio and station hardware. They are described below in the order they appear, top to bottom.
RIG Connection Path — rigctld (Hamlib)
rigctld (Hamlib) is the main way OpenShack reaches your radio, and it is needed for most functions — the Remote Control panel, frequency and mode readback, the client-side rigctld proxy that loggers connect to, click-to-QSY from the DX cluster, and waterfall retuning. Set this up first.
This card lets OpenShack start Hamlib's rigctld.exe
for you. Choose your radio model and port; the command line is
built automatically and shown for reference.
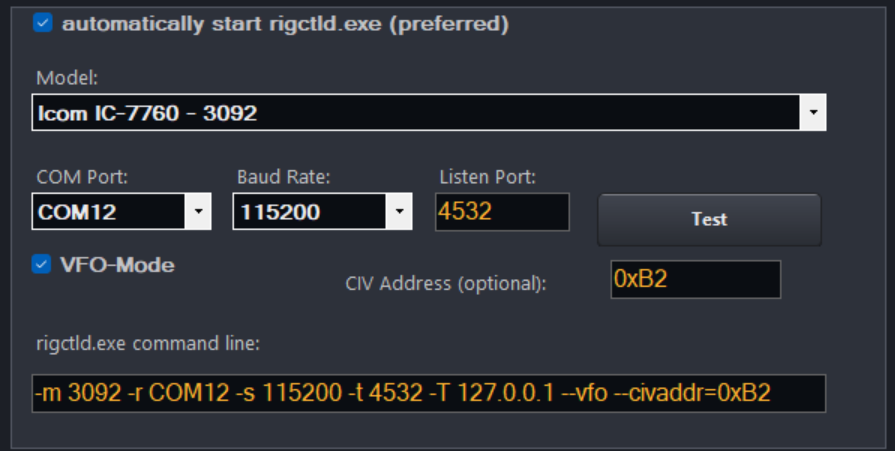
Host settings — Local rigctld.exe launcher
| Control | What it does | Default |
|---|---|---|
| automatically start rigctld.exe (preferred) | When ticked, OpenShack launches rigctld for you using the command line shown at the bottom of the card. | On |
| Model | Hamlib radio model; the number after the name (e.g. 3078) is the Hamlib model ID placed on the command line. | — |
| COM Port / Baud Rate | Serial port and speed rigctld uses to reach the radio. | — / 115200 |
| Listen Port | TCP port rigctld listens on. Hamlib's standard is 4532. | 4532 |
| TEST | Launches rigctld once with the current settings so you can confirm it connects before going live. | — |
| VFO-Mode | Adds Hamlib VFO mode to the command line — some programs need it for correct split / VFO handling. | Off |
| CIV Address (optional) | Leave empty — Hamlib then uses the selected model's standard CI-V address automatically. Only fill this in (hex) if you changed your rig's CI-V address from the factory default, for example to run two identical radios. | empty (model default) |
Transceiver handling — power through rigctld
The Transceiver handling card controls the radio's power state through the same host-side rigctld connection. Both options are off by default, so a normal remote connection never changes whether your radio is on or off.
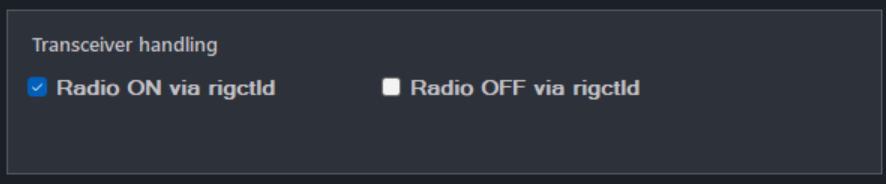
Host settings — enable only the power action your unattended station needs
| Control | What it does | Default |
|---|---|---|
| Radio ON via rigctld | Before the remote rigctld service starts, OpenShack checks whether the radio already answers. If it does not, it sends Hamlib's power-on command and waits for the radio to boot before making rig control available to the client. | Off |
| Radio OFF via rigctld | Sends Hamlib's power-off command when the remote session ends or the Host Remote Station window closes. | Off |
Custom CAT at startup and session end
The two optional fields below Radio ON/OFF send a raw radio command through the configured rigctld service. They work with local or external rigctld and with desktop, browser and Android clients. Leave a field empty to disable it. The power checkboxes are independent.
- Custom Startup CAT string: after optional power-on, OpenShack waits up to 30 seconds for valid frequency replies before sending the payload once and enabling the rig proxy. A startup failure is shown in the status/log and reported to the client.
- Custom End CAT string: at session end or window close, OpenShack sends this once while the radio responds, before Radio OFF and before stopping rigctld. Disconnecting during startup cancels the pending startup. An unreachable radio causes the end payload to be skipped and logged; abrupt PC power loss cannot run cleanup.
Text (ASCII) commands: type the command directly, including its terminator. This simple example sets VFO A to 14.300 MHz (14300 kHz) on a Kenwood TS-590S/SG:
FA00014300000;Copy that line into a custom CAT field.
You do not need to type ASCII:. See the
Kenwood command reference (FA/FB).
Binary commands: type HEX:, including the
colon, followed by space-separated two-digit bytes. Include CR as
0D or LF as 0A when required by your radio.
Use one payload per field, at most 90 bytes, without quotes, line breaks,
or rigctld prefixes such as w or send_raw.
Changes to these settings apply to the next session.
Example for Icom Transceivers
Icom CI-V uses binary commands. Copy the whole example line into a
custom CAT field, including HEX:. These examples use the
IC-7760 with its default CI-V address B2.
Switch the microphone input: for DATA OFF MOD
and the default CI-V address B2, enter:
| Field | Payload | Input |
|---|---|---|
| Custom Startup CAT string: | HEX: FE FE B2 E0 1A 05 01 29 01 FD | USB only |
| Custom End CAT string: | HEX: FE FE B2 E0 1A 05 01 29 00 FD | MIC only |
To restore MIC, USB instead, change the end payload's
00 before FD to 04. Replace
B2 if you use another CI-V address. DATA1/2/3 use separate
settings; the microphone example changes only DATA OFF MOD. Other Icom
models have their own CI-V addresses and may use different microphone
commands. See the
Icom CI-V Reference Guide, pages 2 and 8.
Check the setting on the radio: a successful rigctld send alone cannot
confirm every model-specific command was applied.
Native CAT & existing rigctld — optional
The next two cards sit below the launcher and are optional — most stations run rigctld alone and can ignore them.
Use external rigctld service on the network — rather than have OpenShack launch rigctld, attach to one that is already running (e.g. started by another program) at a given IP and port. Leave it off to let OpenShack manage rigctld itself.

Host settings — use an external rigctld already running on the network (IP and port)
Connect optional additional CAT port (native CAT) — exposes the radio's native CAT protocol in addition to rigctld. Useful only if you have a second path to the radio and want a program to speak the rig's own CAT directly. If in doubt, leave it alone — with one exception: the ICOM waterfall runs over this CAT path, so ICOM stations that want the waterfall set it up here (see Waterfall — Host ICOM).
This must be a different serial port from the one rigctld uses — two programs can never share one COM port. If you pick the same port here, an amber note appears next to the port selector; radios with a single USB serial port, such as the IC-7300, need a small USB CI-V cable on the REMOTE jack for rigctld — the waterfall chapter explains the wiring.
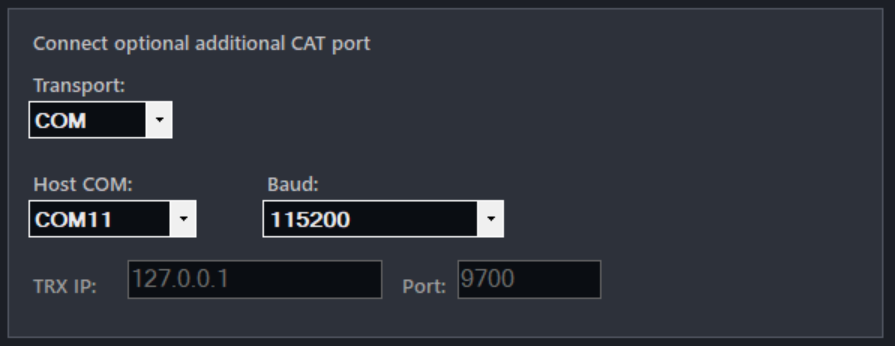
Host settings — optional native CAT path: COM or TCP
| Control | What it does | Default |
|---|---|---|
| Transport | Native CAT over a COM port or a TCP endpoint. The unused set is greyed out. | COM |
| Host COM / Baud | Serial port and speed of the radio's CAT interface (COM transport). | — / 115200 |
| TRX IP / Port | Address and port of the network CAT endpoint (TCP transport). | 127.0.0.1 / 9700 |
Rotators
Bridges the host to PSTROTATORAZ so the client can steer the antenna. OpenShack never talks to rotor hardware directly — see Antenna Rotator Control for the full picture and the client view. You can set up up to four rotators, each with its own PSTROTATORAZ connection and a name — handy if you run separate controllers for different antennas.
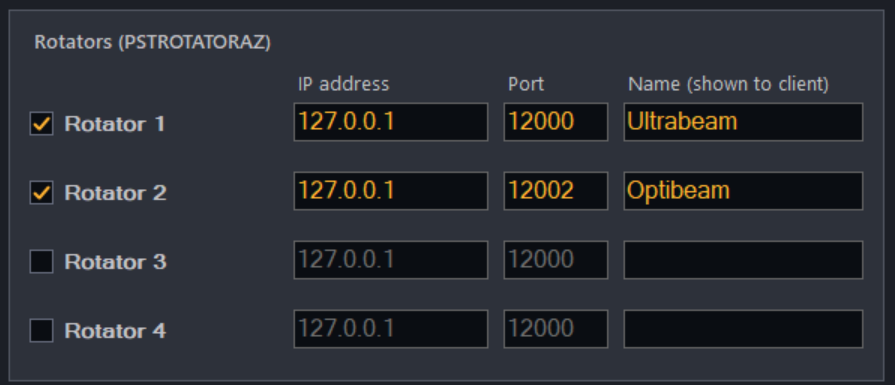
Host settings — Rotators (up to four PSTROTATORAZ bridges)
| Control | What it does | Default |
|---|---|---|
| Rotator 1–4 | Ticking a row turns that rotator on. Enable only the rows you actually use. | Off |
| IP / Port | Address and UDP port of the PSTROTATORAZ instance for this rotator. OpenShack sends on this port and listens on port + 1. Give each rotator its own port. | 127.0.0.1 / 12000 |
| Park ° | Rest bearing in degrees (0–360) this antenna is turned to when the station goes down — see Park Position. Leave it empty and the rotator is never moved on its own. | Empty |
| Name | A label of your choice. The client shows it as Rotator: <name>, so you can tell several rotators apart. | — |
| Park antennas after no client for … minutes | Also park the antennas once nobody has been connected for that long, without shutting the station down. Applies to every rotator that has a park bearing. | Off / 30 |
Hardware PTT for Audio Modes
For voice and digital (audio) modes, the host decides how the radio is keyed, so the client never has to choose. The Hardware PTT for Audio Modes card on the host's rig settings tab selects the keying path and a safety timeout.
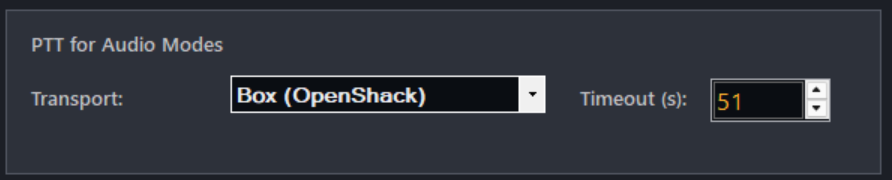
Host settings — Hardware PTT for Audio Modes: keying path and safety timeout
| Setting | What it does |
|---|---|
| Transport | Keying path for audio (voice/digital) overs — Box (DL2CC) hardware PTT or rigctld CAT. Only the paths actually configured on the host are offered. |
| Timeout | Safety auto-release, in seconds, for an audio-mode over (default 120). The OpenShack Box firmware also enforces its own 120 second limit (60 seconds on firmware before 1.55). |
When you transmit in an audio mode, OpenShack keeps the radio keyed until the buffered audio has actually played out on the host before releasing — so the end of every transmission is no longer clipped (important for SSB tails and FT8 decodes at the far end). The Remote Connect title bar shows a PTT countdown in the last 15 seconds before the safety timeout, and the rig-control window shows a live countdown in its title bar for the whole transmission, turning red in the final 10 seconds.
On the client, the Mic control on the Operation tab chooses when your microphone is streamed: Auto (only while you are transmitting), Open (always — needed for VOX), or Muted. Auto is the default and avoids sending audio when you are not transmitting.
Aux Devices — amplifiers, tuners & antennas
Each row connects one auxiliary device so the client can monitor and control it. Tick the device, set its port (and, where shown, its model or antenna); the status square turns green once connected. Every device is off until you enable it. See Aux Devices for what the client sees.
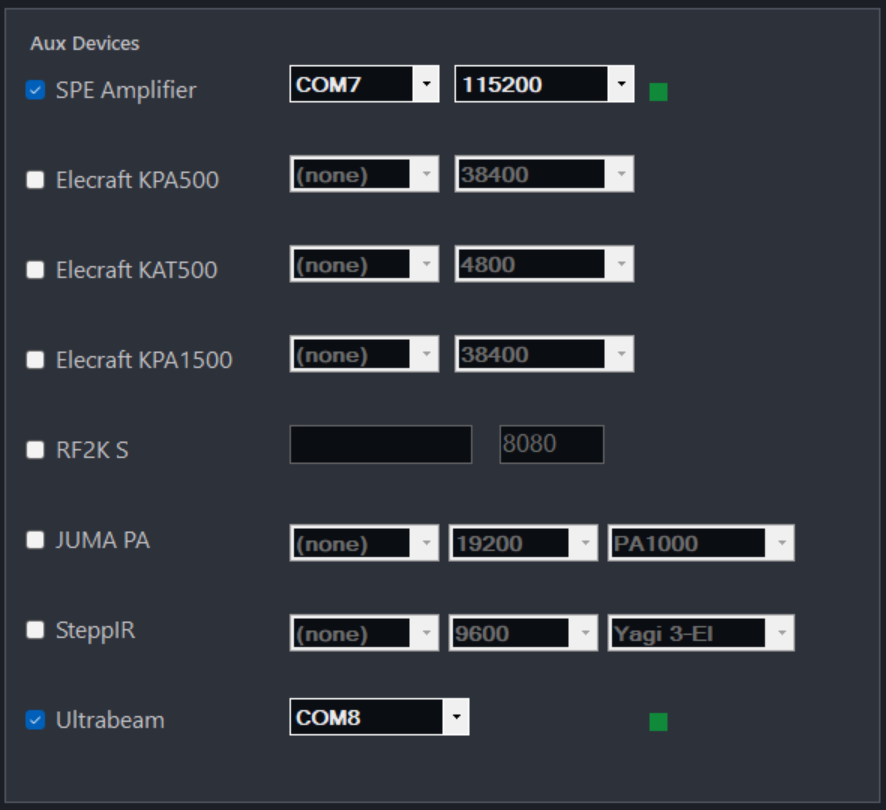
Host settings — Aux Devices: one row per amplifier, tuner or antenna controller
| Device | Connection | Default baud / option |
|---|---|---|
| SPE Amplifier | COM | 115200 |
| Elecraft KPA500 | COM | 38400 |
| Elecraft KAT500 | COM | 4800 |
| Elecraft KPA1500 | COM | 38400 |
| RF2K-S | Network (IP) | port 8080 |
| JUMA PA | COM | 19200 · PA1000 |
| SteppIR | COM | 9600 · Yagi 3-El |
| Ultrabeam | COM | — |
| OM Power (up to 4 amplifiers) | Network (IP) | 192.168.1.211 · port 10001 |
| DU4000AL tuner | Network (IP) | port 10001 |
OM Power amplifiers have their own card right below the Aux Devices card, with one row per amplifier — up to four. Supported models: OM2000A+, OM1700A+, OM2501A, OM3501A, OM4001A and OM4001C (each connected through its built-in LAN port). Each row takes the amplifier's IP address and port (the factory defaults are already filled in) and an optional name such as "Main" so you can tell several amplifiers apart. Close OM Power's own remote control program first: the amplifier accepts only one network connection at a time.
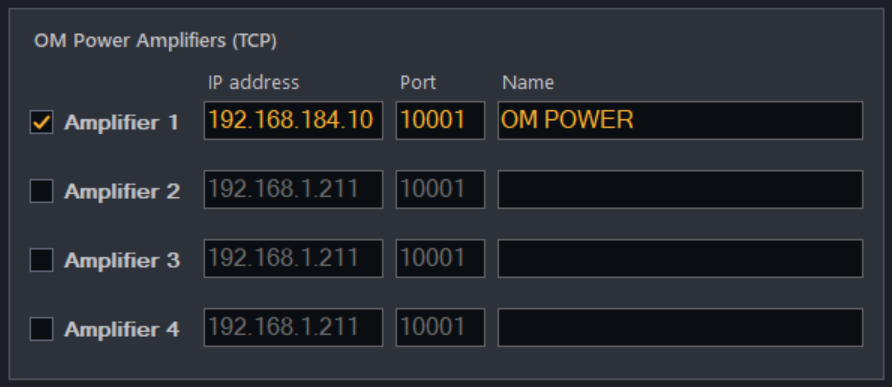
Host settings — OM Power Amplifiers: up to four, each with address, port and name
The DU4000AL Tuner (TCP) card takes the tuner's IP address, TCP port and an optional display name. Its port defaults to 10001; enter the address configured in the tuner. Close the manufacturer's remote-control program before enabling the row so only one program owns the tuner connection.
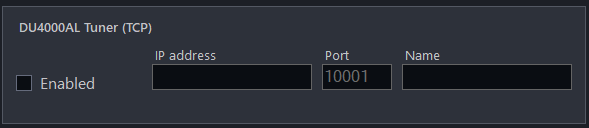
Host settings — DU4000AL Tuner: enable it and enter the tuner's IP address, port and display name
Waterfall sources
Four independent cards — ICOM, Kenwood, FlexRadio and Elecraft K4 — choose where the panadapter data comes from. Enable the one that matches your radio (only one can be active). Full details and the client view are under Waterfall Display. For the K4, enable remote connections on the radio and set a remote password there; the card takes the radio's address, remote port (9205) and that password. The K4's remote connection is not encrypted — use it on your own network or through a VPN only. K4 support is new and still being confirmed with real hardware.
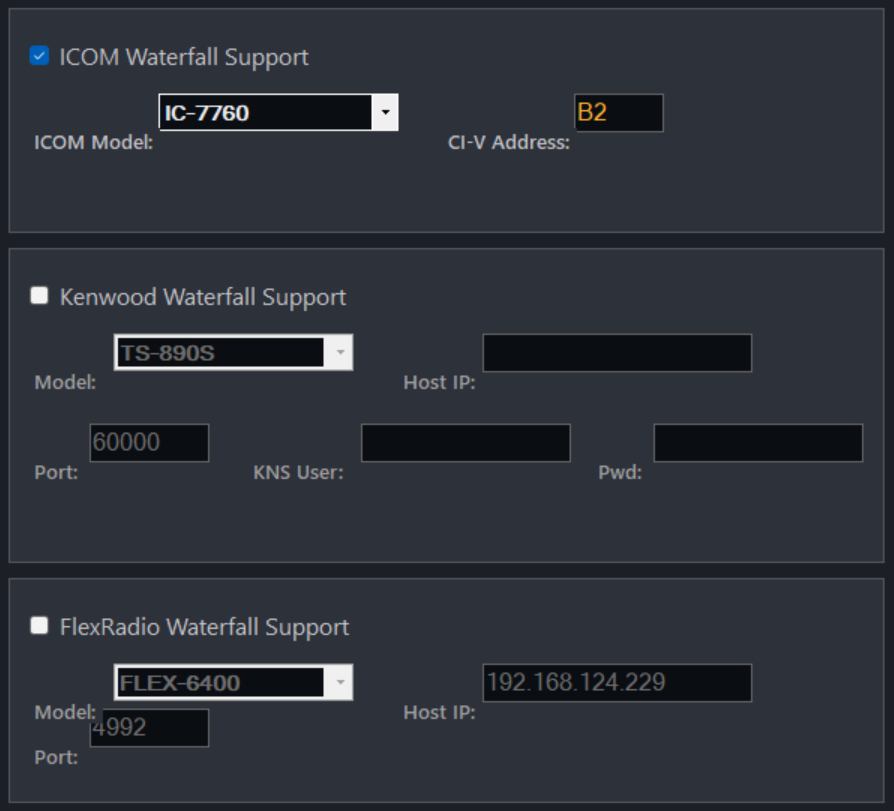
Host settings — waterfall sources (ICOM / Kenwood / FlexRadio)
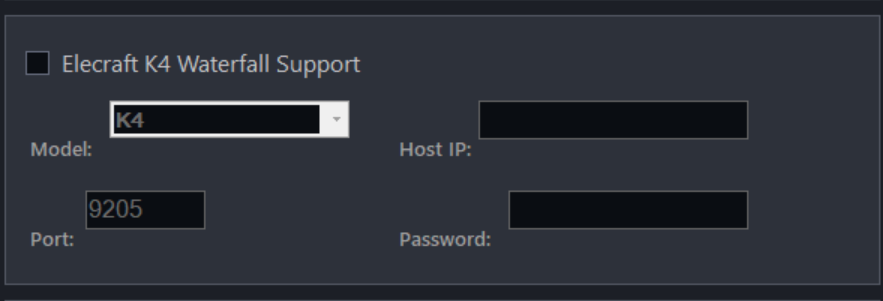
Host settings — Elecraft K4 waterfall source: model, host IP, port 9205 and the K4's remote password
| Card | Key fields | Default |
|---|---|---|
| ICOM Waterfall Support | ICOM Model + CI-V Address (hex) | CI-V B2 |
| Kenwood Waterfall Support | Model, Host IP, Port, KNS User + Pwd | TS-890S · port 60000 |
| FlexRadio Waterfall Support | Model, Host IP, Port | FLEX-6400 · port 4992 |
| Elecraft K4 Waterfall Support | Model, Host IP, Port, Password | K4 · port 9205 |
URL Switcher
Up to ten labelled buttons that fire an HTTP request when pressed — handy for web-controlled relays, antenna switches or smart plugs. Each row carries three visibility tick-boxes plus a label and a URL. See URL Switcher for how the buttons appear to the client.
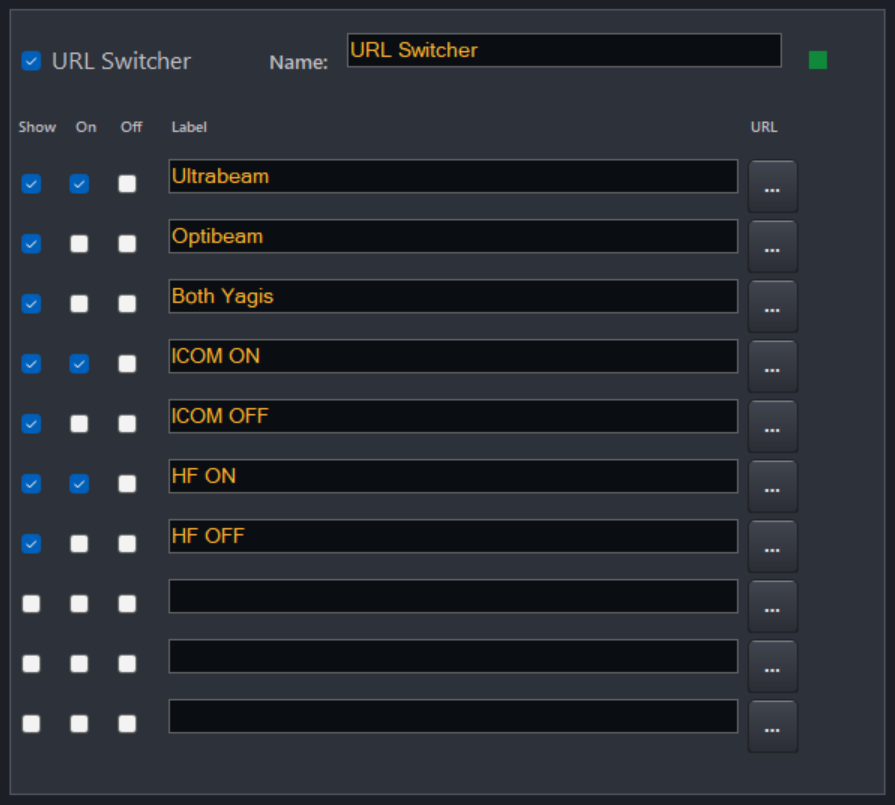
Host settings — URL Switcher: ten rows, each a labelled button with its own URL
| Column | What it does |
|---|---|
| Name | Title shown on the client's URL Switcher panel. |
| Show | Include this row on the client panel. |
| On / Off | Mark the row as an ON or OFF action so paired buttons (e.g. ICOM ON / ICOM OFF) can reflect their state. |
| Label / URL | Button text and the HTTP URL it requests when clicked. |
Enable remote PC shutdown
When ticked, the client may shut down the host PC remotely — useful for an unattended station so you can power it down at the end of a session. Leave it off if the host PC should not be shutdownable from the client. The square turns green when the feature is armed.

Host settings — Enable remote PC shutdown
Inactivity Shutdown
This is the station shutting itself down — you don't need a client for it. Tick Shut down host PC after no client for and choose a time between 5 and 600 minutes. Whenever nobody has been connected for that long, the station shuts down on its own. It's meant for an unattended station so it doesn't sit powered on all day when no one is operating.
The shutdown is the same graceful one you'd start from the client: before Windows shuts down, your URL Switcher's Off actions fire first (for example, powering your amplifier down), so nothing is left switched on. There's no long warning countdown — when the time is up, the station simply goes down. The status line under the setting just confirms it's armed and shows the timeout. Off by default.
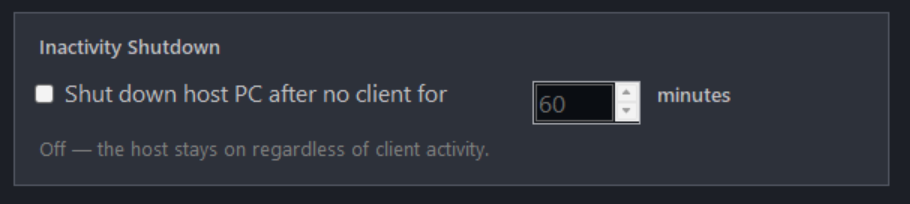
Host settings — Inactivity Shutdown
Browser Network Box support
This card lets an operator use an OpenShack Box with the Remote web client on an iPad or another browser device. The Box sends its paddle and footswitch data straight to the Host, avoiding an extra browser/WebRTC trip and reducing CW latency.
In a new Host configuration, Direct and Relay are both enabled by default but remain dormant during normal Host operation. They are used only when an authenticated operator connects with the Remote web client in a browser and requests Network Box mode. A Windows Remote Station client does not use these connections.
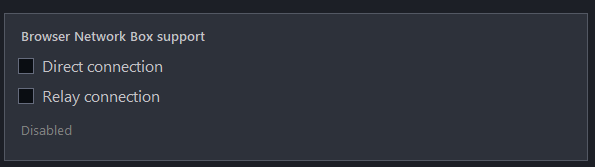
Host settings — Browser Network Box support: Direct and Relay are available by default and are used only by a browser client in Network Box mode
| Control | What it does | Default |
|---|---|---|
| Direct connection | Listens for the operator Box on TCP and UDP port 7373 while an authenticated Web Remote session requests Network Box mode. This path works when that port is reachable at the station, normally through a router port forward or VPN. | On |
| Relay connection | Connects the Host outbound to relay.openshack.com while an authenticated Web Remote session requests Network Box mode. This is the usual path when either end is behind CGNAT or no station port should be opened. | On |
Hover either checkbox to see its endpoint, when the service may start, and its default. An upgrade does not overwrite an existing saved On or Off choice.
Configure the operator Box once as a Box-to-Box client, using direct or relay mode to match the checked Host option. Enter this Remote Station's station secret (10 to 64 characters) as the Box-to-Box authentication key. The browser does not need a second copy of the key and the Host never announces it.
The Box source defaults to Box-2-Box mode when two physical Boxes already manage their CW/PTT link directly or through the relay. The browser does not open a USB or WebSocket connection to either Box, so its Connect and Disconnect buttons remain disabled. While the protected station session is connected, it automatically authorizes the Host's announced native Box route so authenticated CW/PTT traffic is forwarded to the station Box.
To use the browser-managed host route instead, open the Box tab, select Network Box, and click CONNECT BOX. There is no separate ARM step: the connection becomes active automatically once the station session, CW/PTT route, and physical Box are ready. Switching browser tabs does not disconnect it. The client marks the native route as Direct Box-to-Host preferred because it removes the browser from the CW edge path. The browser Network Box relay remains available as a compatibility fallback.
The Host's Status tab has a dedicated Browser Network Box card. It shows the Direct and Relay connection state, the active CW route, traffic counters, and the current timing sample. The Log tab also records service start and stop, waiting, connection, UDP activation, and disconnection events. Values refresh about every two seconds while either Host option is enabled; they remain idle when both options are off.
Client side — your remote location
- Open Operate → Remote Station from the dashboard.
- Select the Client role.
- On the Stations tab, look at the Remote hosts table. Either click the blank row at the bottom to add a new host, or pick an existing row by clicking anywhere on it.
- Type the host's Station-ID (its callsign, for
example
DL0AA), then click the row's ✎ button and enter the same secret as the host you want to reach in the dialog (both must match the host exactly). The secret is shown only inside that dialog, never in the table. Watch the Status column — once it shows Online, the station is reachable. - Make sure the row for the host you want to connect to is the selected (Active) one — that is the host the Session tab's Connect will use. (Or skip straight to the connect by pressing that row's ▶ button.)
- Fill in your own Operator-ID (required) and an optional short Note — the host will see them next to the Connect button once the session is up.
- Click Connect. OpenShack locates the host and starts the remote session.
- Once connected, enable the services you want (Audio, CAT, rigctld, CW/PTT).
Next time you want to reach a different remote station, just pick its row in the table — there is no need to retype a secret. Each row keeps its own remembered side windows, so switching between hosts also restores each host's preferred window layout.
The Settings → Client tab collects the client-side endpoints that other programs on your remote PC connect to. The cards are described below, top to bottom.
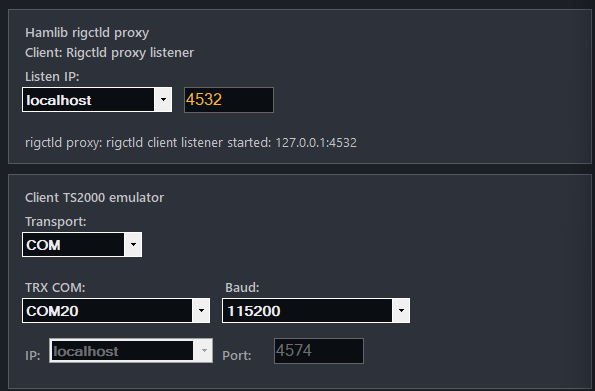
Hamlib rigctld proxy
The main client endpoint: a local rigctld listener that Hamlib-aware programs (loggers such as N1MM+, Win-Test, fldigi …) connect to exactly as they would to a local rigctld. See rigctld / Hamlib.
Client settings — Hamlib rigctld proxy (top) and Client TS2000 emulator (bottom)
| Control | What it does | Default |
|---|---|---|
| Listen IP / Port | Address and TCP port the proxy listens on. Hamlib's standard rigctld port is 4532. | localhost / 4532 |
| Status line | Reads idle until a program connects, then shows the active state. | idle |
Client TS2000 emulator
A Kenwood TS-2000 CAT port for loggers that don't speak Hamlib (bottom card in the screenshot above). Reachable over a COM port or TCP. See TRX Emulator.
| Control | What it does | Default |
|---|---|---|
| Transport | Expose the TS-2000 port on COM or TCP. | COM |
| TRX COM / Baud | Virtual COM port and speed (COM transport). | — / 115200 |
| IP / Port | Address and port (TCP transport). | localhost / 4574 |
Wavelog Integration
Live frequency/mode sync to WaveLog plus automatic QSO upload from digimode programs. Full details under WaveLog Gateway.
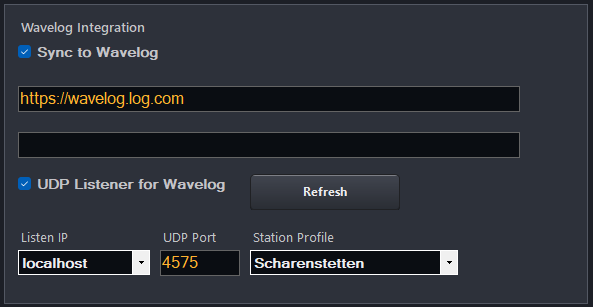
Client settings — Wavelog Integration
| Control | What it does | Default |
|---|---|---|
| Sync to Wavelog | Starts the WaveLogGate-compatible gateway so the WaveLog browser extension receives live rig data. | Off |
| URL / API key | Your WaveLog address and personal API key (shared with the QSO uploader). | — |
| UDP Listener for Wavelog | Listens for finished QSOs from MSHV / WSJT-X / JTDX / FLDigi and uploads them to WaveLog. | Off |
| Listen IP / UDP Port | Where the listener binds and which port the digimode program broadcasts to. | localhost / 4575 |
| Station Profile | Which WaveLog station logbook the contacts go to. Press REFRESH to load your profiles. | — |
Winkey Emulator & Winkey Proxy
A virtual Winkey COM port for any contest logger that speaks the Winkey protocol. With an OpenShack Box the Proxy relays Winkey to the Box; without one the Emulator keys the remote rig over the protected connection — the mode switches automatically. Full setup under Winkey Emulator & Winkey Proxy.
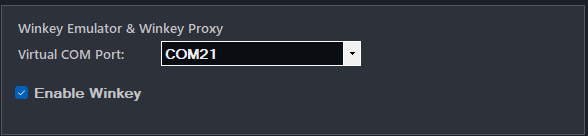
Client settings — Winkey Emulator & Winkey Proxy
| Control | What it does | Default |
|---|---|---|
| Virtual COM Port | The DL2CC side of the Winkey com0com pair; your logger opens the external side. | Pre-selected by setup on a new install (e.g. COM25); otherwise — |
| Enable Winkey | Starts the proxy/emulator on the selected port. | On for a new install when setup created the Winkey port; otherwise Off |
On a new install, OpenShack pre-selects the bundled com0com Winkey port and enables Winkey automatically (Client role) — you usually only need to set the matching external port in your logger.
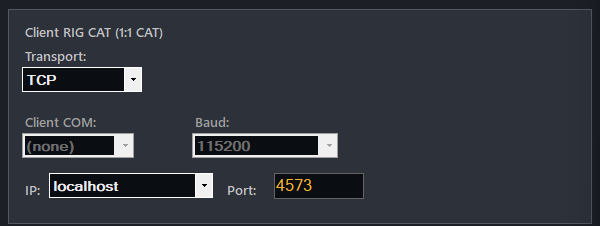
Client RIG CAT (1:1 CAT) — optional
An optional raw CAT byte tunnel straight to the host's rig, with no rigctld in between. Use it only for a program that must speak the radio's native CAT protocol directly; most loggers use the rigctld proxy at the top of the page instead. See CAT Proxy.
Client settings — Client RIG CAT (1:1 CAT)
| Control | What it does | Default |
|---|---|---|
| Transport | Expose the tunnel on a local COM port or as a TCP listener. The unused set of fields is greyed out. | — |
| Client COM / Baud | Virtual COM port and speed your program opens (COM transport). | (none) / 115200 |
| IP / Port | Address and port your program connects to (TCP transport). | localhost / 4573 |
The Client tab also has an advanced area for the jitter buffer and timing compensation — see Latency and Codec Selection.
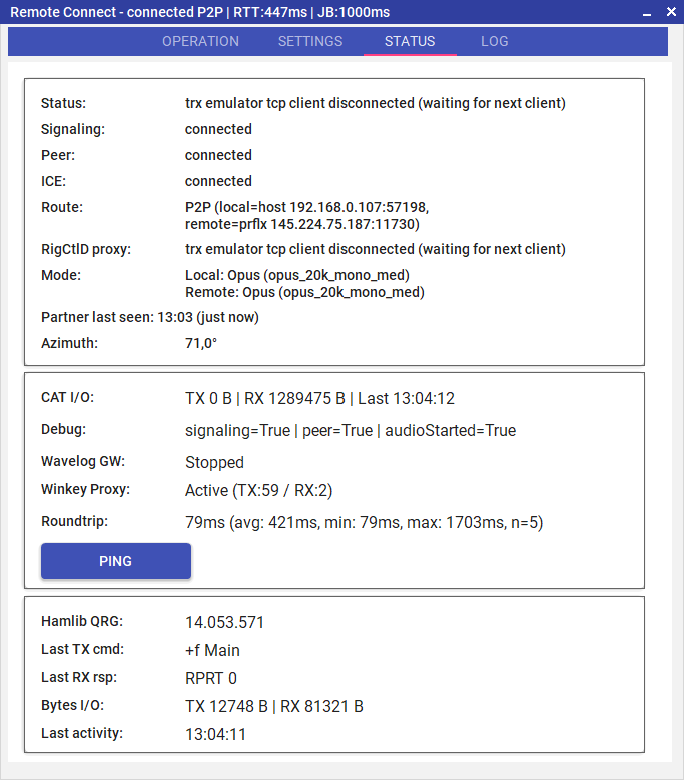
Remote Station status panel — connection state, P2P/Relay indicator and active services
Command Center — Switch Between Your Windows
A remote session can fill the screen with windows — Remote Control, Keyer, DX Cluster, Audio Decoder, Waterfall, Rotator, one or more Aux Device panels. On a laptop they overlap and get hard to reach. The Command Center is a small, always-on-top panel that lists every window you currently have open and lets you jump to any of them with a single click.
Open it with the Command Center button on the Remote Station window, next to the other window buttons (Remote Control, Keyer, DX Cluster …). Click it again to hide the panel.
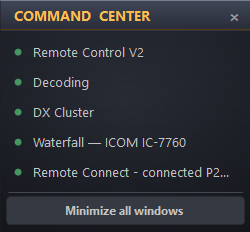
Command Center — one-click switching between all open windows
- Click a name to bring that window to the front. It gets an amber dot to mark it as the one you last picked.
- Click the amber-marked name again to minimize that window — a quick way to set a single window aside and call it back later.
- The order is always the same: Remote Control at the top, the main Remote Station window at the bottom, and everything else alphabetically in between. Each row uses the window's own title, so Aux Device panels show the actual device name.
- Minimize all windows — the button at the bottom — clears the screen in one click: every listed window, plus the OpenShack dashboard, is minimized and only the Command Center stays on top. Click any name to bring a window back.
Drag the Command Center by its title bar to park it wherever you like. It stays on top of the other windows and remembers its position for next time.
Reopen the Same Windows on Connect
The first time you successfully connect to a newly added station, OpenShack automatically opens Remote Control as soon as the host's rigctld service is ready. This happens once per station. After that first connection, the normal window memory described below decides whether Remote Control opens again.
Client side only. Whatever Remote-Connect child windows you have open at the moment you click Disconnect — Keyer, DX Cluster, Audio Decoder, Rotator, one or several Aux Device panels, Waterfall, Remote Control — are remembered and reopened automatically the next time you click Connect with the same secret. The list is stored on disk, so it survives an app restart: come back tomorrow, hit Connect, and your usual window layout returns by itself.
Some windows have prerequisites and reopen as soon as those are satisfied — Audio Decoder waits for the audio session to start, Rotator and Aux Device panels wait for the host to announce the corresponding service, Waterfall waits for the host's CI-V announcement. You don't have to do anything; they just appear once the host is ready. (An Aux Device panel you deliberately closed is the exception — it stays closed until you reopen it from the Aux Devices button; see Aux Devices.)
Changing the secret clears the memory. A new secret usually means a different host, where the old window set no longer makes sense, so OpenShack starts with a clean slate.
Start Directly into Remote Station
Normally you start OpenShack from its usual icon and open Remote Station from the dashboard. If you run a fixed remote station, you can instead create shortcuts that open Remote Connect and connect automatically — reusing the host or client role, secret and settings from the last time you used it, and switching on always stay connected so the link keeps re-trying through network drops until it is up.
Open Remote Station → Advanced. Under Start into Remote Station shortcuts you will find three checkboxes — tick the ones you want, untick to remove them again:
- Start menu entry — adds a normal OpenShack (Remote Station) entry to the Start menu, next to the regular one.
- Desktop shortcut — puts an icon on the desktop for a one-click start straight into a connected station.
- Start automatically with Windows (auto-connect) — the station comes up and connects by itself every time you sign in to Windows. Ideal for an unattended host PC at the radio or a fixed client console.
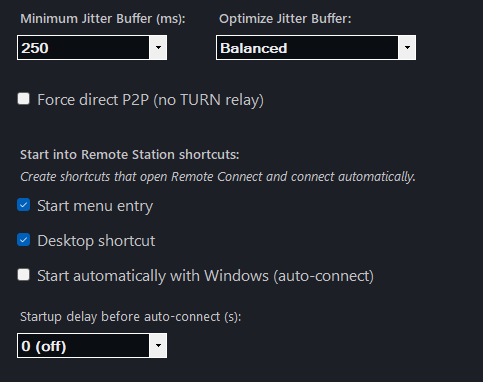
Advanced tab — the shortcuts for starting directly into Remote Station (Start menu, Desktop, auto-start with Windows).
Set the role, secret and the services you want once the normal way; these shortcuts then reuse them every time. Hardware detection still runs first, so the Box is ready before the connection starts. These shortcuts are optional — if you never tick a box, nothing extra is added, and you can remove any of them at any time by unticking it here.
Startup delay before auto-connect (s) — on the same Advanced tab you can set a delay of up to 120 seconds (0 = off). It applies only to the auto-connect launch: when the PC starts the station this way, the app first fires any URL Switcher On URLs (to switch your gear on), then waits the chosen time before opening Remote Connect — so USB COM ports, rig interfaces and any relay-switched equipment have time to come up after a fresh boot. A short countdown is shown while it waits. Normal (manual) launches ignore this setting; the On URLs still fire, but without a wait.
Optional: Windows Auto Logon for Unattended PCs
The OpenShack Windows auto-start shortcut runs after a user has signed in to Windows. If a remote host PC should recover by itself after a reboot or power failure, Windows also needs to sign in to the station user automatically.
The most reliable way is Microsoft's Sysinternals Autologon tool:
- Download Autologon from Microsoft Sysinternals.
- Run Autologon64.exe as administrator.
- Enter the Windows user name, domain or computer name, and password for the account that should run OpenShack.
- Click Enable and restart the PC to test it.
If you use a Microsoft account and Windows Hello, use the real account password,
not the PIN. If auto logon fails, check the exact Windows user and computer name
with whoami, and disable the setting that allows only Windows Hello
sign-in for Microsoft accounts before enabling Autologon again.
WaveLog Gateway
When Sync to Wavelog is enabled on the Client tab of Remote Connect, OpenShack starts a local WaveLogGate-compatible gateway on your PC. Any application that supports the WaveLogGate protocol (including the official WaveLog browser extension) can connect to it and receive live rig data — no server URL or API key needs to be entered in OpenShack itself.
Gateway Endpoints
| Protocol | Address | Purpose |
|---|---|---|
| HTTP GET | http://localhost:54321/api/radio |
Current frequency & mode snapshot (JSON) |
| HTTP POST | http://localhost:54321/api/qsy |
QSY request — tune the rig to a frequency |
| WebSocket | ws://localhost:54322 |
Live push every 2 seconds |
Data Format
All endpoints use the standard WaveLogGate JSON format:
{"freq": 14195000, "mode": "USB", "rig": "DTM Remote"} freq is in Hz. mode reflects
the current operating mode reported by the rig (e.g. CW,
USB, LSB, FM). The gateway
broadcasts an update every two seconds while a rigctld
connection is active.
QSY from WaveLog
The WaveLog browser extension can send QSY commands back to the gateway. OpenShack forwards these to the rig automatically via the active rig control channel — clicking a spot in WaveLog tunes the remote radio instantly.
Gateway Status
The Status tab in Remote Connect shows the gateway state next to Wavelog GW: Stopped when the gateway is not running, Running when active with no WebSocket clients connected, and Running (N client(s)) when one or more applications are connected via WebSocket.
Upload QSOs from MSHV / WSJT-X
OpenShack can also push your logged contacts straight into WaveLog. When you finish a QSO in a digimode program — MSHV, WSJT-X, JTDX or FLDigi — the program broadcasts the contact on the local network, OpenShack picks it up and uploads it to your WaveLog logbook automatically. Duplicate contacts are filtered out by WaveLog itself.
Enable UDP Listener for Wavelog on the Client tab of Remote Connect, underneath Sync to Wavelog. A small group of fields appears — the WaveLog Base URL and API Key (shared with the sync feature, shown just below the Sync to Wavelog switch), and the listener's own Listen IP, UDP Port and Station Profile:
- Base URL and API Key —
your WaveLog address (e.g.
https://log.example.com) and a personal API key from WaveLog (Account → API Keys). - Listen IP — which local address the listener binds to. Leave it on localhost when the digimode program runs on this same PC; pick this computer's LAN address if the program runs on another computer in your network.
- UDP Port — the port the digimode program broadcasts to. The default is 4575; only change it if that port is already in use.
- Station Profile — click Refresh to load your station profiles from WaveLog, then pick the one your contacts should be logged against.
The listener reads the program's secondary /
N1MM-style broadcast (plain ADIF or N1MM XML), not
its primary digital-mode port. Point that broadcast at
127.0.0.1 on the same port (default
4575):
- MSHV: Options → Enable network,
then under Broadcast tick QSOs and
Use N1MM QSO format, with the address set to
127.0.0.1:4575. - WSJT-X / JTDX: Settings → Reporting,
enable the Secondary UDP Server (N1MM Logger+)
broadcast to
127.0.0.1port4575.
If the digimode program runs on a different
computer, broadcast to this PC's LAN address instead
of 127.0.0.1, and set Listen IP
to that same address.
Upload activity (and any errors, such as a wrong URL or missing station profile) is shown on the Status tab and written to the debug log.
Service Overview
OpenShack splits remote operation into six independent service layers. Each can be started and stopped while connected, without interrupting the others. The host automatically mirrors the client's active service set — if the client enables audio, the host's audio capture starts automatically. If the client disables it, the host stops.
| Service | Transport | What It Does | Runs on |
|---|---|---|---|
| 🔊 Audio | Protected remote audio | Bi-directional receive audio and microphone. Configurable bitrate and frame size. | Host + Client |
| 📻 CAT Proxy | Protected remote control channel | Raw byte pass-through between host (COM or TCP) and client (COM or TCP). The rig’s own CAT protocol travels unchanged — no Hamlib required. | Host COM/TCP ↔ Client COM/TCP |
| 🔌 rigctld | Protected remote control channel | Makes Hamlib rigctld available remotely. Requires rigctld.exe
running on the host. Several client-side consumers
share this single channel: OpenShack Remote
Control, rigctld Proxy
(for external loggers), and TRX Emulator,
AUX devices. |
Host: rigctld.exe |
| 🖥️ TRX Emulator | Protected remote control channel | Client-side TS-2000 emulator on a COM or TCP port. Contest loggers connect directly — no virtual COM bridge needed. Requires rigctld on host. | Client only |
| ⚡ CW / PTT | Timing-preserving remote channel | CW keying and PTT forwarded from the client Box to the host Box while preserving operator timing. | Host: OpenShack Box |
| 🔑 Winkey Proxy | Local (virtual COM port) | Bridges a logger's raw Winkey binary to the OpenShack Box
via WINKEY:BYTES: commands. Enables
simultaneous Winkey keying + DL2CC features over the
bundled COM25/COM26 com0com pair. |
Client only |
Audio
OpenShack carries the radio's audio over the internet with the low-latency OPUS codec, using WASAPI for capture and playback on both ends. For a new station there is really only one thing to set up: which sound devices to use. Everything else on the Audio tab — codec quality, mono blend, binaural — ships with sensible defaults you can leave alone.
Setting Up Audio — Pick Source and Target Client
On the client the Audio source and target card holds the only two choices you have to make:
- Audio source — the audio that is sent to the remote radio and put on the air (your transmit audio).
- Audio target — where the audio received from the radio comes out on your PC.
Your choice is remembered by device name as well as by the Windows device entry, so it survives Windows re-numbering your sound devices after a re-plug, a driver update or a reboot. A device that is not there right now — say the radio with its USB sound card still switched off — stays in the list as <device> (not connected) rather than being replaced, and is used as soon as it appears.
Pick the two devices to match how you operate — that one decision sets up the whole audio path:
| How you operate | Audio source (you → radio) | Audio target (radio → you) |
|---|---|---|
| CW or SSB — listening and talking by ear/key | Your PC headset / sound-card microphone (used for SSB; CW is keyed separately) | Your PC headset / speakers |
| Digital modes (FT8, RTTY, JS8, …) decoded by software | The virtual audio cable your software transmits into — e.g. CABLE Output (VB-Audio Virtual Cable) | The virtual audio cable your software decodes from — e.g. CABLE Input (VB-Audio Virtual Cable) |
Then start audio — that is all the audio setup most stations ever need. Leave the Audio quality on its default OPUS preset (change it only if your link is slow or unstable), and leave Mono blend and Binaural CW off unless you want them.
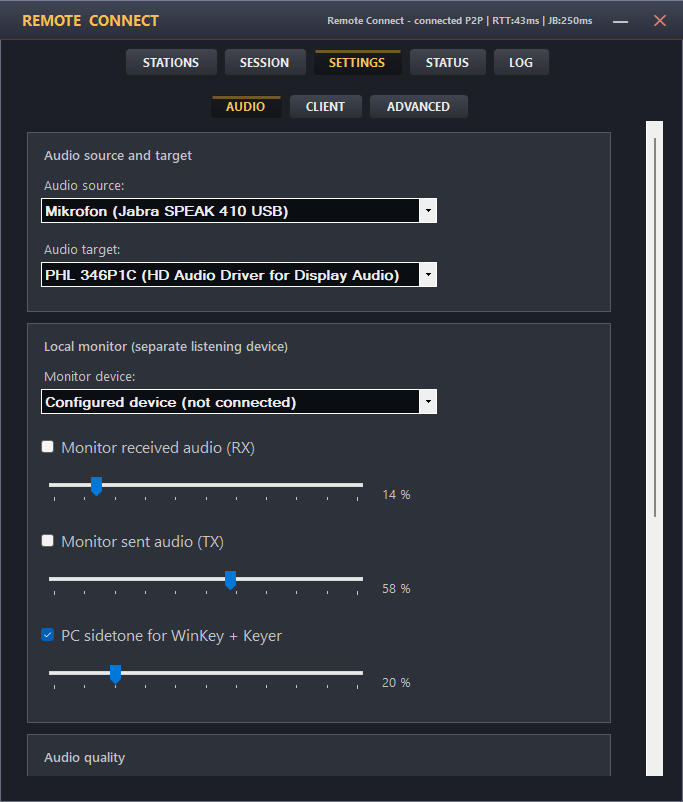
A digital-mode setup on the Client: the Audio source and target card points both devices at a VB-Audio Virtual Cable, and the Local monitor card below plays the received and sent audio on the PC speakers so the operator can still hear the band. For CW/SSB you would instead pick your headset for both devices and leave the monitor off.
Volume — Two Sliders per Direction
The Audio card on the Session tab carries four sliders. Each direction has a software volume inside OpenShack and a device volume, which is the same level Windows shows for that sound device:
| Slider | What it does | Default |
|---|---|---|
| RX Volume | How loud the received audio plays for you. Affects OpenShack only. The same slider sits on the Main tab of the rig control window, below the signal meter — move either one and the other follows. | 100 % |
| RX Device | The Windows volume of your audio target device. Affects every program using that device. | whatever Windows is set to |
| TX Volume | How loud your audio is sent to the other station. Goes up to 200 %, so it can lift a quiet source as well as turn one down. | 100 % |
| TX Device | The Windows recording level of your audio source device. Affects every program using that device. | whatever Windows is set to |
For everyday adjusting, use RX Volume and TX Volume — they only touch OpenShack and leave the rest of your PC alone. Reach for the two Device sliders when the sound itself is wrong rather than just too loud or too quiet: if the audio arrives distorted, the device is recording too hot and no amount of turning it down afterwards will clean it up; if it is faint and hissy, raising the device level gives you a genuinely better signal, while software boost would only make the hiss louder too.
Some devices — a few virtual audio cables and USB codecs — have no level control of their own. The matching Device slider is then greyed out and reads n/a; use the software slider instead. Device levels are not stored in your OpenShack settings, because Windows already remembers them per device.
Muting the Received Audio During TX
Next to the sliders sits Mute RX, which silences the received audio you hear. Beside it is Mute RX during TX: turn it on and the received audio is muted automatically whenever you transmit, then comes back the instant you return to receive. It is handy for silencing the slightly delayed echo of your own signal, or for keeping a monitor headset clean while you talk.
It follows however you key — the PTT button, a footswitch, the OpenShack Box, CW keying or rig PTT — so in everyday operating you can just leave it on. It starts off, and unlike the plain Mute RX box it is remembered between sessions. Clear the box and the audio returns straight away.
The same switch also shapes what web listeners hear. Some stations feed their own transmission back into the receive audio — a rig's TX monitor on the line output, or a loop in the audio interface — so listeners would hear you twice, once slightly delayed. With Mute RX during TX on, the station's receive audio is left out of the web stream while you transmit, and listeners hear only your transmission. It comes back the instant you return to receive.
On the Host the same box is the station's own setting for web listeners: while it is on, the receive audio stays out of the web stream during every transmission, whatever the operator has chosen. It does not touch the audio going into the radio.
Changing Sound Devices While Connected
You can pick a different Audio source or Audio target in the middle of a session — swap from your headset to the speakers, or move to a virtual cable because you have decided to work a digital mode after all. The audio simply moves to the new device.
The session itself is not interrupted: rig control, CW keying and PTT keep running, and the other station stays connected and does not notice anything beyond a brief gap in the audio. Nothing needs restarting.
If the new device cannot be opened — unplugged in the meantime, claimed exclusively by another program, or blocked by the Windows microphone privacy setting — the previous device simply keeps running and the status line tells you what happened.
Audio Source Mode — Single or Dual Host
By default the host captures a single audio device and sends it as the remote audio stream. This is the normal setup for one radio at the host site and needs no extra configuration.
As an optional extra feature, the host can capture two audio sources at the same time — typically two different radios — and pack them into a single stereo stream: source A goes to the Left channel, source B to the Right. The remote operator hears the first source in one ear and the second in the other. This is the standard SO2R-over-internet workflow, but it works equally well for any two mono inputs you want to keep separate (a radio plus a scanner, two receivers, etc.).
Switch the Audio source mode drop-down to Dual mono combine (two radios). A second device picker appears for source B and the first picker is relabelled Radio A (Left). Leave it at Single device for normal one-radio operation.
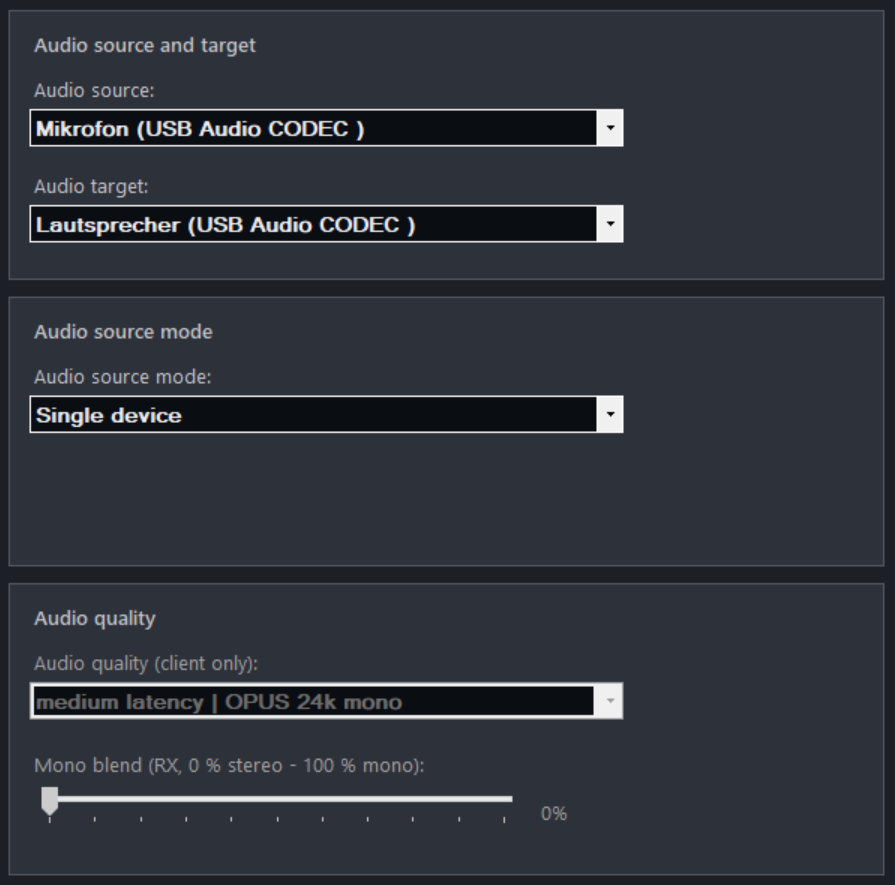
Audio settings on the Host with Dual mono combine active — Radio A (Left) and Radio B (Right) device pickers visible. Audio mode, OPUS preset and mono blend rows are disabled on the host because the client controls them.
- Pick a different physical capture device for A and B — the same device cannot be used twice.
- Dual-mono combine requires a stereo transport. If the client has selected a mono OPUS preset or Compatibility Mono (PCMU), the host will fall back to single-device mode for that session. Ask the client to switch to a stereo OPUS preset.
- The two audio devices have independent clocks, but source A drives the timing and source B is realigned on every 20 ms WASAPI callback. Typical USB sound cards drift by less than one sample per callback, so the correction adds no perceptible latency and no audible artefacts.
- Status events log a periodic drift summary (sample inserts and drops per 10-second window) for support diagnostics.
Mono Blend — Soften L/R Separation Client
When the host sends stereo (especially in dual-mono combine mode, where the two ears carry different sources), some operators want to blend the two channels toward mono — for example to listen on a single speaker, or to keep both sources audible in both ears with a softened directional cue.
The Mono blend slider on the client's Audio tab does exactly that. It applies a simple cross-mix to every inbound stereo frame:
- 0 % — original L/R untouched. Each ear hears only its own channel.
- 50 % — diffuse mix: each ear hears 75 % of its own channel and 25 % of the opposite channel. Both sources audible in both ears, directional cue preserved.
- 100 % — full mono mix. Both ears hear
(L + R) / 2.
The setting is purely on the client side — the host is unaffected and need not know. The slider is disabled when the negotiated audio is mono (PCMU mono or OPUS mono preset) and when the local instance is the host, because both cases have no second channel to blend.
Binaural CW — Frequency-Positioned Stereo Client
CW signals close together in frequency are easier to copy when each one sits at a distinct point in the stereo field. Binaural CW takes the inbound audio and pans each tone left or right based on its pitch — lower tones move to the left ear, higher tones to the right, with the centre pitch staying in the middle.
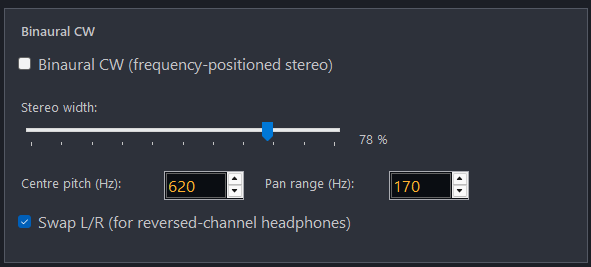
Binaural CW controls on the Client — enable checkbox, stereo width slider, centre pitch and pan range, and a Swap L/R toggle for reversed-channel headphones.
Switch the effect on with the Binaural CW checkbox. The remaining controls fine-tune how it sounds:
- Centre pitch (Hz) — the frequency that stays exactly in the middle. Default 620 Hz, matching the OpenShack Box default sidetone, so signals you've tuned to zero-beat remain centred. Range 300–1200 Hz.
- Pan range (Hz) — the offset from the centre pitch that maps to the full left or right edge. Default 150 Hz: with a 620 Hz centre, a 470 Hz tone is fully left, a 770 Hz tone is fully right, and anything in between is panned proportionally. A smaller range concentrates the spread into a tighter pitch window; a larger range needs a bigger pitch difference to reach the extremes.
- Stereo width — scales the maximum pan magnitude. 0 % = pure mono (no spread); 100 % = full L↔R spread within the pan range. Useful to soften the effect without changing the centre or range.
- Swap L/R — flips low ↔ high so lower tones land on the right and higher tones on the left. Provided for listeners whose headphones, cable or audio routing are wired with reversed channels.
Binaural CW works on any inbound audio — both mono modes (PCMU, OPUS mono) and stereo modes (OPUS stereo, L16). On a mono inbound the spatializer expands the playback chain to stereo automatically. On a stereo inbound the channels are first folded to mono and then re-spatialised by frequency, which replaces the original L/R separation; that combination is offered as a user-choice rather than a recommendation. The effect adds about 22 ms of extra latency at 44.1/48 kHz (one FFT block) on top of the network jitter buffer.
All four binaural settings are persisted in the client settings file and restored on the next session. The controls are disabled in host role.
Local Monitor — Listen on a Separate Device Client
When you run a digital mode through a virtual audio cable (VAC), the received audio is routed into the decoding software instead of your speakers — so you can no longer hear what the radio is doing. The Local monitor sends a copy of the sent and/or received audio to a separate listening device (real speakers or headphones) so you can still follow the band by ear while the digital stream keeps flowing to the VAC.
The monitor has its own card on the client's Audio tab. Pick a Monitor device, then enable the stream(s) you want to hear — each has an independent switch and volume slider:
- Monitor received audio (RX) — plays the incoming rig audio. The common case: hear the band while a decoder reads the virtual audio cable.
- Monitor sent audio (TX) — plays a copy of what you are transmitting, a confidence monitor for the audio your station is putting on the air.
Both streams are intended for the digital / virtual-audio-cable workflow. With an open microphone the TX monitor will feed back, so leave it off in that case. The monitor is a client-only feature, and its device and volumes are saved in the client settings.
The Local monitor card on the client's Audio tab — the RX and TX monitors plus the PC sidetone for box-less CW
The same card also carries the PC sidetone for WinKey + Keyer control. This one is unrelated to the digital-mode monitor: it gives you an instant local sidetone when you key CW without an OpenShack Box at the client location. It plays on the Monitor device selected above and is on by default at 20 %. See Operate CW Without a Box for the full story.
Audio Modes
Two transport modes are available. The mode is selected on the client side and pushed to the host automatically before the session opens.
| Mode | Encoding | Typical Use | Notes |
|---|---|---|---|
| Opus Default | OPUS codec, configurable preset | Internet connections — recommended for all remote operation | 40 presets covering 8–48 kbps in mono and stereo across four latency tiers. See below. |
| Uncompressed Stereo | Uncompressed PCM 16-bit stereo (L16, 44.1 kHz) | Local area network (LAN) only | Zero compression overhead — bit-exact audio, but ~1.4 Mbps and no packet-loss concealment. Do not use over the internet. |
Latency and Codec Selection
When Opus mode is selected, the Audio Preset dropdown offers 40 presets that combine a bitrate (8–48 kbps), channel count (mono or stereo), and one of four latency tiers. The tier controls the OPUS frame duration and jitter buffer depth — together these form the codec contribution to end-to-end audio delay. Your actual perceived latency will be this figure plus your one-way network propagation time (roughly half the round-trip time shown by a ping to the host).
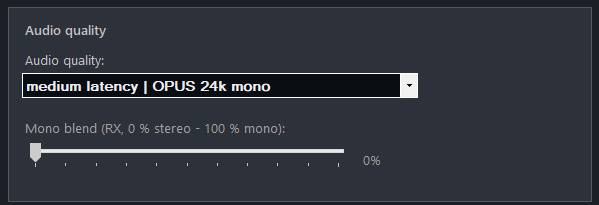
The Client Audio quality card — the OPUS Audio preset (bitrate · channels · latency tier) plus the mono blend slider.
Choose the tier based on the stability of your network path, not just its speed. A stable fibre or cable connection can use Low or Medium. Mobile data, VPN tunnels, satellite, or any path with variable packet timing benefit from High or Very High — the larger jitter buffer absorbs burst losses without audible dropouts, at the cost of extra codec delay.
| Tier | Frame size | Jitter buffer | Codec delay | Total (excl. network RTT) | Best for |
|---|---|---|---|---|---|
| Low | 10 ms | 20 ms | ~30 ms | ~50–80 ms | Fibre / LAN, rock-solid internet path |
| Medium | 20 ms | 60 ms | ~80 ms | ~100–150 ms | Standard broadband (cable, DSL) — lower latency for live CW/SSB on a stable path |
| High Default | 60 ms | 140 ms | ~200 ms | ~220–350 ms | Robust on most internet paths (mobile, VPN, intercontinental) and a good match for digimodes |
| Very High | 60 ms | 300 ms | ~360 ms | ~380–450 ms | Satellite internet, congested or unstable links where dropout avoidance is critical |
Within any latency tier, a higher bitrate improves receive audio quality at the cost of more bandwidth. For typical HF receive audio, 12–16 kbps (mono or stereo) is a good choice. For SSB/AM monitoring where audio fidelity matters, step up to 24–32 kbps. The 40–48 kbps stereo presets are for wideband listening on a fast link.
If audio is choppy or breaking up, increase the tier one step at a time and allow 10–15 seconds for the connection to stabilise after each change. If latency is already acceptable but audio sounds thin or compressed, try a higher bitrate within the same tier.
Recommended Audio Workflow — OpenShack Box as Monitor
For the best CW operating experience on the client side, route the PC audio output into the OpenShack Box rather than listening through PC speakers:
- With the client-side OpenShack Box connected to OpenShack, open Hardware Settings → Audio / Codec and make sure Mix Enabled is On (default). Pick a Mix Mode — Digital gives you the Line In filter and a software volume slider, Analog uses the codec's hardware bypass path. Set Line-In Mix Volume and, in Digital mode, the Mix Filter band to taste. Without this, the Box won't pass the PC audio to your headphones.
- Connect a 3.5 mm stereo cable from the PC headphone or line out to the Box's Line In Mix jack. Alternatively, pair the PC to the Box via Bluetooth Audio (requires WiFi off on the Box).
- On the client PC, open the Remote Station
Settings → Audio tab and set the
playback device to the sound card output
that physically feeds the Box — i.e. the device whose
headphone or line-out jack the cable from
the previous step is plugged into.
Tip: Some sound cards expose the headphone output as a separate device that only appears in the Windows playback device list once a cable is plugged in — which is exactly why we connect the cable first. If the expected entry still isn't there, close the Remote Station window and reopen it so OpenShack re-enumerates the playback devices. - Plug your headphones into the Box's headphone jack.
- The Box now mixes the remote receive audio with its own hardware-generated sidetone in analogue or digital mode — you hear both in your headphones simultaneously.
This is the key advantage: the sidetone is generated entirely in the Box hardware with no audible latency, even though the remote audio travels over the internet. The operating feel is almost identical to sitting at the radio.
Set the receive audio level and the sidetone mix in the Box itself — see Hardware → Audio / Codec Tab for the relevant level controls. We recommend a PC headset with its own inline volume control and the following approach: drive the Box at a high output level and use the headset's volume knob as an attenuator. That way the noise floor of the headset amplifier sits well below the signal, and you can dial back the overall level to a comfortable listening volume without losing dynamic range.
Rig Control
OpenShack offers two independent, parallel approaches to rig control. Choose one or both depending on what your station software expects:
| Approach | How it works | Requires on host | Best for |
|---|---|---|---|
| CAT Proxy | Raw byte pass-through. Host COM/TCP ↔ client COM/TCP. | Rig CAT cable connected to host PC | Software that speaks the rig's own proprietary CAT dialect; simple setups |
| rigctld (Hamlib) | Makes Hamlib rigctld TCP available remotely. Three client-side tools use the same channel. | rigctld.exe running on host PC |
OpenShack Remote Control panel, contest loggers (N1MM+, Win-Test, WriteLog), TRX Emulator |
CAT Proxy
The CAT Proxy is a transparent byte tunnel: every byte the rig sends is forwarded to the client, and every byte the client sends goes back to the rig. OpenShack has no knowledge of the rig protocol — it simply passes data in both directions over the protected remote connection. No Hamlib, no rigctld.exe needed.
Both the host and client endpoints can be either a COM port or a TCP port, independently. Examples: host COM3 → client TCP 4573 (logging software connects via TCP localhost). Or host TCP 4572 (existing CAT server) → client COM5 (legacy app).
Host setup
- Connect the rig's CAT cable to the host PC and note the COM port (or TCP address of an existing CAT server).
- In the Remote Station window (Host), expand the CAT section.
- Select COM or TCP, enter the port/address and baud rate.
- Enable the CAT service.
Client setup
- In the Remote Station window (Client), expand the CAT section.
- Select whether to expose the rig as a COM port or TCP port locally.
- Enable the CAT service. OpenShack starts listening on the selected port.
- Point your logging or CAT software at that local COM or TCP port.
Icom waterfall without external logging software: leave CAT enabled; it is on by default. The built-in waterfall receives its data directly from the remote station and does not require a program to read the local COM or TCP port. If that optional local bridge stalls, OpenShack stops the bridge and records the reason while the waterfall, remote control and Stop button remain responsive. To use the local bridge again, start the external software and restart CAT. With a virtual COM pair, the external software uses the other end of the pair.
rigctld / Hamlib
Hamlib
is an open-source library that speaks the native CAT dialect
of over 300 different transceivers. Its
network daemon, rigctld, connects to the rig
via COM port on the host PC and exposes a simple text-based
TCP server (default localhost:4532). Clients
send universal commands like \set_freq 14195000
and rigctld translates them for the specific rig model.
All three rigctld-based features in OpenShack require rigctld.exe
to be running on the host PC before
enabling the rigctld service. The application coordinates
their access over the protected remote connection.
- Go to Remote Control - Settings - Host
- Select your transceiver model, COM Port, Baud rate
(leave default listen port at 4532 if you don't have
another rigctld.exe running on your PC).
- For ICOM Transceivers: Check "VFO" mode and enter the CIV address for your transceiver in 0x form like 0xB2. You can check the address in the menu of your ICOM transceiver
- Check "Start rigctld.exe with this command
line" to let OpenShack automatically launch the
bundled rigctld.exe when the rig proxy starts. The
generated command line always binds rigctld to localhost (
-T
                127.0.0.1
) so it is not accessible from the network.
Using an already-running rigctld: If you already have rigctld running as a service or started manually, check "Use external rigctld service" instead. Enter the IP address and port of that service. The two options are mutually exclusive — enabling one automatically disables the other.
MANUAL Host setup
- Install Hamlib on the host PC.
- Start
rigctldfor your transceiver model, e.g.:
rigctld -m 229 -r COM3 -s 9600(Kenwood TS-2000 on COM3) - In the Remote Station window (Host), enable the rigctld service and confirm the port (default 4532).
Virtual COM Ports
Some logging or CAT software only supports a physical COM port and has no TCP client option. If your client application cannot connect directly via TCP, you can bridge the gap with a virtual COM port pair: two COM ports that appear as real serial ports to Windows, with data written on one side arriving on the other.
Two common scenarios where this is useful:
- CAT forwarding — the client-side CAT Proxy exposes a TCP port, but your logging software only speaks COM. The bundled com0com pair connects the logger's COM port to OpenShack's COM port.
- WinKey Proxy — the bundled COM25/COM26 com0com pair lets logger software talk Winkey while OpenShack keeps full control of the Box over USB.
OpenShack setup can install com0com and create the port pairs for you. No separate VSPE purchase or manual virtual-COM setup is needed for the standard configuration.
Port pairs created by setup
| Use | Select in OpenShack | Select in external software |
|---|---|---|
| CAT bridge | COM21 | COM22 (WSJT-X / logger) |
| TRX Emulator / TSEMU | COM23 | COM24 (external software) |
| Winkey Proxy / Emulator | COM25 | COM26 (N1MM+ / logger Winkey) |
On a new install, OpenShack fills these ports in for you (Client role): the CAT, TRX Emulator and Winkey COM fields are pre-selected from what setup created, and the Winkey proxy is enabled automatically. You normally only set the matching external port in your other software.
%LocalAppData%\OpenShack\Setup\virtual-com-ports.txt and also included
in %LocalAppData%\OpenShack\Setup\setup-notes.txt.
OpenShack Remote Control Panel
The Remote Control window is OpenShack's own virtual radio front panel, built on top of the rigctld service. Open it from the Remote Station window while connected. It works identically in both Host and Client roles — the connection wiring is handled internally and is transparent to the user.

OpenShack Remote Control panel — VFO, mode, levels, and CW memories
What you can control
| Control | Function |
|---|---|
| VFO A / VFO B frequency | Read and set. The amber VFO A display updates immediately when you tune and is confirmed once the rig echoes the new frequency back. See Frequency Tuning for all input methods. |
| Mode & Passband | USB, LSB, CW, CWR, AM, FM, and more — all modes reported by rigctld. Passband width in Hz. |
| Split operation | Enable/disable split, set TX frequency and mode independently on VFO B. |
| PTT | Send PTT to host (use space key). The TX lamp tells you what you asked for from what the radio confirms. Key from your own side — PTT button, space bar, footswitch or paddle on the OpenShack Box — and it lights amber straight away, then turns red about a second later once the radio itself reports that it is transmitting. A transmission started at the station, for instance on a microphone footswitch or by another operator, is red from the start. Amber that never turns red means the radio is not confirming the transmission over CAT. |
| RX Volume | Your listening volume, on the MAIN tab below the signal meter. It is the same setting as RX Volume on the Remote Station audio settings — move either one and the other follows. |
| RF / AF / SQL levels | Read and set all supported levels (RF gain, AF volume, squelch, etc.). Available controls depend on the rig's rigctld capabilities. |
| Attenuator / Preamp | Populated automatically from dump_caps
— only the steps your rig actually supports are
shown. |
| Functions (NR, NB, RIT, XIT, …) | Toggle or set any function supported by the rig's rigctld driver. |
| NB Depth / Width Icom only | On the AUDIO & FILTER tab, NB DEPTH (1–10) and NB WIDTH (1–100) appear beside NB LEVEL on supported Icom models, including the IC-7760. OpenShack reads both values from the radio on connect and reads back every change before showing it as confirmed. “—” means the radio has not returned a value yet. They remain hidden on other radios. |
| Transverter Icom only | The X-VERTER button on the ANTENNA & TUNER tab switches the radio's transverter function on and off — for stations operating through a transverter. It appears only on Icom models that expose this function (e.g. IC-7760) and is hidden on every other rig. |
| CW Memories | Programmable CW text macros sent via rigctld PTT and CW keying. |
| Power per band | Preset a TX power level for each band (with three profiles) so it is applied automatically on a band change — see Power per Band. |
How VFO A, VFO B and Split work
The panel follows the classic receive on A, transmit on A or B model. A few points are worth knowing before you tune:
- You always listen on VFO A. The large amber display is your receive frequency. The knob, mouse wheel, +/− buttons, band buttons and direct entry all move VFO A.
- VFO B is a second frequency store, not a second receiver. Pressing VFO B does not switch your receiver to B — it simply points the tuning controls at the VFO B value so you can set it. Press VFO A again to return to normal tuning.
- SPLIT uses VFO B as your transmit frequency. With split on you receive on VFO A and transmit on VFO B — the classic setup for working a DX station that listens up. Turn split off to transmit on VFO A again.
- A→B, B→A and A↔B move the whole VFO. The copy and swap buttons transfer the mode and filter width together with the frequency — press A→B and VFO B becomes an exact copy of what you are listening to, ready for a same-mode split. (When both VFOs already share the same mode and filter, only the frequency changes.)
- The small label next to the VFO B display shows the mode and filter width VFO B is currently set to (for example CW 500), so a split that would transmit in the wrong mode is visible before you key up. It stays empty until the radio has reported VFO B’s mode — on some radio models that is only known after your first A→B copy.
- The RX / TX tags under the VFO labels show this at a glance: RX always sits under VFO A; TX sits under VFO A when split is off and moves under VFO B when split is on. These tags reflect the actual state read back from the radio, not just your button press — so the TX tag moves under VFO B a moment later, once the rig confirms the change.
Frequency Tuning
Several input methods are available for changing the VFO A frequency. All of them go through the same tuning pipeline, so the step size set with the STEP buttons applies to the mouse wheel and the +/− buttons alike.
| Input | How it works |
|---|---|
| Mouse wheel | Scroll anywhere on the panel (except over a slider or the frequency text box) to tune up or down by one step per detent. Hold Shift while scrolling to move 10 steps at once. |
| Tuning knob | Scroll the mouse wheel over the large knob — it has its own wheel handler and behaves identically to scrolling on the rest of the panel. |
| + / − buttons | The two small buttons to the right of the VFO A display. A single click moves one step; press and hold for continuous auto-repeat tuning. |
| Direct frequency entry | Type a frequency in kHz into the text box on the MAIN tab and press Enter or click SET. The rig QSYs immediately, and the mode switches automatically to match the sub-band — see Frequency, Mode & Filter Memory. |
| Band buttons | Click any band button (160m … 6m) to jump to that band. The panel stays in the current mode group (SSB or CW) and recalls that band's last frequency for it, picking the correct sideband automatically — see Frequency, Mode & Filter Memory. |
| STEP buttons | Select the tuning step used by the wheel and +/− buttons: 10, 50, 100 Hz or 1, 5, 10 kHz. The active step is highlighted. |
A real knob on your desk (ADV tab)
Remote Control → ADV → External VFO knob: enable VFO KNOB.
Program the compatible OpenShack dual-knob controller once over USB with the OpenShack VFO Programmer. The stored assignments are used for both USB and Bluetooth: Ctrl+Shift+F1 to F8, with F4 unused. Follow the download page’s setup guide and verify all seven controls over the connection you intend to use. The ADV tab also lists the mapping under ASSIGNMENTS.
Close the programmer’s verification window before using the knob in OpenShack. The status beside the setting shows whether capture is active and lists any shortcuts that could not be registered.
When capture is enabled and the shortcuts are registered, the knob also works while another application has focus, as long as the Remote Control window is open. You can switch VFO KNOB off when you need these shortcuts in another application.
Frequency, Mode & Filter Memory
The Remote Control panel remembers the operating settings you normally want back after a band or mode change:
| What is remembered | How it behaves |
|---|---|
| Per-band, per-mode frequency | Each band keeps separate last frequencies for SSB (USB/LSB) and for CW (CW/CWR). Clicking a band button stays in the current mode group and recalls the matching frequency on the new band. The sideband is chosen for the band automatically (LSB below 10 MHz, USB above), so USB on 20 m becomes LSB when you drop to 40 m. This frequency memory is shared across stations. |
| Filter width per mode | The passband/filter you last chose for each mode is restored when you switch back to that mode: narrow for CW, wider for SSB. This is remembered per station, so each radio can keep its own suitable filter values. |
| CW / CWR preference | Whether you operate CW or CW-reverse is remembered per station and re-used by the automatic mode selection. |
RIT / XIT and Frequency Offset
The RIT and XIT buttons enable receive or transmit incremental tuning. Once active, use the offset row (−500 … +500 Hz buttons) to shift the receive or transmit frequency relative to the displayed VFO. The current offset is shown between the buttons. Click CLR to zero the offset without disabling RIT/XIT.
Rig Monitor
All commands sent and responses received by the Remote Control panel are logged to the Rig Monitor tab in the Remote Station window. This is useful for diagnosing unexpected rig behaviour or verifying that a command was actually received.
\chk_vfo and \dump_caps
to the host rigctld. This discovers VFO naming (VFOA/VFOB or
Main/Sub), supported attenuator and preamp levels, and all
available level and function names. The Remote Control panel
then shows the controls Hamlib supports for your specific rig,
together with model-matched vendor controls such as Icom
NB DEPTH and NB WIDTH. 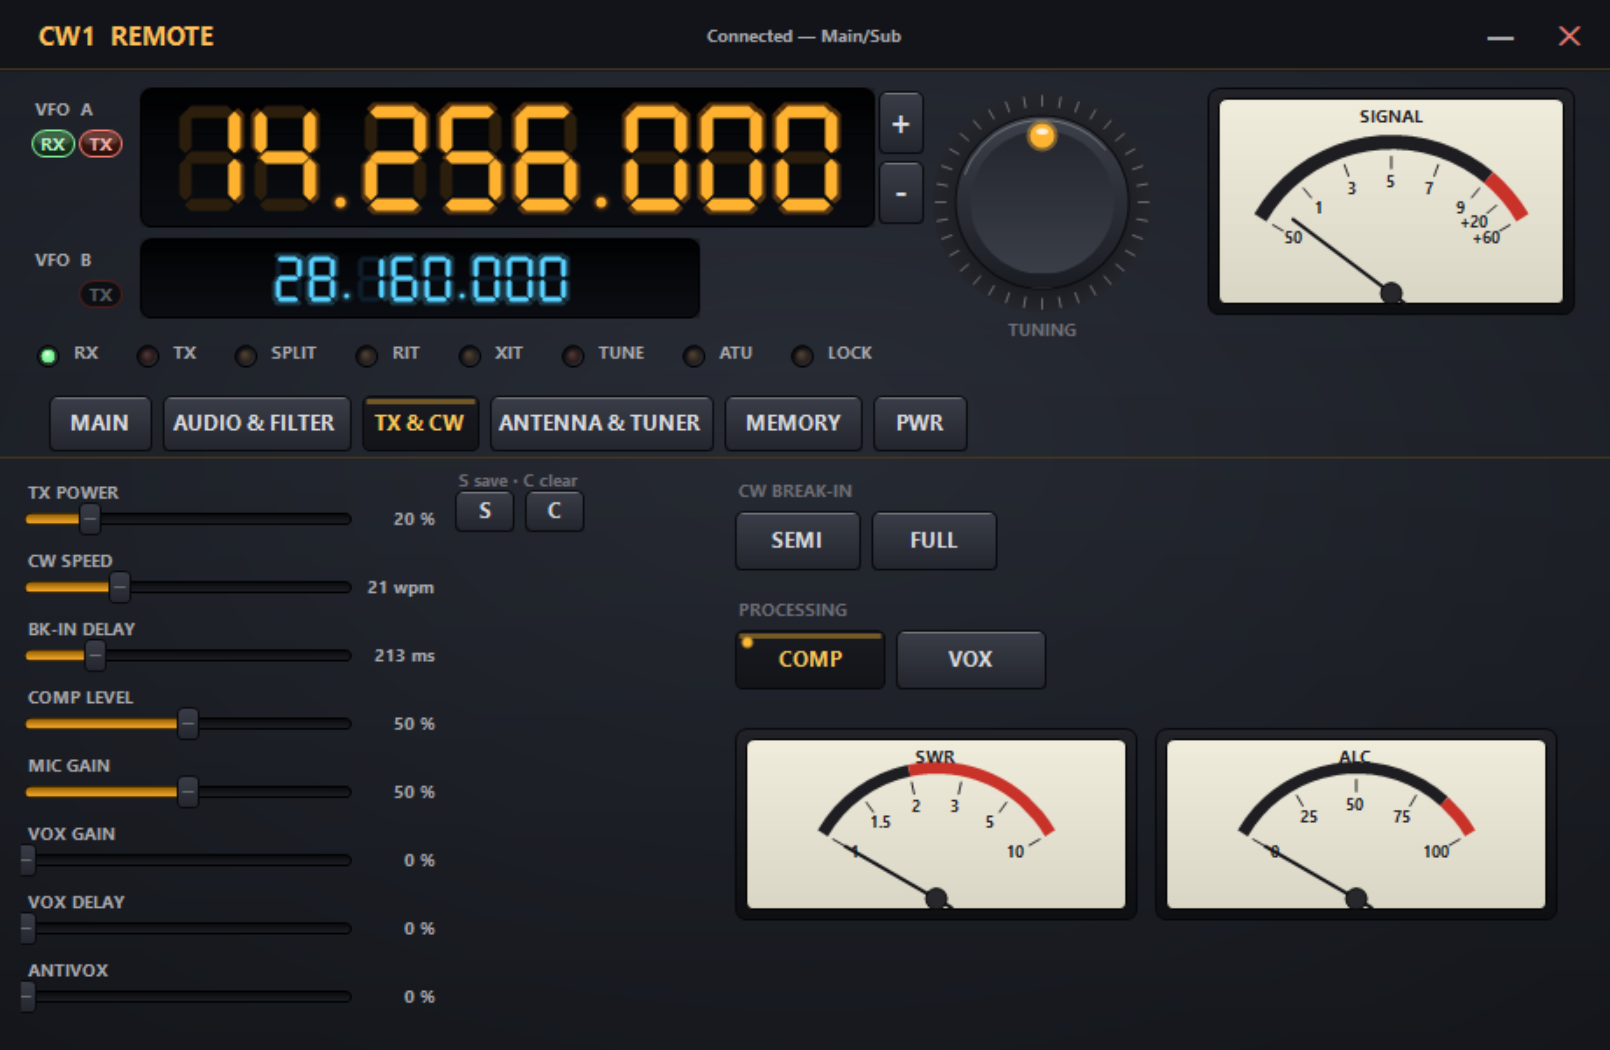
Remote Control — TX & CW tab: TX power with the S/C per-band power memory buttons, CW keying and processing controls
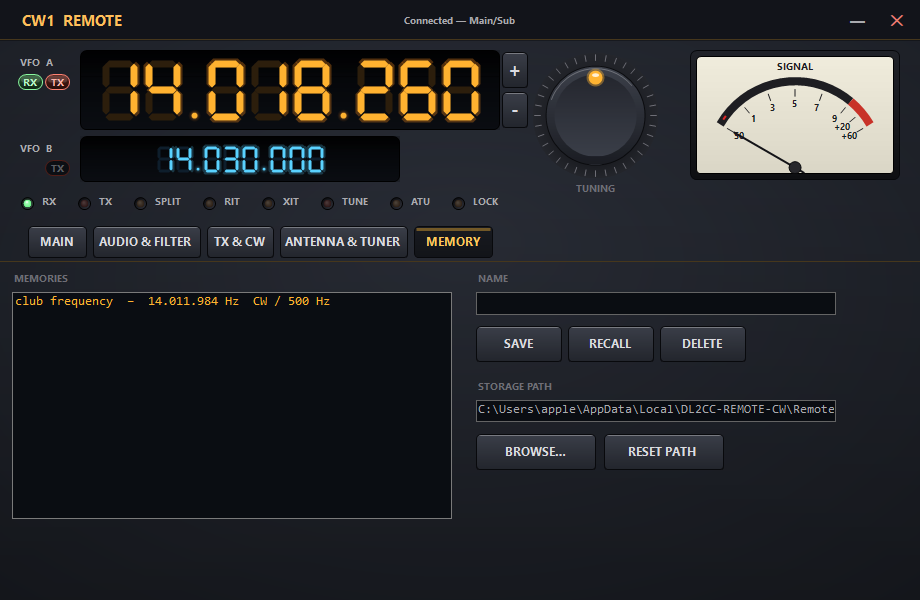
Remote Control — CW memory macros
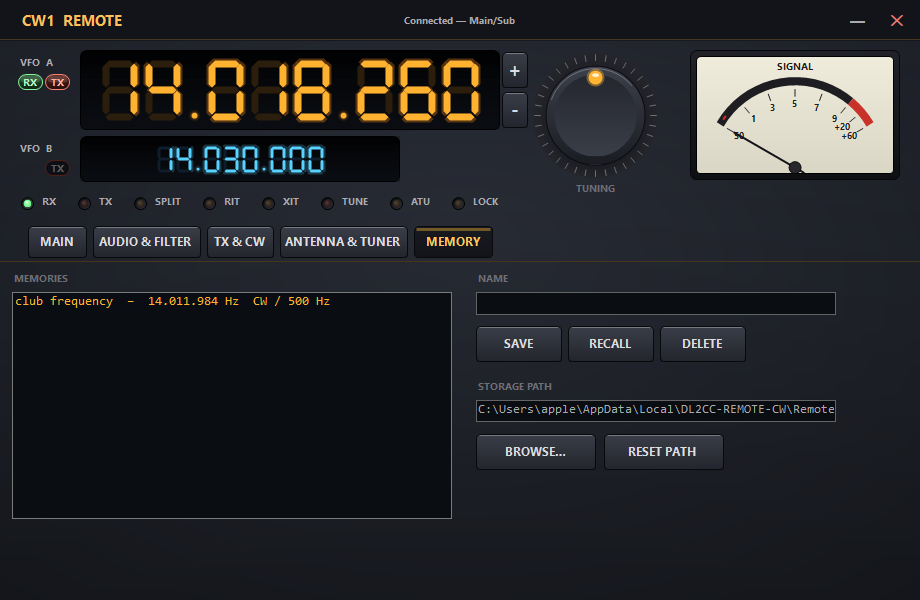
Remote Control — audio filter settings; NB DEPTH and NB WIDTH appear beside NB LEVEL on supported Icom models
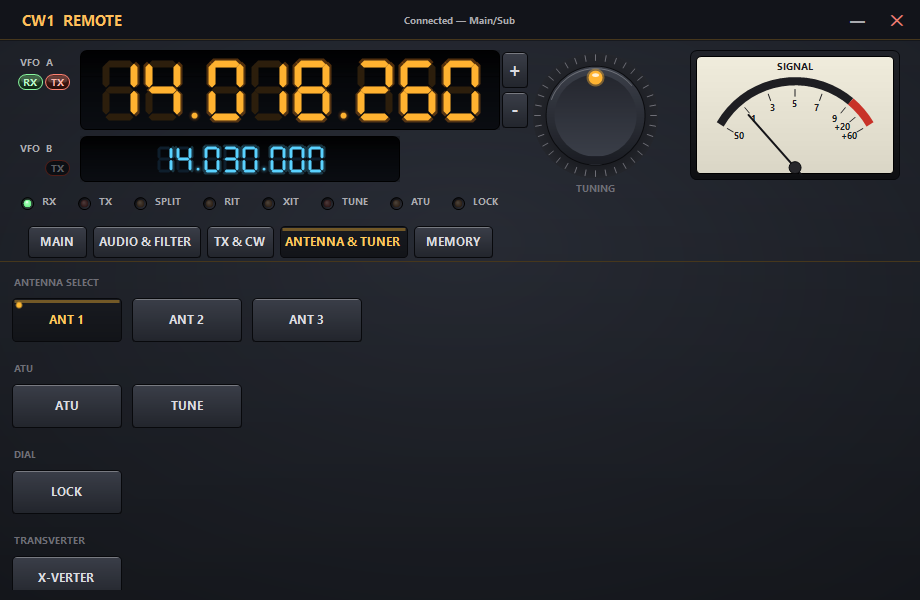
Remote Control — antenna tuner controls (with the X-VERTER transverter switch, shown on supported Icom models)
Power per Band (PWR tab)
The PWR tab lets you preset a TX power level for every band. When you move to a band, the panel applies that value to the radio automatically — full power on 40 m, but a lower value on 6 m through a delicate amplifier, for example.
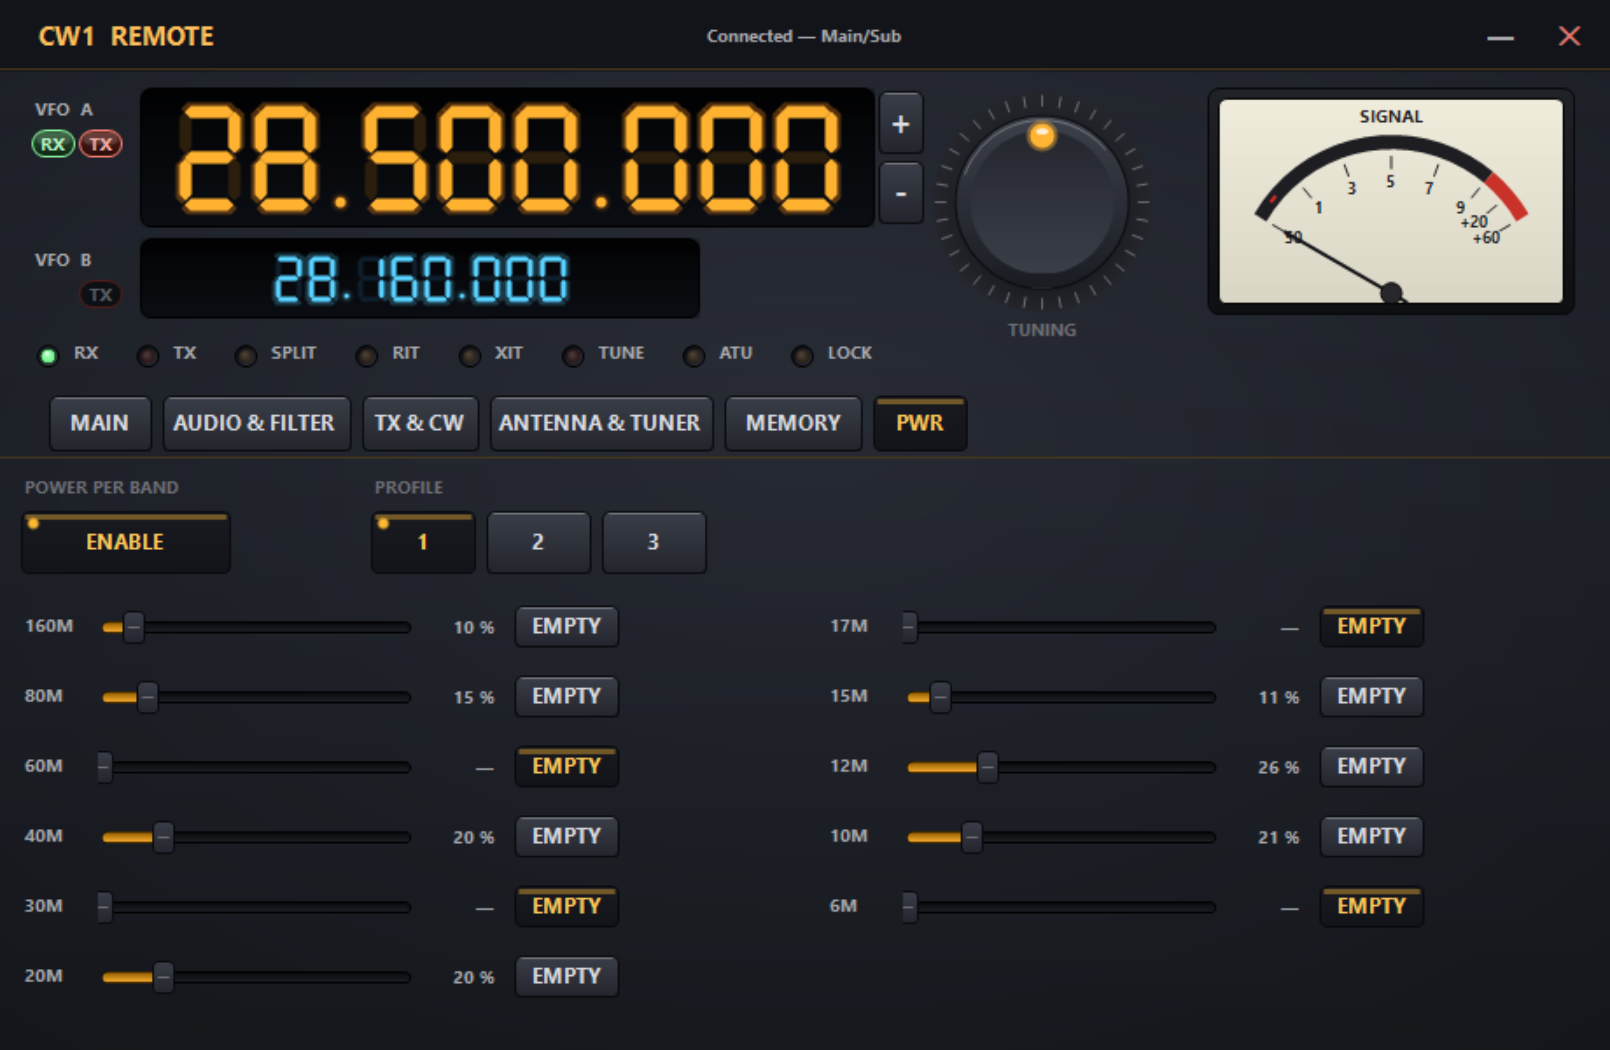
Remote Control — PWR tab: per-band TX power with three profiles
| Control | Function |
|---|---|
| ENABLE | Master switch for the feature. Off by default — the panel then never changes the radio's power on its own. When on, changing band applies that band's stored level once. |
| PROFILE 1 / 2 / 3 | Three independent sets of per-band power levels — handy for different antenna systems (a beam vs. a wire, or with and without an amplifier). Switch profile and, if the current band has a stored level in the new profile, it is applied to the radio straight away. Profiles are remembered per station. |
| Band sliders | One slider per HF band (160 m … 6 m). Drag to set the power level (0–100 %) for that band in the active profile. |
| EMPTY | Marks a band as not set — its readout shows “—”. For a band without a stored level, no power value is sent on band change; the radio's current power is left untouched. Click EMPTY again to use the slider value as that band's stored level. |
The power is sent to the radio once when you change band — by band button, by tuning across into another band, or when the rig is tuned elsewhere (for example from your logger). Bands without a stored level send no power value.
Saving from the TX & CW tab — the S and C buttons
Next to the TX POWER slider on the TX & CW tab are two small buttons, S and C (labelled “S save · C clear”):
- S — save: store the current TX power as the level for the band you are on, in the active profile.
- C — clear: remove the stored level for the current band (marks it empty).
This is the quick way to build up your per-band power levels while operating: set the power you want, press S, and it is remembered the next time you return to that band.
Spacebar PTT
While the Remote Control window is focused, press and hold Space to assert PTT — release to drop it (hold-to-talk). Enable Hold Mode to change this behaviour: each press of Space then toggles PTT on and off instead of requiring the key to be held down.
PTT Source
How the radio is keyed for audio (voice/digital) modes is now chosen once on the host, under Hardware PTT for Audio Modes — the Remote Control panel no longer has a per-panel PTT SOURCE button. The host applies the selected path automatically and keeps the radio keyed until the audio tail has drained before releasing, so transmissions are never clipped.
TRX Emulator
The TRX Emulator is a client-side Kenwood TS-2000 CAT emulator. It runs inside OpenShack and exposes a TS-2000-compatible interface on a local COM port or TCP port. Your contest logger or logging software connects to it exactly as if a real TS-2000 were plugged into that port. Frequency and mode data are fed from the host rigctld through the protected remote connection.
TRX Emulator vs. rigctld Proxy
| Aspect | rigctld Proxy | TRX Emulator |
|---|---|---|
| Protocol exposed to logger | Hamlib rigctld (text protocol) | Kenwood TS-2000 CAT |
| Client connection type | TCP only | COM port or TCP port |
| Requires rigctld on host | Yes | Yes |
| N1MM+ — no virtual COM needed | No — N1MM+ needs a COM port for Hamlib | Yes — connect via TCP directly |
| Best for | Hamlib-native apps (fldigi, WSJT-X, …) | Contest loggers that natively support TS-2000 or Kenwood |
Setting Up for N1MM+
- On the client, enable the TRX Emulator (TCP) in the Remote Station window. Note the TCP port.
- In N1MM+, open Config → Configure Ports → Radio.
- Set the radio type to Kenwood TS-2000.
- Set the address to
localhostand the port to the TRX Emulator TCP port. - N1MM+ now reads frequency and mode directly from OpenShack over TCP — no virtual COM port software required.
Setting Up for Win-Test / other loggers (COM mode)
- Enable the TRX Emulator (COM) in the
Remote Station window and select a virtual COM port from
the drop-down. With the bundled com0com setup, select the
DL2CC side of the TRX Emulator / TSEMU pair, normally
COM23.
- In your logger, configure a TS-2000 rig on the other
port, normally
COM24, at the matching baud rate.
CW Keying & PTT
When the CW/PTT service is active, OpenShack captures your keying from the local OpenShack Box on the client side and transports microsecond-precision keying-edge timestamps to the host's OpenShack Box, which keys the radio. This is not a decode-then-re-encode process — your exact timing, including every nuance of your fist, travels to the radio.
Advanced tab — minimum jitter buffer, connection routing (Force direct P2P, Relay via TLS only), and shortcuts for starting directly into Remote Station. Available on host and client.
Some networks — hotel or campus Wi-Fi, corporate guest networks, certain mobile hotspots — let the connection establish but silently block the audio and keying data that follows: the session shows connected and then drops a few seconds later, every time you retry. If that pattern matches, enable Relay via TLS only (restricted network) on the client's Advanced tab. The whole session is then carried through the relay server over TLS on port 443 — the same kind of connection a normal HTTPS website uses, which restricted networks allow. Everything keeps working; the relay adds only a small amount of latency. The option exists in client role only and cannot be combined with Force direct P2P.
Input Sources
Iambic Paddle
Connect a dual-lever (or single-lever) iambic paddle to the OpenShack Box. The Box runs its own keyer engine locally — timing is generated in the Box, not on the PC, for zero-latency keying feel.
Straight Key / Bug
Connect via the straight key input on the Box. Every edge timestamp is captured and forwarded. Your bug timing goes on air exactly as you sent it.
Footswitch PTT (SSB Mode)
Connect a footswitch to the OpenShack Box footswitch input. Pressing the footswitch asserts PTT at the remote radio — ideal for SSB operation with a PC headset and microphone. The footswitch signal is debounced in the Box firmware before forwarding.
Connection Buffer & Latency Compensation
Network delivery varies from moment to moment. OpenShack and the Box compensate for those variations so remote CW keeps the operator's original rhythm. The connection is measured automatically and the buffer adapts without interrupting active keying.
Automatic Connection Measurement
The host measures connection quality automatically and adjusts the buffer. The client displays the resulting round-trip and buffer values in the Status tab and title bar.
Adaptive Tuning
The adaptive setting smooths short-lived network variation and changes the buffer only when the connection quality genuinely requires it. Measurements are coordinated so they do not disturb active keying, and both sides show the same current status.
The Status tab Roundtrip row shows the host's live RTT statistics. If you press the Ping button yourself, the row is temporarily replaced with your own client-side roundtrip result instead.
Optimize Jitter Buffer
The Optimize Jitter Buffer dropdown on the Advanced tab lets you choose how the automatic tuning balances low latency against protection from dropouts. The buffer itself is always calculated on the host (the station with the rig and the OpenShack Box), but both sides can express a preference: the client's choice is sent to the host, and the host then uses the more protective of the two. In other words either side may ask for a bigger safety margin, but neither can force a smaller one on the other — the same idea as the Minimum Jitter Buffer below. There are three settings:
- Low-Latency — keeps the buffer as small as possible and rejects spikes most aggressively. Best for good, stable connections, or for links like Starlink where the occasional huge ping is almost always a brief glitch and you want the shortest possible keying delay.
- Balanced (default) — a sensible middle ground that suits most connections.
- Robust — keeps a more generous buffer and lets it grow faster when latency really does climb. Best for genuinely poor or highly variable connections where you would rather have a little extra delay than risk choppy CW.
Minimum Jitter Buffer
The Minimum Jitter Buffer dropdown in the CW/PTT settings section lets you set a floor that the adaptive algorithm will never go below. Values range from 20 ms to 1000 ms in 10 ms steps. The automatic measurement still runs in the background, but the computed value will always be at least as high as your minimum setting.
Both the host and client have their own independent minimum setting. If the client changes their minimum, it is sent to the host automatically. The host then uses the higher of its own minimum and the client's minimum as the effective floor — neither side can lower the other's preference.
max(RTT × factor,
              minimum floor)
. The active value is shown in the
title bar as JB:<ms>. Raise the floor if
you experience dropouts despite the adaptive algorithm. Box Diagnostics
The Status tab can retrieve detailed Box diagnostics for support. If keying quality is poor, reset the statistics, key normally for a minute, retrieve the status again, and include the result in your support request.
Require a Direct Connection
By default, OpenShack automatically selects a suitable connection path and can use professionally operated infrastructure where necessary.
The direct-only connection option on the Advanced tab restricts the session to a direct network path. Use it only on a known, reliable network or for connectivity diagnostics.
CW Keyer & Digital Voice Keyer (DVK)
The CW Keyer provides 10 programmable memory buttons (F1–F10) for sending CW macros — CQ calls, 5NN, your callsign, contest exchanges, and more. The Digital Voice Keyer (DVK) adds 10 voice message slots for SSB operation. Open it from Operate → Keyer on the dashboard.
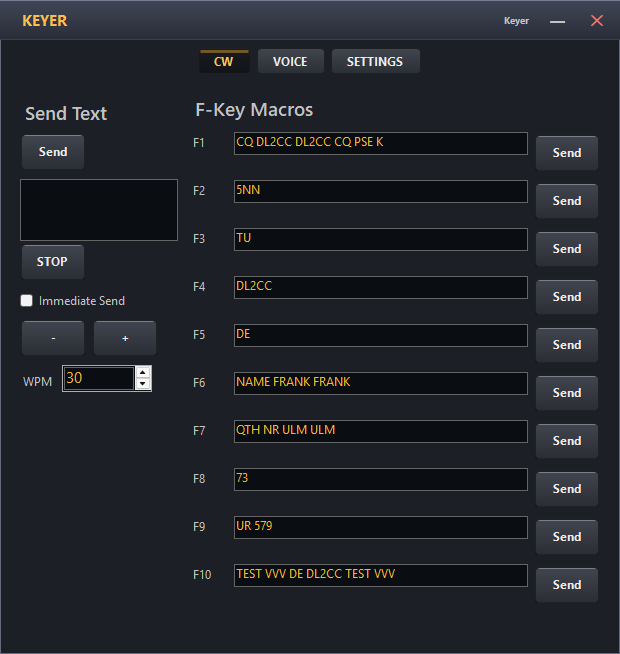
CW Keyer & DVK window — F1–F10 memory buttons and voice slot controls
CW Memory Buttons (F1–F10)
- Each button stores a free-text CW macro. Edit by clicking the label next to the button.
- Common variables are supported — use your callsign, contest serial number, etc.
- WPM and sidetone frequency are adjustable directly in the Keyer window.
- During remote operation, macros are transmitted through the active CW/PTT service over the protected remote connection to the host Box, which keys the radio.
- Locally (no remote connection), macros play through the OpenShack Box sidetone or PC audio.
Digital Voice Keyer (DVK)
- 10 audio message slots — record voice messages for CQ, 5NN, exchange, QSL, 73, etc.
- Press a slot button to play the recorded message. PTT is asserted automatically for the duration of playback.
- Erase a message — right-click a recorded slot button (F1–F10) and choose Erase to delete its recording.
- Space key = PTT — while the Voice Keyer tab is focused, hold Space to assert PTT and release to drop it (hold-to-talk). Enable Hold Mode to toggle PTT on and off with each press of Space instead of holding it down.
- During remote operation, DVK audio is routed through the remote audio service to the remote station.
- Recording length is configurable in File → Settings.
Keyboard Shortcuts from Other Windows
During remote operation, focus often sits on the Waterfall or Remote Control window rather than the Keyer. OpenShack routes the most important keyboard shortcuts automatically, so you never have to click back to the Keyer in the middle of operating:
| Key | Focused window | Action |
|---|---|---|
| F1 – F10 | Waterfall or Remote Control | Fires the matching CW macro (CW tab active in Keyer) or voice slot (Voice tab active in Keyer). No action if the Keyer window is not open. |
| Space (hold) | Waterfall | Asserts PTT while held. Routed to the Remote Control panel if it is open (respects its Hold Mode toggle), otherwise forwarded to the Keyer Voice tab PTT. |
| Space (hold) | Remote Control | Asserts PTT directly on the Remote Control panel while held, or toggles PTT on/off in Hold Mode. Primary path for SSB push-to-talk when operating from the Remote Control window. |
| Escape | Waterfall or Remote Control | Stops the current transmission immediately — cancels voice playback or sends a CW stop to the Keyer. |
PTT for the Voice Keyer
The Voice Keyer no longer has its own PTT-path toggle. Voice and digital playback key the radio through the same path chosen on the host under Hardware PTT for Audio Modes, so the keyer, live voice and the footswitch always key the radio the same way — and the keyer's tail is held until the audio has drained, so the end of each message is not clipped.
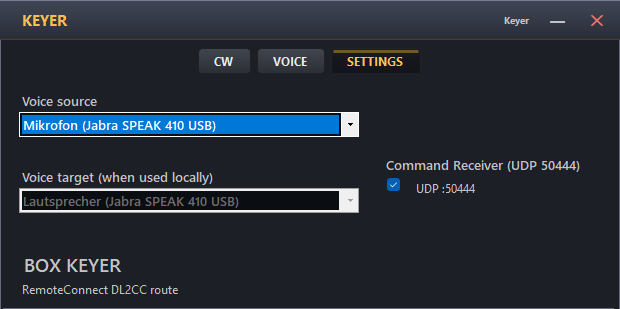
Keyer Settings — speed and Command Receiver toggle
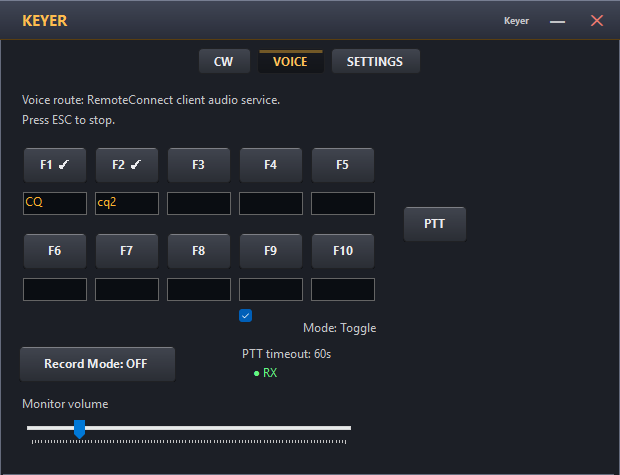
DVK Voice Slots — record and label up to 10 SSB voice messages
Command Receiver (N1MM+ Integration)
The Command Receiver lets external logging software such as N1MM+ trigger OpenShack voice messages directly from F-key macros — without touching the mouse. During a contest, your logging macros play the correct voice message at the right moment while you focus entirely on the keyboard and keyer.
openshack-commandreceiver.exe
— is called by N1MM+ whenever you press a function key. It
sends a short UDP message to OpenShack on your local PC (loopback
only, no network traffic). OpenShack receives the message and
plays the corresponding voice slot — exactly as if you had
pressed that F-key inside OpenShack yourself. Step 1 — Enable the Command Receiver in OpenShack
- Open the Keyer form in OpenShack.
- Go to the Settings tab.
- Switch the Command Receiver (UDP 50444) toggle to ON.
- The status line confirms: Command Receiver: enabled (UDP :50444).
This setting is saved automatically. OpenShack will start the listener automatically on next launch as long as the toggle remains on.
Step 2 — Copy the companion tool
The companion executable is included in the OpenShack installation folder at:
Resources\openshack-commandreceiver\openshack-commandreceiver.exe Copy openshack-commandreceiver.exe to
a permanent location that N1MM+ can reach — for example:
C:\N1MM+\openshack-commandreceiver.exeStep 3 — Configure N1MM+ function key macros
In N1MM+, open Config → Config Ports, Mode
Control, Winkey, etc. and select the Function
Keys tab, or open the Function Key Messages
editor directly. For each F-key that should trigger a voice
message, add a macro using the {RUNPROGRAM}
tag:
| N1MM+ Macro | OpenShack Action |
|---|---|
{RUNPROGRAM
                      C:\N1MM+\openshack-commandreceiver.exe VOICE
1} |
Play voice message F1 |
{RUNPROGRAM
                      C:\N1MM+\openshack-commandreceiver.exe VOICE
2} |
Play voice message F2 |
{RUNPROGRAM
                      C:\N1MM+\openshack-commandreceiver.exe VOICE
3} |
Play voice message F3 |
| … up to … | |
{RUNPROGRAM
                      C:\N1MM+\openshack-commandreceiver.exe VOICE
10} |
Play voice message F10 |
{RUNPROGRAM
C:\N1MM+\openshack-commandreceiver.exe STOP} |
Stop current playback |
A typical N1MM+ F-key entry looks like this — you can mix
the {RUNPROGRAM …} tag with normal CW message
text in the same macro:
5NN {RUNPROGRAM C:\N1MM+\openshack-commandreceiver.exe VOICE 1}Voice message slots
Record your voice messages inside OpenShack on the Voice
tab of the Keyer form. Enable Record Mode,
then press any F-key button (F1–F10) to record a message for
that slot. The same slots map directly to the VOICE 1–VOICE
10 commands sent by N1MM+.
Give each slot a short label in the Name field (e.g. CQ, 5NN, TU) so you can identify them at a glance during a contest.
PTT during voice playback
When a voice message is triggered by the Command Receiver, OpenShack follows the same PTT logic as when you press the button manually:
- If a OpenShack Box is connected, PTT is asserted via the box before playback and released when the file finishes.
- If rigctld PTT is enabled on the Settings tab, PTT goes through the rigctld channel instead.
- The configured PTT safety timeout (default 120 seconds) prevents transmitter lock-up if something goes wrong.
Troubleshooting
| Symptom | Check |
|---|---|
| Nothing happens when the macro fires | Verify the Command Receiver toggle is ON in OpenShack → Keyer → Settings. Check the OpenShack log panel for a CMD: VOICE N entry. |
| “Voice message Fn not found” | No WAV file has been recorded for that slot yet. Use Record Mode in OpenShack to record it. |
| N1MM+ shows an error running the program | Verify the path to openshack-commandreceiver.exe
is correct and the file exists. |
| Voice plays but no PTT | Ensure the OpenShack Box is connected (local or remote) or that rigctld PTT is configured in the Settings tab. |
For more detail when something doesn't work, see the Log tab further down this page — its Debug view shows the verbose internal log including every Command Receiver event.
Operate CW Without a Box
You don't need an OpenShack Box at your remote location to work CW. When the client PC has no Box, your contest logger keys the remote rig through the software Winkey Emulator, and OpenShack plays a local PC sidetone so you can hear what you are sending without waiting for the audio to travel back from the host.
Keying from your logger
Any contest logger that speaks the Winkey protocol (N1MM+, Win-Test, …) keys the remote rig through the Winkey Emulator. The emulator runs a software WinKeyer engine on the client, turns your logger's characters into precise keying edges, and sends them over the protected remote connection to the host's Box, which keys the radio. You set it up once on the Settings → Client tab — full details, including the virtual COM port, are under Winkey Emulator — no box at client.
PC sidetone for Winkey + Keyer
Without a Box there is no hardware sidetone, and the audio coming back from the host trails the link by the jitter buffer plus network latency — far too late to work with. OpenShack therefore generates a local sidetone on the client PC the instant you key, so your sending feels immediate. The same sidetone is used for the Winkey Emulator and for CW macros played from the built-in CW Keyer.
The control sits at the bottom of the Local monitor card on the client's Audio tab (shown under Local Monitor):
| Control | What it does | Default |
|---|---|---|
| PC sidetone for WinKey + Keyer | Turns the local PC sidetone on or off. Switch it off if you would rather monitor by ear from the rig audio alone, or if a Box already provides the sidetone. | On |
| Volume slider | Sidetone level, 0–100 %. Kept low by default so the tone sits comfortably under the received audio. The slider takes effect immediately, even while you are sending. | 20 % |
The switch, volume and device are saved in your client settings and restored on the next connect.
Winkey Emulator & Winkey Proxy
OpenShack provides a Winkey-compatible virtual COM port so any contest logger that speaks the Winkey protocol can key CW during a remote session. The mode — Proxy or Emulator — is chosen automatically based on whether an OpenShack Box is connected; you only need to enable the feature and pick a COM port.
COM25) and the external
side in your logger (normally COM26). Use
virtual-com-ports.txt if setup assigned different ports.Setup
- During setup, select the com0com virtual COM port option, or rerun setup and add it later.
- In OpenShack, open Operate → Remote Station and select the Client role.
- Go to the Settings → Client tab and scroll to the Winkey Proxy card.
- Select the DL2CC side of the Winkey pair (normally
COM25) from the dropdown, then tick Enable Winkey. On a new install this is already done for you — the port is pre-selected and Winkey is enabled; just confirm it. - In your logging software, set its Winkey port to the external side (normally
COM26). In N1MM+ this is under Config → Config Ports, Mode Control, Winkey, etc.
OpenShack detects whether a Box is connected and activates the appropriate mode automatically. The two modes are mutually exclusive — enabling one stops the other.
Winkey Proxy — Box connected via USB
When an OpenShack Box is connected via USB serial, OpenShack takes over that serial port to run the full DL2CC protocol at 115200 baud. Your logger can no longer use that port directly for Winkey. The Winkey Proxy solves this: it listens on the virtual COM port, translates Winkey binary to DL2CC commands, and forwards them to the Box — so your logger gets Winkey, and OpenShack keeps full control of all other Box features (sidetone, PTT, macros, remote CW transport).
COM25 in OpenShack,
set the logger's Winkey port to COM26, and enable Winkey. WiFi remains useful
when a USB cable to the client PC is impractical, but it is no longer needed for parallel
logger Winkey operation.Winkey Emulator — no box at client
When operating remotely without an OpenShack Box at the client location, the Winkey Emulator provides a software Winkey device at the same virtual COM port. Your logger connects as usual, and the emulator translates Winkey commands into remote CW keying. The host's OpenShack Box then physically keys the rig.
Status Monitoring
The Status tab in Remote Connect shows the current state:
| Status | Meaning |
|---|---|
| Stopped | Feature is disabled or the CW service is not yet connected. |
| Waiting | Virtual COM port is open; waiting for the logger to connect. |
| Active | The logger is connected and sending Winkey data. |
The status panel also shows byte counters (bytes received from the logger and responses sent back) so you can verify data is flowing in both directions.
Audio Decoder
OpenShack includes a software CW decoder that can receive audio directly from the Remote Station audio stream or from any Soundcard audio stream which exists on your PC (when opened standalone in the main menu). When the remote station connection is active, enable use remote audio in the Audio Decoder and it will automatically feed from the incoming remote audio — no additional cables or sound card routing required.
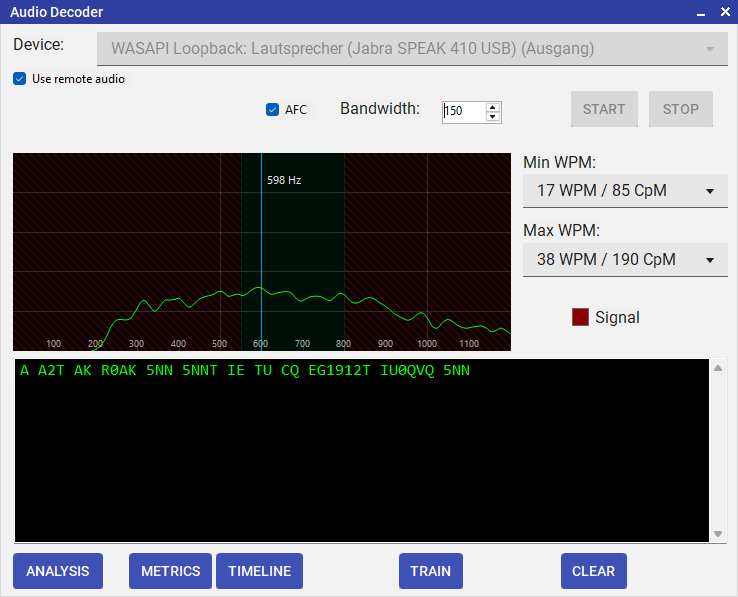
Audio Decoder — FFT spectrum display with adaptive CW signal detection
How the Decoder Works
The decoder performs a 4096-point FFT on every 10 ms audio window and analyses the spectrum around the selected centre frequency. It measures the signal-to-noise ratio (SNR) and applies hysteresis thresholds to classify each window as signal-on or signal-off, building a sequence of timing elements that are then decoded by the same engine used for hardware input.
| Control | Description |
|---|---|
| Spectrum display | Real-time FFT view up to 1200 Hz. Click anywhere on the spectrum to lock the decoder to that frequency. |
| Frequency filter | Narrow the detection window to reject QRM on adjacent frequencies. |
| WPM range | Min and max WPM filter — elements outside this range are ignored. Prevents false triggers from non-CW audio. |
| Adaptive noise floor | The baseline SNR reference adjusts automatically to the current band noise level. |
| Remote audio mode | Feeds directly from the incoming remote audio. Enable this when connected to a remote station. |
Using the Audio Decoder with SDR / WebSDR
- In Windows Sound settings, enable Stereo Mix or use the bundled VB-Audio VB-CABLE to route your SDR output to a recording device.
- In the Audio Decoder, select that device as the input source.
- The decoder picks up and decodes any CW present in the audio stream.
Waterfall Display
For compatible transceivers OpenShack can display a live spectrum waterfall directly inside the application. Four vendor families are supported today: ICOM (CI-V scope stream over USB or LAN), Kenwood TS-890S / TS-990S (KNS scope stream over LAN), FlexRadio 6000-, 8000- and Aurora AU-series (SmartSDR API over LAN — TCP control plus a VITA-49 UDP panadapter stream), and Elecraft K4 / K4D / K4HD (the radio's built-in network remote connection over LAN — new, and still being confirmed with real hardware).

Waterfall Display — live spectrum with click-to-QSY
Features
- Live spectrum display — see the band activity in real time, just like on the rig's own screen.
- Click to QSY — left-click anywhere on the waterfall to immediately tune the remote radio to that frequency via the active CAT or rigctld service.
- Right-click to set your split frequency — a right-click puts VFO B on the frequency under the cursor instead of tuning. Working split, that lets you drop your transmit frequency straight onto the gap you can hear in the pileup, without moving the VFO you are listening on. OpenShack only places the frequency — it does not switch the radio into split for you, so turn Split on in the Remote Control window when you are ready.
- Fine tuning — once you are close, turn the mouse wheel over the spectrum or the waterfall to move up and down one step at a time, or hold the left button and drag sideways to slide the band under the frequency marker. The arrow keys do the same thing from the keyboard. The Step: button in the toolbar shows the current step size (10 Hz, 50 Hz, 100 Hz, 1 kHz, 5 kHz or 10 kHz — 50 Hz to begin with); click it to cycle through the sizes, or use Ctrl+Left and Ctrl+Right.
- DX Cluster spot overlay — when the DX Cluster window is open, live spots are drawn directly on the spectrum as labeled markers. Click any marker to QSY instantly. See DX Cluster Spot Overlay below.
- ICOM scope Mode & Edge dropdowns — for ICOM rigs only, switch the scope display mode (Center / Fixed / Scroll-C / Scroll-F) and the fixed-mode edge straight from the waterfall toolbar. See Host — ICOM.
Setup
Waterfall configuration is a host-only setting. Once the host has configured the rig connection, any client that connects will automatically be able to open the waterfall window — no additional configuration required on the client side.
The Host settings page contains three waterfall cards — ICOM Waterfall, Kenwood Waterfall and FlexRadio Waterfall — and they are mutually exclusive: only one vendor can be announced at a time. Enabling one automatically disables the others.
Host — ICOM
- Connect the ICOM transceiver to the host PC via USB or Ethernet (depending on model).
- Ensure the rig's CI-V LAN or USB interface is enabled in the rig's menu.
- In the Remote Station window, open Settings → Host and scroll to the ICOM Waterfall card.
- Tick ICOM Waterfall Support, select the correct ICOM Model, and enter the rig's CI-V Address.
- The waterfall becomes available to all connected clients automatically once the session is active.
With ICOM Waterfall Support ticked, the host sends a CI-V power-on command to the radio automatically whenever it opens the CAT connection. A modern ICOM left in standby therefore switches itself on — you don't have to be at the radio or open the waterfall window. This works over the USB CI-V connection (modern ICOMs keep USB alive in standby); a radio that is fully off on its network port can't be woken this way. Sending it to a radio that is already on does no harm.
For ICOM rigs the Waterfall window has two extra dropdowns in the top toolbar, next to the frequency display. They appear only for ICOM — Kenwood and FlexRadio scopes don't have them — because they drive the radio's own CI-V scope:
- Mode — switch the scope between Center, Fixed, Scroll-C and Scroll-F. The dropdown always shows the scope's current mode, so you can put it back into the mode you want — particularly handy on a remote rig where you can't reach the radio's own screen.
- Edge — pick which of the radio's stored fixed edges (Edge 1–4, fewer on some models) the scope shows. It is active only in Fixed and Scroll-F mode (greyed out otherwise) and simply points the radio at one of its saved edges — it does not change the edge frequencies themselves.
Both dropdowns work the same whether you are at the host or operating remotely.
Host — Kenwood TS-890S / TS-990S
The Kenwood adapter uses the KNS (Kenwood Network Service) interface built into the radio. KNS carries both rig control and the scope stream over a single TCP connection, so no extra serial cabling is needed for the waterfall itself.
- On the radio, enable KNS and create an admin-level KNS account (the radio's menu calls these User Profiles). Note the account name and password.
- Make sure the radio is reachable on your LAN — the host
PC must be able to open a TCP connection to the radio.
Default KNS port is
60000. - In the Remote Station window, open Settings → Host and scroll to the Kenwood Waterfall card.
- Tick Kenwood Waterfall Support, select the Model (TS-890S or TS-990S), and enter the radio's IP address, the KNS port, and the account / password you configured on the radio.
- The host runs the KNS session as a background service. It starts as soon as you click Connect and is torn down cleanly on disconnect or when you change any of the Kenwood waterfall settings.
Host — FlexRadio (6000-, 8000- and Aurora AU-series)
The FlexRadio adapter uses the SmartSDR API built into the radio. SmartSDR is a multi-client network protocol — DTM connects directly to the radio on the LAN and creates its own panadapter, so it coexists peacefully with the SmartSDR client (or any other SmartSDR-aware software) running at the same time.
- Make sure the Flex is reachable on your LAN — the host PC must
be able to open a TCP connection to the radio. Default SmartSDR
port is
4992. - The radio's SmartSDR API does not require login on the LAN, so there are no credentials to enter.
- In the Remote Station window, open Settings → Host and scroll to the FlexRadio Waterfall card.
- Tick FlexRadio Waterfall Support, select the Model (any FLEX-6xxx, FLEX-8xxx, or Aurora AU-series — they all share the same SmartSDR API, so the dropdown is for display only), enter the radio's Host IP and the Port (default 4992).
- The host runs the SmartSDR session as a background service. It starts as soon as you click Connect and is torn down cleanly on disconnect — the panadapter is removed from the radio so no slot is left dangling.
Host — Elecraft K4 (K4, K4D, K4HD)
The K4 adapter uses the radio's built-in network remote connection — the same one the K4's own remote software uses. OpenShack connects to the radio on the LAN, logs in with the K4's remote password and receives the panadapter as the radio streams it; the pan width is whatever is set on the radio.
- On the K4, enable remote connections and set a remote
password. Make sure the host PC can reach the radio on your LAN
(or through a VPN). The default remote port is
9205. - In the Remote Station window, open Settings → Host and scroll to the Elecraft K4 Waterfall card.
- Tick Elecraft K4 Waterfall Support, select the Model (K4, K4D or K4HD — they all share the same remote protocol, so the dropdown is for display only), enter the radio's Host IP, the Port (default 9205) and the Password.
- The host runs the K4 session as a background service. It starts as soon as you click Connect and is closed cleanly on disconnect.
Client
No setup needed. Connect to the host as normal and open Operate → Waterfall from the Remote Station window. The waterfall stream is provided automatically by the host, regardless of which vendor adapter the host is running.
OpenShack needs two CI-V paths into an ICOM radio to run everything at once:
- Bind one port to OpenShack's rigctld service — that's what Remote Control, the rigctld proxy, the TRX Emulator, and any external logger talking through rigctld will use.
- Use the other port for direct CAT — this is the channel OpenShack needs to drive the waterfall, including the spectrum stream itself.
Two programs can never share one serial port, so if both services point at the same COM port the waterfall simply cannot start while rigctld is running. Settings → Host shows an amber note next to the CAT COM port when that is the case.
IC-7610, IC-9700, IC-7760, IC-705: these radios expose two USB serial ports (on the IC-705 the second one is "Serial Port B" — set its function to CI-V in the radio menu). Use one for rigctld and the other for direct CAT — done.
IC-7300 — one USB serial port: the IC-7300's USB connection provides a single COM port. Its second CI-V path is the 3.5 mm REMOTE jack on the back, which needs an inexpensive USB CI-V interface cable (FTDI-based "CT-17 replacement" cables with a 3.5 mm plug). The spectrum stream is far too heavy for the REMOTE jack's 19200 baud, so the ports go this way round:
- USB port → direct CAT (the waterfall path) at 115200 baud.
- REMOTE jack via the CI-V cable → rigctld at 19200 baud.
Radio menu, MENU › SET › Connectors › CI-V: CI-V USB Port = Unlink from [REMOTE] (the important one — linked, both paths share one bus capped at 19200), CI-V USB Baud Rate = 115200, CI-V Baud Rate = 19200 (that is the REMOTE jack), CI-V Transceive = ON, and leave CI-V Output (for ANT) off. The USB audio codec is not affected — your audio stays on the USB cable as before.
DX Cluster Spot Overlay
When the DX Cluster window is open and receiving spots, those spots are drawn as live markers directly on the spectrum. Each marker shows the callsign and a colored frequency tick at the exact spot frequency. No setup is required — the overlay activates automatically whenever both windows are open at the same time.
- Show all vs. filtered — the Spots button in the waterfall toolbar switches the overlay between two modes. Spots: All draws every spot received from the cluster, independent of the column, band, mode, and age filters set in the DX Cluster window. Spots: Filtered mirrors the DX Cluster list, so only spots passing those filters appear. Switching the button refills the overlay immediately — backfilling the extra spots or dropping them — and your choice is remembered between sessions.
- Click to QSY — left-click anywhere on a spot's label — first letter to last — and the radio tunes straight to that spot's exact frequency, via the active CAT or rigctld service. Clicking open spectrum away from any label still tunes to the point under the cursor. Right-clicking a label sets your split (VFO B) to that spot's frequency instead of tuning to it.
- Cursor change — as the mouse pointer enters a spot label, the crosshair cursor changes to a hand pointer to indicate a clickable target.
- Hover tooltip — hovering over a label shows a tooltip with the full spot detail: callsign, frequency, date & time, spotter, and comment.
- Last seen (age expiry) — the Seen: button next to Spots sets how old a spot may be before it is removed from the overlay. Click it to cycle through Off, 5, 15, 30, and 60 minutes. This is the waterfall's own age limit and applies in both Spots: All and Spots: Filtered modes, independent of the Max Age set in the DX Cluster window; your choice is remembered between sessions. With Seen: Off the waterfall applies no age limit of its own — in Spots: Filtered mode the cluster still pre-filters spots, so the overlay never shows more than the DX Cluster list, while in Spots: All mode the overlay keeps every received spot.
- Band deduplication — if the same callsign is re-spotted on the same band, the earlier spot is replaced by the new one. Spots for the same callsign on different bands coexist independently.
- Staggered labels — labels that would overlap on adjacent frequencies are placed in offset tiers so no callsign obscures another.
- Edge clamping — when a spot falls near the left or right edge of the display, the callsign label is shifted inward so it remains fully readable, while the frequency tick stays at its exact spectral position.
DX Cluster
OpenShack includes a built-in DX Cluster client. During remote operation, open it from Operate → DX Cluster alongside the Remote Station window. Both windows can be open simultaneously with no interference.
Spots can reach you two ways: from a normal Telnet cluster node, or from the OpenShack Server — our own spot service, which still works when your network blocks the cluster Telnet ports. See OpenShack Server below.

DX Cluster window — live spots with click-to-QSY to the remote radio
Connecting to a Cluster
- Open Operate → DX Cluster from the dashboard.
- On first use, open the Settings tab and enter your callsign. If you skip this step and click Connect without a callsign, OpenShack will take you there automatically. The OpenShack Server needs no callsign, so you can skip this step entirely if you use it.
- Select a server from the drop-down list at the top of the window. OpenShack comes with a built-in list: the OpenShack Server and the well-known cluster nodes DB0BCC, OH8X, GB7DXC, K0XM, VE7CC and VK2IO.
- Click Connect. On a Telnet node OpenShack logs in automatically using your callsign.
- DX spots should appear soon. The OpenShack Server sends the spots of the last couple of hours right away, so the list is full the moment you connect.
While a connection is being set up the button reads Cancel — click it if a node is not answering and you would rather not wait. The status line only says Connected once the node has really accepted you; if something goes wrong it tells you what, for example that a port is blocked or that a node did not accept your callsign.
OpenShack Server
Many networks — company LANs, hotel and campus Wi-Fi, mobile hotspots — block the ports the DX Cluster nodes use. If Connect keeps timing out on every node in the list, that is almost certainly what is happening.
Pick OpenShack Server from the drop-down instead. It carries the same worldwide spots, but reaches you over an ordinary secure web connection, which those networks leave alone. It is also what the browser remote at remote.openshack.com uses, so you see exactly the same spots in both. No callsign and no login are needed.
One thing it does not do: it is receive only. You cannot send your own DX spots through it and there is no cluster command line, so the command box at the bottom of the window is switched off while it is selected. Everything else — the spot list, all filters, sorting and click-to-QSY — works exactly as it does on a Telnet node. To announce your own spots, connect to a Telnet cluster node instead.
Filtering Spots
Filters are available in both the Spots tab (quick, live) and the Settings tab (persistent).
Spots tab — live filters
- Band filter — when checked, only spots on the same amateur band as the current rig VFO are shown (e.g. with the rig on 14.025 MHz, only 20 m spots remain visible; 40 m or 15 m spots are hidden). The current rig frequency is displayed in the label next to the checkboxes. When the rig frequency is unknown (no rig connected), the filter has no effect.
- Mode range filter — tightens the band filter to the specific sub-range (CW, Digital, or SSB window) the rig is currently tuned to, based on the IARU Region 1 band plan. With the rig on 14.025 MHz (CW window), SSB spots at 14.250 MHz are hidden even though both are on 20 m. Can be combined with the Band filter or used on its own.
- Column filter input fields — the four
text boxes directly above the spot list (Filter
Freq, Filter DX Call, Filter
Spotter, Filter Comment) act on the
column below them. Each one is a case-insensitive
substring match by default — typing
EAin the DX Call box keeps every spot whose call containsEA(so EA1ABC, K1EA, and W3EAX all stay visible). Wildcards*(any characters) and?(single character) are supported and switch the field to glob matching against the whole value:EA*matches only calls starting with EA;??1*matches any two-character prefix followed by a 1. The four boxes are AND-combined — a spot must pass every non-empty field. Clearing a box (or clearing all of them) restores the unfiltered list. Changes apply with a short ~300 ms debounce. These fields are not persisted across restarts.
Sorting the spot list
Click any column header (Freq, DX Call, Spotter, Comment, Time) to sort the list by that column. Click the same header again to toggle between ascending and descending order. The QSY column is not sortable. The chosen column and direction are saved automatically and restored the next time you open the DX Cluster window — so if you prefer the list sorted by frequency, you only need to set it once.
Settings tab — persistent filters
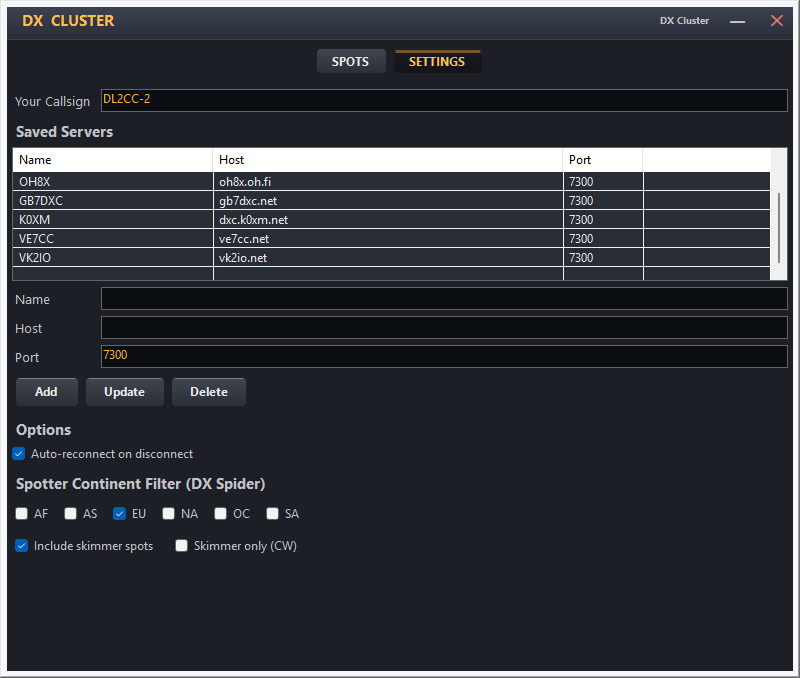
DX Cluster — Settings tab with continent and skimmer filters
The Settings tab also lets you manage the server list. To add your own cluster server, fill in the Name, Host, and Port fields and click Add. Your server then appears in the list and in the drop-down on the Spots tab. The built-in servers cannot be deleted — only servers you add yourself can be removed. The OpenShack Server entry has a fixed address, so its Host and Port fields cannot be changed.
- Spotter continent — select one or more continents (AF, AS, EU, NA, OC, SA) to see only spots from spotters there. Leaving all boxes unchecked restores all continents. On a Telnet node the cluster does the filtering for you and the setting is applied after each login; on the OpenShack Server it takes effect immediately, and unticking a continent brings its spots straight back without reconnecting.
- Include skimmer spots — asks the cluster node to include RBN/Skimmer spots in the stream. Not available on the OpenShack Server, which always delivers what the service carries; use Skimmer only or the spotter filter there instead.
- Skimmer only — pre-fills the spotter
filter field with
-#so that only skimmer-sourced callsigns (those ending in-#) are displayed. This also enables skimmer spots automatically. - Max age — spots older than the chosen number of minutes are hidden. The age check runs every ~15 s, so expired spots are pruned in the background as well as on every new spot.
%LOCALAPPDATA%\OpenShack\Cluster\BandPlan.jsonOpenShack writes the built-in IARU Region 1 plan on first run. You can edit the file with any text editor to add your own sub-ranges or adjust existing ones. Each entry has four fields:
{
  "lowKHz":  14000,
  "highKHz": 14070,
  "bandName": "20m",
  "mode":    "CW"
}Click to QSY
Clicking any spot in the DX Cluster list sends a QSY command to the remote radio through whichever rig control service is currently active (CAT or rigctld proxy). The radio tunes to the spotted frequency instantly, without touching a dial.
Antenna Rotator Control
When the host has a rotator controller running PSTROTATORAZ, the client can see the live antenna heading on a compass rose and steer the antenna by clicking the desired bearing — all over the existing protected remote connection, with no extra network configuration required. The host can offer up to four rotators, each with its own name; they open from the Aux Devices button.
OpenShack does not talk to your rotor hardware directly. Instead it interfaces with PSTROTATORAZ on the host over local UDP, and PSTROTATORAZ does the actual driving. That single design choice means OpenShack supports every rotator and rotator-controller PSTROTATORAZ supports — which, in practice, is everything on the market.
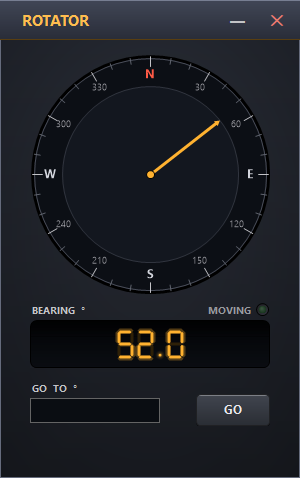
Rotator Control window — live compass rose with click-to-steer
Host Setup
- Start PSTROTATORAZ on the host machine and configure it for your rotator hardware.
- In PSTROTATORAZ, open Communication → UDP
Control Setup and configure it:
- Set IP to
127.0.0.1. - Leave the port at the default
12000. - Tick Automatically positions reporting when the rotor is moving, so PSTROTATORAZ pushes azimuth updates to OpenShack while the antenna turns.
- Set IP to
- Then tick Setup → UDP Control to actually switch the UDP interface on. The setup dialog above only configures the parameters — this menu item is the on/off toggle. Without it, PSTROTATORAZ stays silent on the network and OpenShack can neither send steer commands nor read the azimuth.
- In Remote Connect → Settings → Host, scroll to the Rotators section and tick a Rotator 1–4 row to turn it on.
- Set the IP address and UDP
port to match the values configured in
PSTROTATORAZ (default:
127.0.0.1 : 12000). OpenShack sends commands to this port and listens for azimuth updates onport + 1(e.g. 12001). Optionally type a Name — the client shows it as Rotator: <name>. - Have more than one rotator? Run a separate PSTROTATORAZ instance per rotator on its own UDP port, then fill in a second, third or fourth row the same way. Each rotator needs a different port.
Park Position
A remote station is usually left alone for days at a time, and a beam parked broadside to the wind is the one that comes down first. Type a bearing in degrees into the Park ° field of a rotator row and the station turns that antenna there by itself when it goes down. Leave the field empty — the default — and the rotator is never moved on its own.
A park bearing is sent in these situations:
- You shut the station down from the client. The park command goes out the moment the shutdown is scheduled, not when the countdown runs out, so the antennas have the whole abort window to turn.
- The inactivity shutdown fires. Same thing, triggered by the station itself instead of by you.
- Nobody has been connected for a while — only if you tick Park antennas after no client for … minutes under the four rotator rows. The station stays on; just the antennas go to their rest position.
A short connection dropout never parks anything: the antennas would swing away just as you reconnect in the middle of a QSO. That is why the idle park is off by default and its timeout is generous — set it to the kind of gap that really means you have finished for the day.
Client Usage
- Once connected to the host, open a rotator from the Aux Devices button — rotators now appear there alongside your amplifiers, tuners and switches (there is no separate Rotator button). If more than one device is available, a small menu lists them; pick the one titled Rotator: <name>.
- The compass needle updates in real time as the antenna turns. PSTROTATORAZ pushes azimuth readings continuously during rotation; when the antenna is stationary the display is refreshed every 5 seconds from a keep-alive poll.
- To steer, click anywhere on the compass rose or type a bearing and press GO. The bearing is sent to the host, which forwards it to PSTROTATORAZ as a steer command.
Connection Flow
Aux Devices — Amplifier & Tuner Control
OpenShack can monitor and control external amplifiers and tuners
connected to the host station via serial port or network.
Live status (power, SWR, band, temperature, faults) is
pushed to the client in real time, and the client can send
commands (Operate, Standby, Tune, Antenna select) back to
the host.
As OpenShack can handled different devices, the user interface
might look simple for individual devices, but functional.
And that's what we need.
Your device is not supported?
Let the author know, make a post to request the feature in
our discourse forum. Include links to documents, ideally
there already is a programmers reference documentation for
the device that you seek to be implemented.
We can't promise it will be implemented, that really depends
on how easy it is and whether there are more people out
there wanting the same thing.
Supported devices
| Device | Type | Protocol | Status |
|---|---|---|---|
| SPE Expert (1K-FA, 1.3K-FA, 2K-FA) | Amplifier + built-in Tuner | Binary (SYN 0xAA framing, 115 200 baud) | ✅ Supported |
| Elecraft KPA500 | Amplifier | ASCII serial |
✅ Supported |
| Elecraft KAT500 | Tuner | ASCII serial |
✅ Supported |
| Elecraft KPA1500 | Amplifier + built-in Tuner | ASCII serial (^CMD; framing, 38 400 baud) | ✅ Supported |
| RF Concepts / Alpha RF-2Ks | Amplifier + built-in Tuner |
Network HTTP |
✅ Supported |
| Juma PA600/PA1000 | Amplifier | Binary serial |
✅ Supported |
| OM Power (OM2000A+, OM1700A+, OM2501A, OM3501A, OM4001A, OM4001C) | Amplifier (up to 4 at once) | Network (built-in LAN port) | ✅ Supported |
| DU4000AL | Standalone antenna tuner | Network (TCP) | ✅ Supported |
| Ultrabeam Antennas |
Antenna |
Binary serial | ✅ Supported |
| SteppIR SDA 100 / SDA 2000 |
Antenna controller |
ASCII serial (Reference Protocol, default 9600 baud) | ✅ Supported |
| URL Switcher
(hamparts.shop / qro.cz remote relays) |
Switch / Relay |
HTTP GET (JSON
{"Status":"OK"} response) |
✅ Supported |
| Shutdown Host PC |
Remote power-off (no hardware) |
Windows shutdown, with abort window | ✅ Supported |
Host Setup
- Open Remote Station settings on the host.
- Scroll to the Aux Devices section (tab 3).
- Tick Enable for the amplifier and/or tuner slot you want to use.
- Select the device type from the dropdown.
- Choose the COM port and verify the baud rate (auto-filled for known devices).
- Click Connect. OpenShack opens the serial port and starts polling the device at ~1 Hz.
Host settings — Aux Devices serial port configuration
While OpenShack is using a device's serial port on the host, that device's own program (for example the Ultrabeam or SPE Expert software) cannot open the same port at the same time. So that you don't lose access to it, the host now shows the same Aux Devices windows locally. They open automatically as soon as the device has been read — the same way they do on the remote client — so you do not need a client connected. A window you close yourself stays closed — and it stays closed the next time you start up too, not just for the current session. Use the Aux Devices button on the host's Remote Station window to reopen it (or to bring an open window to the front); once you reopen it, it goes back to opening automatically. Each window's position and size are remembered, per screen layout.
Client Display
Once connected, the client automatically receives live device status. The Aux Devices window shows the appropriate tab for the detected device combination.
You don't have to open this window yourself: as soon as the station announces an aux device, the Aux Devices window opens on its own. If the station offers several devices, each one gets its own window. Don't need one? Just close it — it stays closed from then on, including the next time you connect, so it won't keep popping back up. To bring a closed window back, click the Aux Devices button in the Remote Station window's button row (next to Remote Control, Keyer and DX Cluster); when the station offers more than one device, a short menu lets you pick which one to open. Once you reopen a window this way, it goes back to opening automatically again. Each window's position and size are remembered, per screen layout, so they come back where you left them.
Only the relevant tab is shown — unused tabs are hidden automatically. The active operating state is highlighted on the Operate/Standby buttons: the currently active mode appears with a filled (blue) button while the other is outlined (light).
The following screenshots are examples of two specific integrations to give you an idea of what the Aux Devices window looks like for different device types. The actual layout adapts automatically to the connected device.
Automatic power on and off
Some devices are switched on and off together with the host's Remote Station window. This happens on the host when the window opens and closes — a client connecting or disconnecting never switches anything. The device must be reachable over its serial port or network link, so its own mains switch has to be on. If you change a device's settings on the host, the link is re-established and the device briefly goes off and on again.
| Device | Window opens | Window closes |
|---|---|---|
| SPE Expert | switched on | switched off |
| Elecraft KPA500 | switched on | switched off |
| Elecraft KPA1500 | switched on | switched off |
| Elecraft KAT500 | woken up only, not switched on | switched off (standby) |
| OM Power | not switched on — use the Power button on the panel (the tubes need to heat up first) | cool-down started; the amplifier finishes it and switches itself off |
| DU4000AL tuner | switched on | switched off |
| JUMA PA600/PA1000, RF2K-S | no remote power switching in these devices' protocols | |
To switch on gear that has no remote power command — the radio, a JUMA or RF2K-S amplifier, a power supply — use a network relay with the URL Switcher: rows with On / Off ticked are called when the Remote Station window opens and closes.
Example: SPE Expert — Amplifier & Tuner
This screenshot shows the integration of an SPE Expert amplifier with built-in tuner. The upper amplifier card displays power output, SWR, band, heatsink temperature, power level (L/M/H), and the current RX/TX state together with the active input channel. The Operate, Standby, Input (toggles between input 1 and 2) and Power buttons are available directly. The lower tuner card shows the tuner SWR, active antenna, bypass and tuning state, and provides Tune and Ant Next buttons.
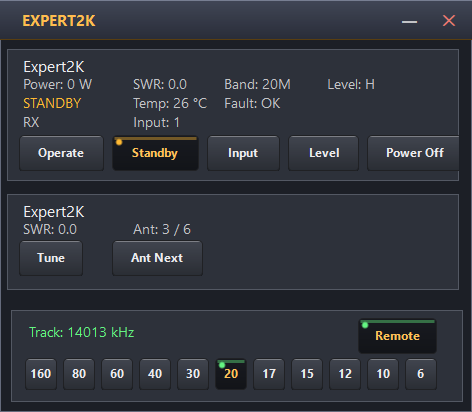
Example: SPE Expert — amplifier card with RX/TX indicator, input channel, and power level; tuner card below
DU4000AL — Standalone Antenna Tuner
The DU4000AL connects directly to the host over TCP. Its panel reports power, frequency readback, SWR and power readings, temperature, CAT mode, fan mode, active antenna and match state. Power On/Off and CAT Active/Passive are available from the panel.
For the tuner's built-in antenna ports, choose Tuned 1–4 to route a port through the matching network, Dummy for the dummy load, or Direct 1–4 for the corresponding untuned path. The highlighted button follows tuner readback; OpenShack does not assume a switch succeeded before the tuner confirms it.
The protocol does not provide an absolute frequency-set command. The displayed frequency is read from the tuner, which normally gets it from the configured radio CAT connection.
Ultrabeam — RCU-06 Antenna Controller
OpenShack talks to the Ultrabeam RCU-06 controller over its native binary protocol (STX/ETX framing with DLE escaping and an XOR-plus-one checksum). The host opens the controller's serial port and continuously polls the device at about 1 Hz for frequency, band, orientation, motor state and progress; the client UI mirrors that state live and can send frequency, orientation and retract commands back to the controller.
- Connect the RCU-06 to the host PC via its USB / serial port. The controller's USB interface presents itself as a standard COM port — no extra driver beyond the manufacturer's USB-serial driver is needed.
- In the Remote Station window, open Settings → Host and scroll to the Aux Devices section.
- Tick the Ultrabeam checkbox and pick the COM port the controller is connected to. The baud rate is fixed at 19200, 8N1, no hardware handshaking — OpenShack sets this automatically and explicitly disables DTR and RTS, as required by the controller.
- Click Connect. The host immediately starts polling and reports the supported bands to the client. If the controller is powered off or sleeping, OpenShack still announces the device so the client can show the Ultrabeam tab — status fields stay empty until the controller answers.
Supported bands on the client band panel (fixed by the RCU-06 firmware):
| Bands | Orientations | Retract |
|---|---|---|
| 40, 30, 20, 17, 15, 12, 10, 6 | Normal / 180° / Bidirectional | Dedicated command (parks elements at home) |
The client side reuses the standard antenna-controller panel: a status card with current frequency, band, orientation and motor state (including a live progress indicator while the elements are moving), a row of direction buttons (Normal, 180°, Bidirectional, Retract), and the shared band panel for direct frequency steering. Unlike SteppIR, Retract on the Ultrabeam is a dedicated controller command — it parks all elements at the home position without the host having to send a fake frequency of 0.
When motors are moving, the host additionally polls the controller's progress endpoint and forwards the current and total motor travel to the client, so the UI can show how far the tuning has progressed. As soon as the motors stop, the progress indicator disappears.
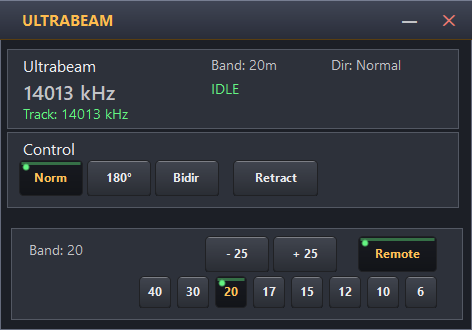
Ultrabeam — live orientation and motor status with frequency steering band panel
SteppIR — SDA 100 / SDA 2000 Antenna Controller
OpenShack talks to the SteppIR SDA 100 and SDA 2000 controllers over their published Reference Protocol (the same wire format used by N1MM, DXLab Commander, HRD and similar rig-control software). The host opens the COM port that is connected to the controller and forwards element-tune and orientation commands; the client UI looks and feels exactly like the Ultrabeam panel.
- Connect the SteppIR controller to the host PC via its serial port (USB-to-serial works fine). Default baud rate is 9600; 1200 / 2400 / 4800 / 19200 are also supported if you have changed it on the controller.
- In the Remote Station window, open Settings → Host and scroll to the Aux Devices section.
- Tick the SteppIR checkbox, pick the COM port the controller is connected to, and choose the matching antenna model from the dropdown next to it.
- Click Connect. The supported bands reported to the client are derived automatically from the selected model.
Supported models and the bands they enable on the client band panel:
| Model | Supported bands | Orientation |
|---|---|---|
| BigIR | 80, 40, 30, 20, 17, 15, 12, 10, 6 | Normal only (vertical) |
| SmallIR | 40, 30, 20, 17, 15, 12, 10, 6 | Normal only (vertical) |
| DB18 | 20, 17, 15, 12, 10, 6 | Normal / 180° / Bidirectional |
| DB36 | 30, 20, 17, 15, 12, 10, 6 | Normal / 180° / Bidirectional |
| MonstIR | 40, 30, 20, 17, 15, 12, 10, 6 | Normal / 180° / Bidirectional |
| UrbanBeam | 20, 17, 15, 12, 10, 6 | Normal / 180° / Bidirectional |
| Yagi 3-El / Yagi 4-El | 40, 30, 20, 17, 15, 12, 10, 6 | Normal / 180° / Bidirectional |
The client side reuses the existing antenna-controller panel: a status card with current frequency, band and motor state, a row of direction buttons (Normal, 180°, Bidirectional, Retract; vertical models show only Normal and Retract), and the shared band panel for direct frequency steering. Retract parks the elements at the home position; under the hood OpenShack simply sets the target frequency to 0, since the SteppIR protocol has no dedicated retract command.
URL Switcher — Generic HTTP Relays
The URL Switcher is a generic adapter for HTTP-controlled
switches and relays such as the remote relay boxes sold by
hamparts.shop
(qro.cz). Each button on the client sends a GET request to a
URL you configure on the host. The device's JSON response
({"Status":"OK"}) is relayed back to the client
and shown as a brief status line that fades after a few
seconds.
- In the Remote Station window, open Settings → Host and scroll to the URL Switcher card at the bottom of the host settings tab. Tick the URL Switcher checkbox to enable the adapter.
- Optionally change the device Name
(e.g.
QRO Switch) — it appears in the client window title. - For each of the ten rows, enter a short Label (shown on the client button) and the full URL the host should call.
- Use the three checkboxes on each row to control what the
row does:
- Show — when ticked (the default), the row appears as a button on the client (as long as it has a Label). Untick it to hide the row from the client while still using it for automatic on/off switching below.
- On — the URL is called once, automatically, when you open the Remote Station window. Use this to switch equipment on when you sit down to operate.
- Off — the URL is called once, automatically, when you close the Remote Station window (or exit the app). Use this to switch equipment off when you are done.
- For most relays a plain web address in the URL field is all you need. If your relay expects a POST request with a small piece of text (for example the Shelly Cloud service — see the example below), click the small … button at the end of the row. A little window opens where you can edit the URL, tick Use POST with a JSON body, and type the body to send. The … button is highlighted for any row set up this way. Leave it untouched for ordinary relays — they keep working as a simple web request.
- If any row has On ticked and the station is started automatically (via a Startup or Desktop shortcut), the On URL(s) are fired first and then the app waits the Startup delay set on the Advanced tab before it starts talking to your other equipment. This gives a device that was just switched on (for example an amplifier powered through a relay) time to boot up and have its COM port appear, so set that delay to cover your slowest device. When you start the app by hand, the On URL(s) still fire to switch your gear on, but there is no wait.
Sample URL formats used by hamparts.shop / qro.cz controllers (consult your device manual for the exact parameters):
http://192.168.124.59:59/Set0/514
http://192.168.124.59:59/Set1/0On : http://<shelly-ip>/relay/0?turn=on
Off : http://<shelly-ip>/relay/0?turn=offhttp://<shelly-ip>/rpc/Switch.Set?id=0&on=true
/ &on=false.) The Shelly must be reachable
from the host PC, and switching must not require a password —
the URL Switcher sends a plain request with no login. If your
relay also powers an amplifier such as a KPA500, set the
Startup delay (Advanced tab) to a few seconds
so the amplifier is ready before OpenShack connects to it
on an automatic start.control.shelly.cloud (User settings → Authorization
cloud key), and the device id from each device's
information page.
URL  : https://<server>.shelly.cloud/v2/devices/api/set/switch?auth_key=<KEY>
Body : {"id":"<deviceid>","channel":0,"on":false}- Let the PC shut down Windows properly with the Shutdown Host PC device (next section).
- For the relay feeding the PC, send a delayed off
so power is cut only after Windows has finished. A Shelly
can do this itself: tell it to turn on now and switch off
again 60 seconds later. Put this on an Off
row (via the … button, as POST):
{"id":"<deviceid>","channel":0,"on":true,"toggle_after":60}
Host settings — URL Switcher card with ten rows (Show / On / Off / Label / URL)
The client form shows only the rows that have
Show ticked and a Label filled in. After
clicking a button, the device's response is displayed
briefly below the buttons and fades after a few seconds.
Both host and client log every click and every result line
to the Remote Station debug log under
%LocalAppData%\OpenShack\DEBUG\.
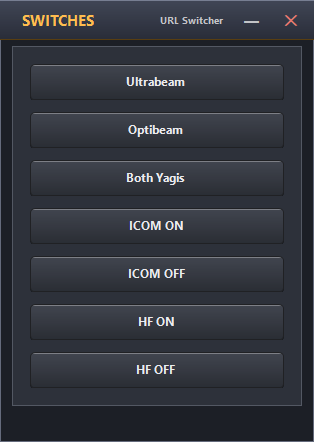
Client view — only rows with Show ticked and a Label filled in appear, and the latest response fades in under the buttons
Shutdown Host PC — Remote Power-Off
This device lets the remote operator shut the host PC down at the end of a session. It has no hardware — it simply runs a Windows shutdown on the host. Because it is destructive and one-way, it is disabled by default and protected by two safeguards: a confirmation dialog and a countdown you can still abort.
- On the host, open Settings → Host and scroll to the Enable remote PC shutdown checkbox at the bottom of the Aux Devices area. Tick it to offer the control to connected clients.
- On the client, open the Aux Devices window. The Shutdown Host PC panel shows a single Shutdown Host PC button.
- Click it. A confirmation dialog appears — confirm only if you really want the host to power off.
- The button is replaced by an Abort pending shutdown button and a live countdown (“Shutting down in 23 s…”). Click Abort any time before the countdown ends to cancel the shutdown.
Host settings — tick Enable remote PC shutdown to offer the control to clients
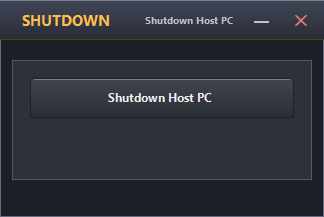
Client view (idle) — a single Shutdown Host PC button. Clicking it asks for confirmation first.
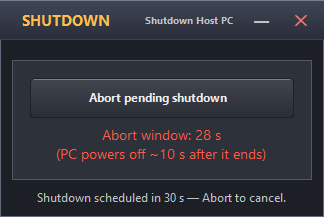
Client view (counting down) — the button becomes Abort pending shutdown and a live countdown is shown. Click Abort before it reaches zero to cancel.
If a client connects while a shutdown is already counting down, its window opens straight into the Abort state showing the remaining seconds, so the shutdown can still be cancelled from a fresh connection.
Log Tab — Session History & Debug
The Log tab is the last tab in the Remote Station window. It combines two views in one place: a tidy session history (who connected, when, and what note they sent) and a verbose debug log for troubleshooting. A single button at the top right of the tab flips between them.
Session view
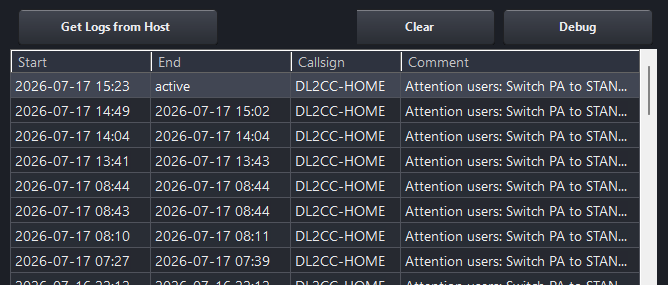
Session view — one row per remote connection, newest on top. The current connection shows
active in the End column until it ends. Each remote session adds one row to the table the moment
the remote operator's callsign arrives.
The row stays as active in the End column
while the session is live, and gets its End time stamped
the instant you click Disconnect (or when
the remote side leaves). Columns:
- Start / End — local date and time, minute precision.
- Callsign — the callsign the remote operator set as their Operator-ID (Station-ID when hosting).
- Comment — the optional Note the remote operator entered (free text).
The session history is kept in
%LocalAppData%\OpenShack\Remote\session_history.json
and is reloaded automatically the next time you open the
Remote Station window — so the list survives restarts. If
OpenShack is closed or crashes while a session is still
running, that row is marked (interrupted) in
the Comment column on the next load so the table never
falsely shows a session as still live.
Debug view
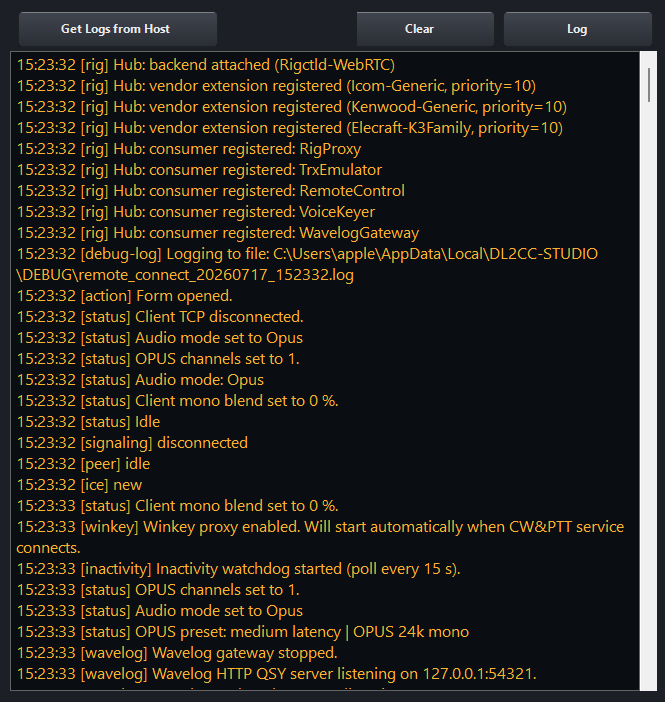
Debug view — the same tab with the Debug button clicked. The verbose internal log replaces the session table; the button is now labelled Log so you can flip back.
The Debug button switches the tab to a line-by-line internal log of everything the form is doing: connection state, remote-session events, rig proxy traffic, aux device messages, etc. This view is mostly useful when something is not working and you want to understand what the app is doing under the hood, or when you are sending a log to support. The button caption flips to Log while the debug view is shown — a single click takes you back to the session table.
Clear button
The Clear button on the right side of the header always clears whichever view is currently visible:
- In the Session view, Clear asks for
confirmation and then empties the table and
wipes
session_history.jsonon disk. If a session is in progress at the time, that row is kept so its disconnect still closes it cleanly. - In the Debug view, Clear empties the
text panel only. The on-disk log file from this run
(
remote_connect_YYYYMMDD_HHmmss.log) is not touched — your trail to send to support stays intact.
Where the files live
Both per-run log files are written to
%LocalAppData%\OpenShack\DEBUG\ while
the app is running:
remote_connect_YYYYMMDD_HHmmss.log— full debug log for this app run.session_YYYYMMDD_HHmmss.log— short human-readable START/END lines for the session table.session_history.json— the persistent session table itself. This file is always written, even if internal file logging is disabled, so your history never disappears.
Connectivity Behind Routers
OpenShack automatically selects a suitable path between host and client across common IPv4 and IPv6 networks. Most users need no router changes. Professionally operated infrastructure is available where the network does not permit a straightforward path.
The Status panel identifies the active connection type. If you intentionally require a direct path on a network you control, use Require a Direct Connection on the Advanced tab.
How to Improve Your Latency
The default configuration works out of the box for most setups. The following operational steps can improve latency where you control the radio-site network. Apply only the changes that fit your setup.
UDP Port Range
For explicit firewall or router rules, the radio-site host uses the UDP range 46702–46721. The browser-listen feature uses a second block, 46722–46741, which only sends outward and never needs a firewall or router rule.
Most users do not need to configure these ranges manually. Use them only where a managed firewall or a deliberately direct host setup requires an explicit rule.
Port Forwarding (IPv4)
Most networks work without router configuration. If you deliberately require a directly reachable host, forward the documented UDP range on the host router. Otherwise leave automatic connectivity enabled.
You only need to do this on the host side (the machine at the radio site). The client benefits from the host's open port without needing its own forwarding rule.
- Log in to your router's admin page (typically
192.168.1.1,192.168.0.1, or192.168.178.1for FRITZ!Box). - Navigate to Port Forwarding (also called Virtual Servers, NAT, or Applications & Gaming depending on the router brand).
- Create a new rule:
Field Value Protocol UDP External port range 46702 – 46721 Internal IP The host PC's LAN address (e.g. 192.168.1.50) — assign it a static lease in your router's DHCP settingsInternal port range 46702 – 46721 - Save and apply. Most routers activate the rule immediately.
- Reconnect from the client and confirm the Status panel shows P2P.
New-NetFirewallRule -DisplayName "OpenShack Remote" -Direction Inbound -Protocol UDP -LocalPort 46702-46721 -Action AllowIPv6 — Direct P2P Without NAT
If both the host and client have IPv6 connectivity (most modern ISPs provide it), OpenShack will often establish a direct IPv6 P2P path with no router configuration at all. IPv6 global unicast addresses are publicly routable — there is no NAT to traverse, so a direct path can often be established between the two machines.
No router port-forwarding rule is needed for IPv6. If you already ran the Windows Firewall command from the Port Forwarding step above, no second rule is required — that rule already covers both IPv4 and IPv6 on ports 46702–46721.
Stable IPv6 Address (advanced)
This is only relevant if your operating partner's firewall allowlists your host by its IPv6 address. Windows Privacy Extensions (RFC 4941) rotate that address every few hours or after a reboot, which would silently break such a rule.
If that applies to your setup, run these two commands once in an elevated PowerShell on the host PC:
# Disable random temporary addresses
netsh interface ipv6 set privacy state=disabled store=persistent

# Force stable EUI-64 suffix (derived from the MAC address)
netsh interface ipv6 set global randomizeidentifiers=disabled store=persistent
Then reboot. Afterwards, ipconfig will show a
single Preferred address without the
Temporary label — stable across reboots and safe to
put in a firewall rule.
Starlink — Enable IPv6 for a Direct Path
Some Starlink connections do not offer direct inbound reachability on IPv4. OpenShack therefore uses automatic managed connectivity when a straightforward path is unavailable.
The remedy is to enable IPv6 in the Starlink app or web interface:
- Open the Starlink app → Settings → Advanced →
Local Network and switch IPv6 to
On. (On the web UI at
192.168.100.1the same toggle is under Settings → Advanced → Network.) - After the setting saves, reboot the Starlink router so that it requests a fresh IPv6 prefix from the satellite network.
- Reconnect from the client and confirm the status panel shows P2P.
How Starlink IPv6 addressing works
Starlink uses DHCPv6 prefix delegation to
assign your router a block of globally routable IPv6
addresses — typically a /56 prefix (256 possible
sub-networks). The router then hands out individual
/64 sub-prefixes to each interface on the local
LAN. Every device on your network receives a real, publicly
routable IPv6 address. There is no NAT layer between the
device and the internet, so a direct path can be established
the same way it would on a native IPv6
broadband link.
If the Stable IPv6 Address commands above were already applied on the host PC, the address suffix remains constant even after a prefix change; only the first four groups of the address change.
VPN — Fallback and Site Access
A VPN can provide connectivity when normal automatic routing is restricted and neither port forwarding nor IPv6 is available. However, it comes with trade-offs that make it a fallback option rather than a first choice.
Option A — Dial-In Site VPN (Preferred)
A traditional dial-in VPN runs a server directly on the remote site's router or host PC (WireGuard, OpenVPN, or similar). The client connects to that server and is placed logically on the site's own LAN. There is no intermediate relay server — the encrypted tunnel goes from your client straight to the radio site. OpenShack then connects to the host's LAN address as if both machines were in the same room.
This is the preferred VPN approach because:
- The only overhead is the VPN encryption — no cloud relay in the path.
- You know the connection terminates at the site, not at a proxy server.
- OpenShack's P2P report is accurate — traffic genuinely goes directly to the host machine.
Many modern home routers include a built-in WireGuard or OpenVPN server. Alternatively, run WireGuard directly on the host PC. This requires opening the VPN port on the site router — straightforward if you have already set up port forwarding as described above.
Option B — Mesh VPN (Last Resort)
Mesh VPN tools such as Tailscale and ZeroTier create a virtual network between two machines with minimal configuration. They are easy to set up but have two significant caveats for radio remote work:
- Hidden relay: When a direct VPN tunnel cannot be established (e.g., both peers are behind very restrictive NATs), Tailscale uses its own DERP relay servers and ZeroTier uses its planet/moon servers. OpenShack still reports P2P — because it reached the peer via the VPN address — but the physical path passes through a cloud relay. You must check the Tailscale or ZeroTier admin panel separately to know whether the VPN tunnel itself is direct.
- Encryption overhead: Even on a genuinely direct VPN tunnel, all traffic is wrapped in an additional encryption layer, adding CPU load and a small but measurable latency penalty compared to a raw direct connection.
| Tool | Notes |
|---|---|
| Tailscale | Install on both PCs, sign in with the same
account. Machines appear under 100.x.x.x
addresses. Free tier supports up to 3 users / 100
devices. Check the admin panel for the Direct
connection indicator to confirm no relay is in use. |
| ZeroTier | Create a free network at my.zerotier.com,
install on both PCs, join the same network ID.
Machines get stable private IPs in the 10.x.x.x
range. Check the peer list for the DIRECT
path status indicator. |
Use a mesh VPN only when port forwarding, IPv6, and a dial-in site VPN are all unavailable. It is a reliable fallback — the connection will work — but with the relay and overhead caveats described above.
Box with WebRemote — mobile CW and PTT
WebRemote lets you operate from a phone, tablet, iPad or Chromebook without carrying a Windows Client PC. A wireless Client Box beside you supplies the paddle, footswitch PTT and immediate hardware sidetone, while the browser supplies the station screen, audio and controls.
How it works
The Client Box is not plugged into the mobile device and the browser is not a serial bridge. Once configured, the Box joins WiFi — including a phone hotspot — and opens its own authenticated connection to the Windows Host at the radio. WebRemote opens a separate protected station session and authorizes that Box route only for as long as the session is active. This keeps the timing-critical paddle and PTT traffic out of the browser/WebRTC round trip.
Setup
- At the station, open Remote Station → Host → Settings and leave the required option enabled under Browser Network Box support: Direct connection, Relay connection, or both.
- Connect the operator Box to a computer once and configure it as a standalone Client (At the remote operator). Choose Direct or Relay to match the Host route. Use the Remote Host's station secret as the Box-to-Box link password, then save the settings to the Box and make sure its WiFi is configured.
- Open WebRemote on the mobile device and connect to the station. In the Box tab, leave Box-2-Box mode selected. WebRemote then authorizes the Host-native route automatically; the Box itself connects independently.
- Check the Box tab in WebRemote and the Host's Browser Network Box status card. They show whether Direct or Relay owns the active CW path.
If the Host does not announce the native route, WebRemote also offers a browser-managed compatibility path: select Network Box, enter the Box-to-Box pairing key and click CONNECT BOX. That fallback uses the secure browser relay; the Host-native route above is preferred because it removes the browser from the CW edge path.
RHC requirement — and why web trainers are different
Box-2-Box — Standalone CW and PTT
Box-2-Box is the standalone option for CW and PTT. Two OpenShack Boxes connect over TCP/IP — the Client Box with the operator and the Host Box at the radio — and relay CW keying and PTT without OpenShack in the keying path. Once configured, the Boxes work on their own: no PC software needs to keep running for the CW to go through.
What you need
- Two OpenShack Boxes — one with the remote operator (client), one at the radio (host).
- WiFi enabled on both boxes. Box-2-Box always uses the boxes' WiFi connection; USB serial is only used for configuration and remains the preferred path with CW Link when a PC is available.
- A DTM Remote license at the radio side. CW Link and the radio-side (host) Box setup require a DTM Remote license. The operator-side (client) Box can be set up without a license under Settings → Network Box. Direct connections are free of charge apart from that. If you use the relay, an active Remote Host Connect (RHC) yearly subscription is required at the radio side in addition. You configure each box from OpenShack before deploying them standalone.
- A way for the two boxes to find each other. On a local network that is automatic. Over the internet you have three options — port forwarding, a direct IPv6 connection, or Relay mode when neither box can accept an incoming connection. See Internet Use below.
How it works
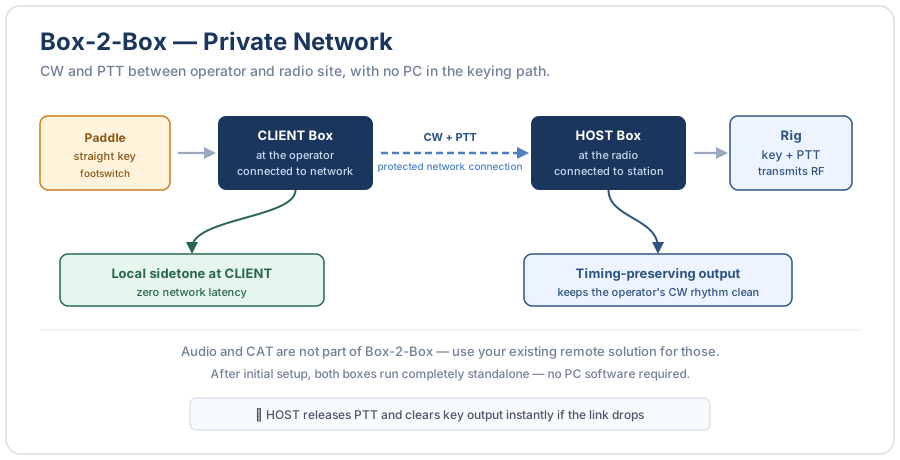
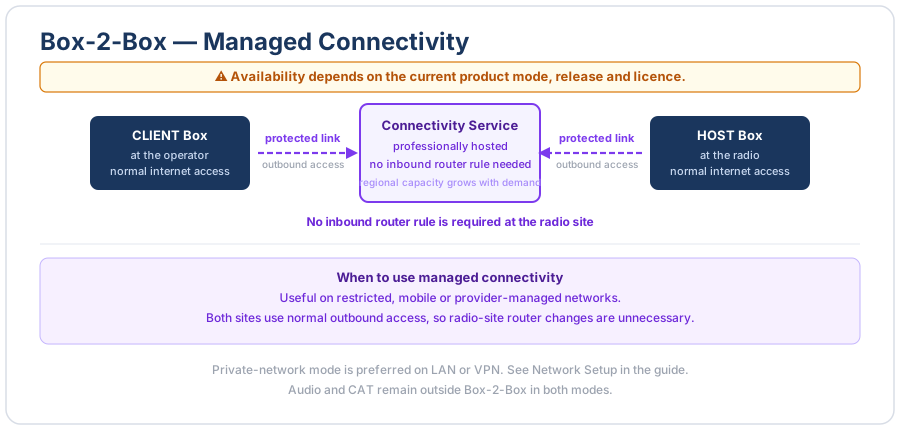
The client box streams every keying and PTT change. Your paddle sidetone plays in the client box locally — zero network delay. The host box receives the stream and replays the same timing onto the rig's key jack and PTT input.
The boxes maintain a heartbeat. If the link drops, the host box immediately releases PTT and clears key output — the rig is never left transmitting after a disconnect.
The two modes differ only in how the boxes find each other — the keying, the buffer and the authentication are identical either way. In Direct mode the client dials the host's address. In Relay mode both boxes dial outward to a relay that pairs them and passes the session through, so neither box needs to accept an incoming connection. The relay never learns your secret: the boxes identify their pair to it with a one-way fingerprint derived from the secret, and authenticate each other end-to-end through the relay pipe.
Both modes work over IPv4 and IPv6. This matters most at the radio: on a modern DS-Lite or CGNAT line, where inbound IPv4 is impossible, the host box can still take Direct connections over IPv6 with nothing but a firewall rule.
Setting up Box-2-Box
Standalone Boxes are configured from CW Link: open Operate → CW Link with a Box connected by USB, choose Standalone OpenShack Box under What do you want to set up?, and select where that Box will be used. OpenShack saves the settings in the connected Box; after that, the Box runs on its own. For a two-Box link, configure the Host Box at the radio first, then the Client Box with the operator.
Host box (at the radio)
- Connect the host box to OpenShack via USB.
- Open Operate → CW Link, choose Standalone OpenShack Box, then select At the radio. The Standalone Box tab opens with the matching Box location selected.
- Enter a Link password of at least 10 characters (for example
my-pair-secret-2026). Both Boxes must use the same password. - Leave Timing buffer at Normal for most links. Use Robust (poor network) if your connection is slow or variable.
- Set Connection to Direct if this Box can be reached from the internet (or you are on a LAN or VPN), or Relay if it cannot. Relay hosting needs an active RHC subscription.
- Tick Connect automatically after power-on and click Save to Box.
- Click Read from Box. The status readout shows that the Box is waiting. In Relay mode it dials out and waits at the relay.
Client Box (with the remote operator)
- Connect the client box to OpenShack via USB.
- Open Operate → CW Link, choose Standalone OpenShack Box, then select At the remote operator.
- Set Connection to the same choice as the Box at the radio — Direct or Relay.
- For Direct, enter the Station address. On a LAN, use the station Box's local IP (for example
192.168.1.50). Leave Station port at7373unless your port-forwarding rule uses a different external port. Relay needs no station address. - Enter the same Link password as the Box at the radio.
- Tick Connect automatically after power-on and click Save to Box.
- Within a few seconds the client box plays a short C in sidetone — the connection is live and keying goes through.
Settings reference
These are the controls on the Standalone Box tab of CW Link. WebConfig offers the same settings under slightly different names.
| Control | Description |
|---|---|
| Box location | Host: At the radio — the Box waits for the Client connection and sends CW and PTT to the radio. Client: At the remote operator — the Box sends CW and PTT to the Host over the network. Off — no standalone link — the Box's network link is off; USB keying still works. |
| Station address | IP address or DNS hostname of the host box. Only used when Role is CLIENT and Mode is Direct — in every other combination the field and its caption are greyed out, because no address is dialled. On a LAN, use the host's local IP. Over the internet, use your DDNS name, static public IP, or the host's IPv6 address — bracketed when a port follows it, e.g. [2003:e5:2711:9a10::7]:7373. |
| Station port | TCP port on the host (default 7373). Change only if your port-forwarding rule maps a different external port to 7373 on the host box. Greyed out alongside Target. |
| Link password | Shared passphrase — must be identical on both boxes. At least 10 characters, up to 64. The value is stored in flash and never transmitted over the network. Leave it empty to keep the key the box already has; tick Show to reveal what you type. |
| Timing buffer | Adaptive jitter buffer profile (set on the host box): Fast (good network) — lowest added latency, for fast local links. Normal — default; handles typical home broadband. Robust (poor network) — more margin for slow or lossy connections. |
| Minimum (ms) | Minimum jitter buffer depth in milliseconds. Raise this if your monitored CW sounds choppy. When both boxes are connected, the larger value wins so either side can request extra safety margin. |
| Low-latency UDP | Recommended: leave ticked. UDP carries keying with lower delay and usually gives better CW performance. If you switch it off, TCP still works but may need a higher Minimum (ms) setting. |
| Repeat (ms) | How often the Box repeats each keying change over UDP. Leave it at 70 unless support asks you to change it. |
| Connection | Direct — the client dials the host. Use it on a LAN, over a VPN, with port forwarding, or over IPv6. Relay — both Boxes connect outward through a relay. Use it when neither end can accept an incoming connection (CGNAT, hotel WiFi, phone hotspot). Both Boxes must use Relay. Hosting through a relay requires an active RHC subscription. |
| Connect automatically after power-on | Master switch. When ticked, the setting is saved to flash and the connection starts automatically every time the box boots — no PC required. |
| Save to Box | Sends all current settings to the box and saves them to flash. |
| Reset counters | Clears the local Box-2-Box/TX diagnostic counters and, when a peer is connected, clears the other box's counters too; the status readout is refreshed afterwards. |
| Read from Box | Re-reads the local Box-2-Box status and, when a peer is connected, asks the other box for its read-only status too. The peer output is appended under the local device output. |
| Status readout | Shows the Box location, connection state, other end, round-trip time, timing buffer, network path, counters, and WiFi address. Click Read from Box to update it. |
Using Box-2-Box over the internet
On a local network no extra configuration is needed. Over the internet, work down this list and stop at the first one your connection allows:
- Direct over IPv4 — port forwarding. In the router at the radio, forward TCP port
7373and UDP port7373to the host box's local IP address. Put your public IP — or a DDNS hostname, if your provider changes it — in the client box's Target field. - Direct over IPv6 — a firewall rule. If both ends have IPv6, there is nothing to forward: allow inbound TCP and UDP 7373 to the host box's IPv6 address in the router firewall, and give the operator that address in brackets, e.g.
[2003:e5:2711:9a10::7]:7373. The host box's IPv6 addresses are listed at the bottom of Hardware Settings → WiFi, ready to copy. This is often the easiest path on a modern DS-Lite line, where inbound IPv4 does not exist at all. - Relay — nothing inbound at either end. Set Mode to Relay on both boxes. They dial outward, the relay pairs them, and keying runs through it. No router changes anywhere, and it also bridges a v6-only end to a v4-only one. Requires an active RHC subscription for the box that hosts.
Some providers (mobile broadband, some cable) put customers behind CGNAT (Carrier Grade NAT). There, port forwarding in your own router has no effect — an incoming IPv4 connection never reaches your box.
Two ways out, in this order: many CGNAT lines still hand out real IPv6, so a Direct connection over IPv6 often just works; and if that is unavailable, Relay mode is built exactly for this case and needs no inbound reachability at either end.
Morse Announcements
Both boxes play short sidetone-only CW announcements to tell you what is happening. No RF is transmitted — the key output is not active during these. The host box is usually unattended, so its announcements play on its local sidetone output.
| CW | Meaning |
|---|---|
| B | Box-2-Box is enabled and the stream has started (played on enable). |
| R | Relay mode only: the relay has accepted this box and is waiting for the other end. Played once — not repeated while the box waits and redials. |
| C | A peer has connected and authenticated — keying is now live end-to-end. |
| <AR> | Box-2-Box has stopped — the link dropped, you disabled it, or issued a disconnect. |
| L | Relay mode, host box only: the relay refused the pairing because this box has no active RHC subscription. It retries by itself every minute, so this repeats until the subscription is in place. |
| W | Box-2-Box settings were wiped by holding Button 4 at power-on for 6 seconds or more. |
Hardware escape hatches
Once deployed you can control Box-2-Box from the box buttons — no PC or USB cable needed. These are useful when both boxes are in the field or at a hotel.
| Action | Effect |
|---|---|
| Hold Speed − + Button 4 together (while running) | Toggles the Box-2-Box stream on or off immediately and saves the new state — the box remembers across reboots. |
| Hold Button 4 at power-on (brief hold) | Skips Box-2-Box for this session only. The box comes up on standard WiFi/TCP so the web config tool can reach it. Saved settings are unchanged; Box-2-Box resumes on the next boot. |
| Hold Button 4 at power-on for 6 seconds or more | Wipes all Box-2-Box settings from flash. The box plays W in sidetone to confirm. Use as a last resort to recover a misconfigured or inaccessible host box. |
| Hold Speed − at power-on | Brings the box up ready for USB configuration and skips Box-2-Box as well. This is the one to reach for when you want to plug in and set the box up from a PC or the web config tool, whatever state it is in. |
Speed − = leftmost top button (WPM−); Speed + is the one next to it; Button 4 = rightmost top button (4th button). See Hardware — Top Buttons.
Limitations
- CW and PTT only. Audio and CAT are not handled by Box-2-Box.
- One-way keying. The client keys the host's radio. The host cannot key back through Box-2-Box in the current version.
- Host listen port is fixed at 7373. Direct mode uses TCP 7373 and UDP 7373 on the host. You cannot change the port the host listens on — only the client's target port is adjustable. In Relay mode neither box listens at all.
- Direct mode needs reachability. One address family has to be usable end to end — IPv4 with forwarding, or IPv6. Where that is impossible, use Relay mode, which also bridges a v6-only end to a v4-only one.
- One session at a time. The host box has a single connection slot, and a configuration client takes priority over the peer. Connecting OpenShack or the web config tool to a running host box therefore displaces the link; the other box redials by itself when you disconnect again.
- Do not run a Winkey logger on the host box USB simultaneously. Two independent keying sources on the same rig can interfere with each other.