
What squeeze keying means
With a dual-lever paddle, one lever asks the keyer for dits and the other for dahs. Hold both and an iambic keyer alternates them. That can reduce finger movement in letters such as C, K, R and period—but only if the keyer and your hand agree about what should happen when you let go.
Karl Fischer, DJ5IL, gives the subject a thorough treatment in All about Squeeze-Keying. The important practical point is simple: squeeze keying is a technique, not a test of whether you are a “proper” CW OP. Use the mode that produces your cleanest CW.
Iambic A: release means stop
While both levers are held, dots and dashes alternate. When you release them, Mode A finishes the element already under way and stops. It does not remember the squeeze beyond that element.
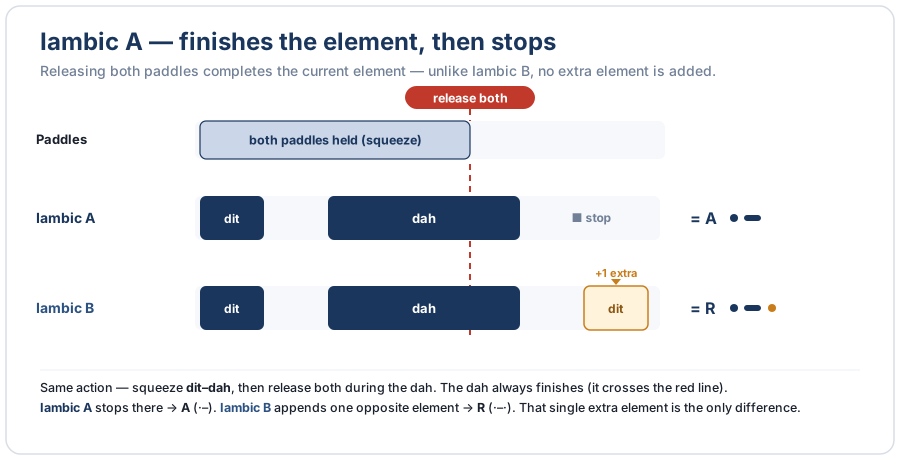
Iambic B: one remembered element
Iambic B can queue the opposite element while the current dit or dah is still running. This happens during a squeeze, but it also happens when you tap the opposite lever once during the current element. If the tap reaches the capture window, that opposite element is sent next—even if you have already released the lever before the current element ends.
Releasing both levers during a squeeze is therefore only one Iambic B case: the queued opposite element becomes the familiar extra tail. Skilled Iambic B users use it deliberately; an OP accustomed to Iambic A may hear it as an unwanted dit or dah.
The Kenwood TS-890 offers A and B and defaults to B. FlexRadio SmartSDR also provides both modes. Yaesu radios may label the choices ELEKEY-A, ELEKEY-B and, on some models, ELEKEY-Y. Always check the manual for the exact radio or keyer in front of you.
Switchpoint and Pause Memory
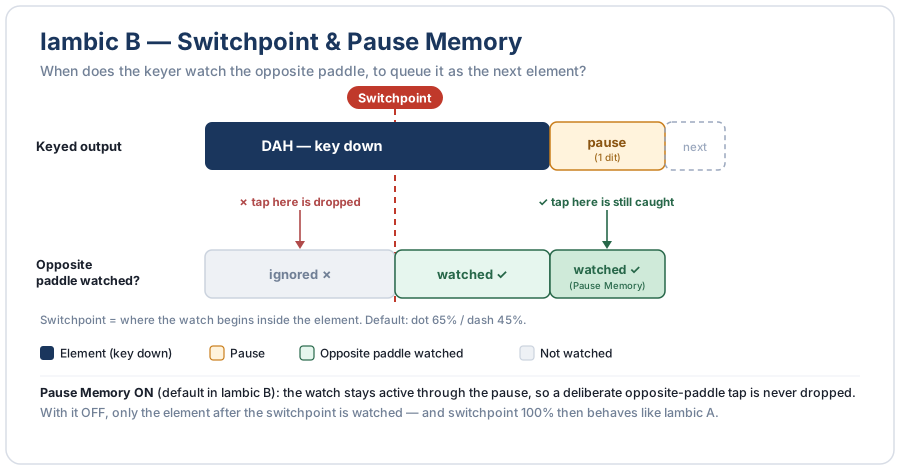
While Iambic B sends an element, it watches the opposite lever so it can queue that lever next. The switchpoint marks where this capture window begins. A low value starts watching earlier and catches shorter taps. A high value starts later, so the opposite lever must still be down nearer the end of the element. A tap made and released entirely before the switchpoint is ignored; a tap that is still down after the switchpoint is captured.
Pause Memory keeps watching during the short gap after the element. With it enabled, a tap in that gap is remembered and becomes the next element. Dit and dah have separate switchpoints because their lengths differ; the Box defaults are 65% for a dit and 45% for a dah.
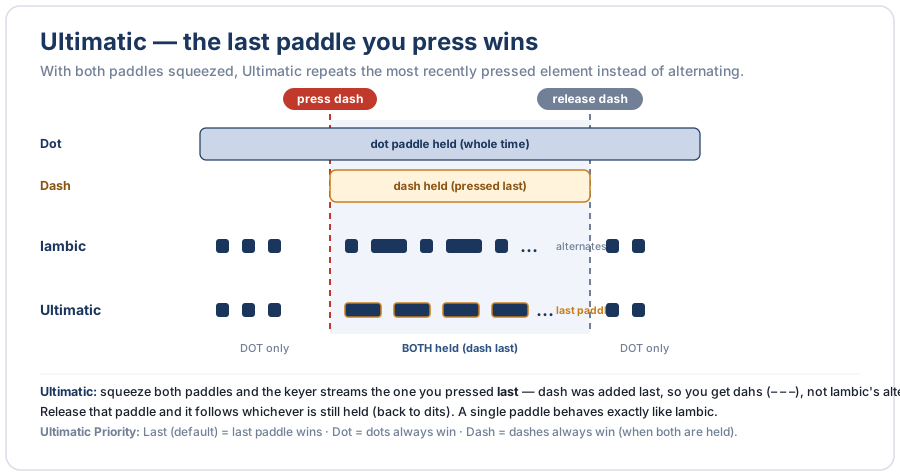
Ultimatic: the last lever wins
Ultimatic does not alternate continuously while both levers remain down. It repeats the lever pressed last.
Stop guessing: watch the paddle
The OpenShack Box supports Iambic A, Iambic B and Ultimatic. Its Paddle Analyzer puts your raw dot and dash contacts above the elements the keyer actually sent. You can see the squeeze, release point, switchpoint capture and pause-memory decisions on one timeline.
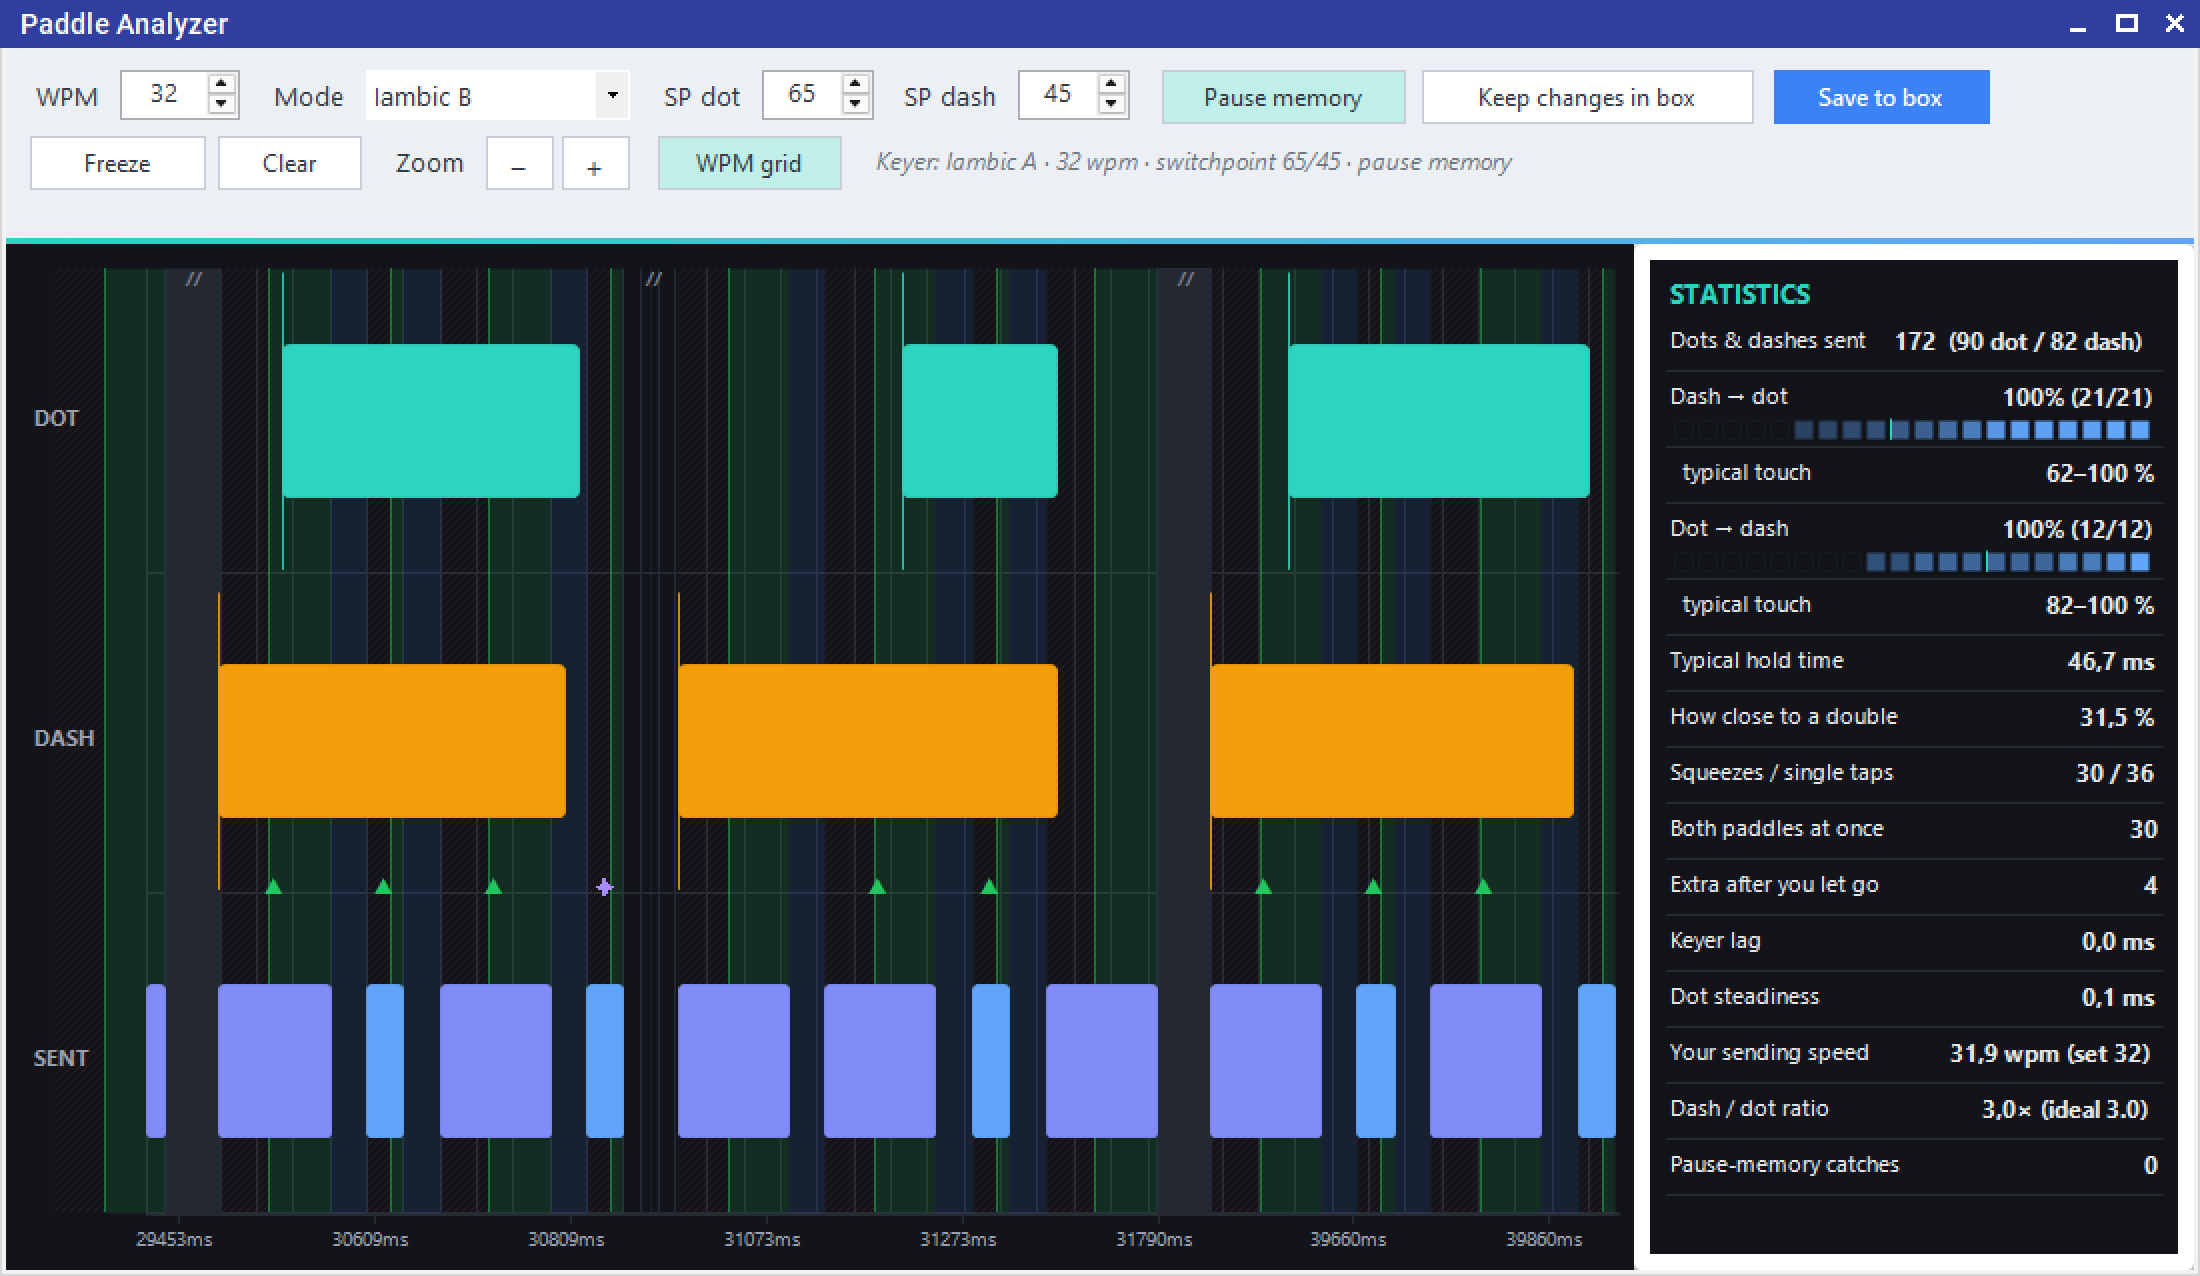
This is particularly useful when an occasional extra element appears only at speed. Change the mode or timing setting, send the same word again and compare the trace. The detailed controls are documented in the user manual; the analyzer itself turns the adjustment into something you can see and repeat.